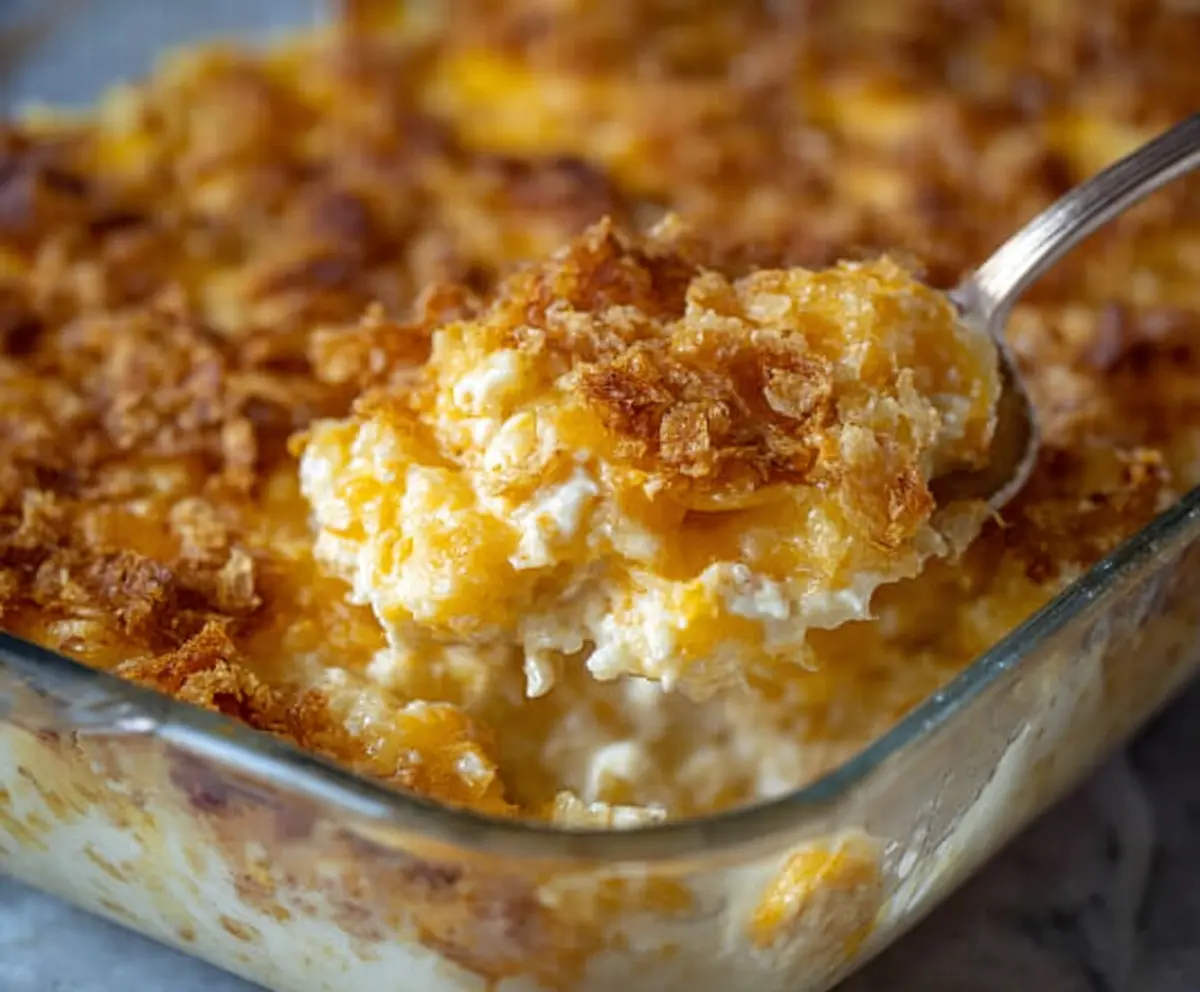
Cheesy Funeral Potatoes are a warm, comforting dish made with shredded potatoes, creamy cheese, and a crispy topping. Perfect for gatherings, they bring smiles all around!
These yummy potatoes are hard to resist! I make them for every family get-together, and they always disappear fast. Who can say no to cheese and crispy goodness? 😄
Key Ingredients & Substitutions
Hash Brown Potatoes: The star ingredient here! Frozen shredded hash browns make this recipe super easy. If you’re out of frozen ones, you can shred fresh potatoes, but soak them to remove excess starch.
Sour Cream: This adds tanginess and creaminess to the dish. If you’re looking for a lighter version, Greek yogurt is a great substitute. It has a similar creamy texture and a bit of tang as well.
Cream of Chicken (or Mushroom) Soup: This ingredient gives the casserole moisture and flavor. If you’re vegetarian, use cream of mushroom soup or a homemade version with cream and mushrooms. For a dairy-free option, try a plant-based cream soup.
Sharp Cheddar Cheese: Cheddar adds a lovely sharp flavor. I always use sharp for more taste. If you’re in need of a substitute, gouda or Monterey Jack can work in a pinch. Just stick with semi-hard cheeses for the best melt.
Cornflakes: The crispy topping adds a nice crunch. If you’re avoiding gluten, you can use crushed gluten-free cereal or even panco breadcrumbs mixed with a little olive oil as a replacement.
How Can I Ensure My Cheesy Potatoes Bake to Perfection?
Getting that golden, bubbly top is key. Start by mixing your ingredients thoroughly to ensure even distribution. Don’t skip greasing the dish well; it will help with both cooking and cleanup!
- Preheat your oven thoroughly before baking. This ensures even cooking.
- Bake uncovered for most of the time, but cover it with foil if it starts to brown too quickly. You want that gooey, melted cheese and crispy topping!
- Finally, add cheese just before it’s done baking for an extra melty finish. This enhances both flavor and presentation!

How to Make Cheesy Funeral Potatoes
Ingredients You’ll Need:
For the Casserole:
- 1 (32 oz) bag frozen shredded hash brown potatoes, thawed
- 2 cups sour cream
- 1 can (10.5 oz) cream of chicken soup (or cream of mushroom soup)
- 2 cups shredded sharp cheddar cheese, divided
- 1/2 cup finely chopped onion
- 8 tablespoons (1 stick) unsalted butter, divided
- 1/4 teaspoon garlic powder
- Salt and pepper to taste
For the Topping:
- 2 cups cornflakes, crushed
- Optional: 1/4 cup chopped green onions or chives for garnish
How Much Time Will You Need?
This recipe takes about 15 minutes to prep and 45-50 minutes to bake. So, in total, you’ll spend about 1 hour or so getting this delicious dish ready! It’s perfect for gatherings or holiday meals, and it’s super comforting.
Step-by-Step Instructions:
1. Preheat and Prepare:
First, preheat your oven to 350°F (175°C). While that’s warming up, lightly grease a 9×13 inch baking dish to help prevent sticking later on.
2. Mix the Casserole Ingredients:
In a large bowl, combine the thawed hash browns, sour cream, cream of chicken soup, 1 1/2 cups of shredded cheddar cheese, chopped onion, garlic powder, salt, and pepper. Use a big spoon or spatula to mix everything together until it’s well blended. This should smell amazing already!
3. Transfer the Potato Mixture:
Pour the potato mixture into your greased baking dish. Spread it out evenly to make sure it cooks through nicely.
4. Prepare the Cornflake Topping:
In a small bowl, melt 4 tablespoons of butter. Once melted, add the crushed cornflakes and stir to coat them in butter. This gives them that crunchy texture you’ll love!
5. Add the Topping:
Evenly sprinkle the buttery cornflake mixture over the potato layer in your baking dish. Make sure it covers all the potatoes!
6. Add More Butter:
Now, dot the top of your casserole with small pieces of the remaining 4 tablespoons of butter. This will help it turn golden brown while baking.
7. Bake the Casserole:
Place your dish in the preheated oven and bake uncovered for about 45-50 minutes. You’re looking for the top to be golden brown and for the casserole to be hot and bubbly. The smell will be irresistible!
8. Add Final Cheese:
In the last 5-10 minutes of baking, sprinkle your remaining 1/2 cup of cheddar cheese on top. Let it bake for those final minutes until the cheese is melted and gooey.
9. Cool and Garnish:
Once baked to perfection, remove the casserole from the oven and let it cool slightly. If you want an extra pop of flavor, sprinkle some chopped green onions or chives on top for garnish.
10. Serve and Enjoy:
Serve your Cheesy Funeral Potatoes warm as a delightful side dish. They are a crowd-pleaser and go great with just about any meal. Enjoy!
Can I Use Fresh Potatoes Instead of Frozen Hash Browns?
Yes, you can definitely use fresh potatoes! If you choose to go this route, shred them and soak them in cold water for about 30 minutes to remove excess starch. Then, drain and pat dry before using them in the recipe.
Can I Make This Dish Ahead of Time?
Absolutely! You can prepare the casserole up to the baking point, cover it, and refrigerate for up to 24 hours. When you’re ready to bake, add an extra 10-15 minutes to the baking time since it will go into the oven cold.
How Do I Store Leftovers?
Leftover Cheesy Funeral Potatoes can be stored in an airtight container in the fridge for up to 3 days. To reheat, place in the oven at 350°F (175°C) until heated through, or microwave them for a quicker option.
Can I Customize the Cheese Used in This Recipe?
Yes, you can customize the cheese! While sharp cheddar is traditional, feel free to mix in Monterey Jack, pepper jack, or even a blend of cheeses for extra flavor. Just stick with semi-hard cheeses to maintain a good melting quality!