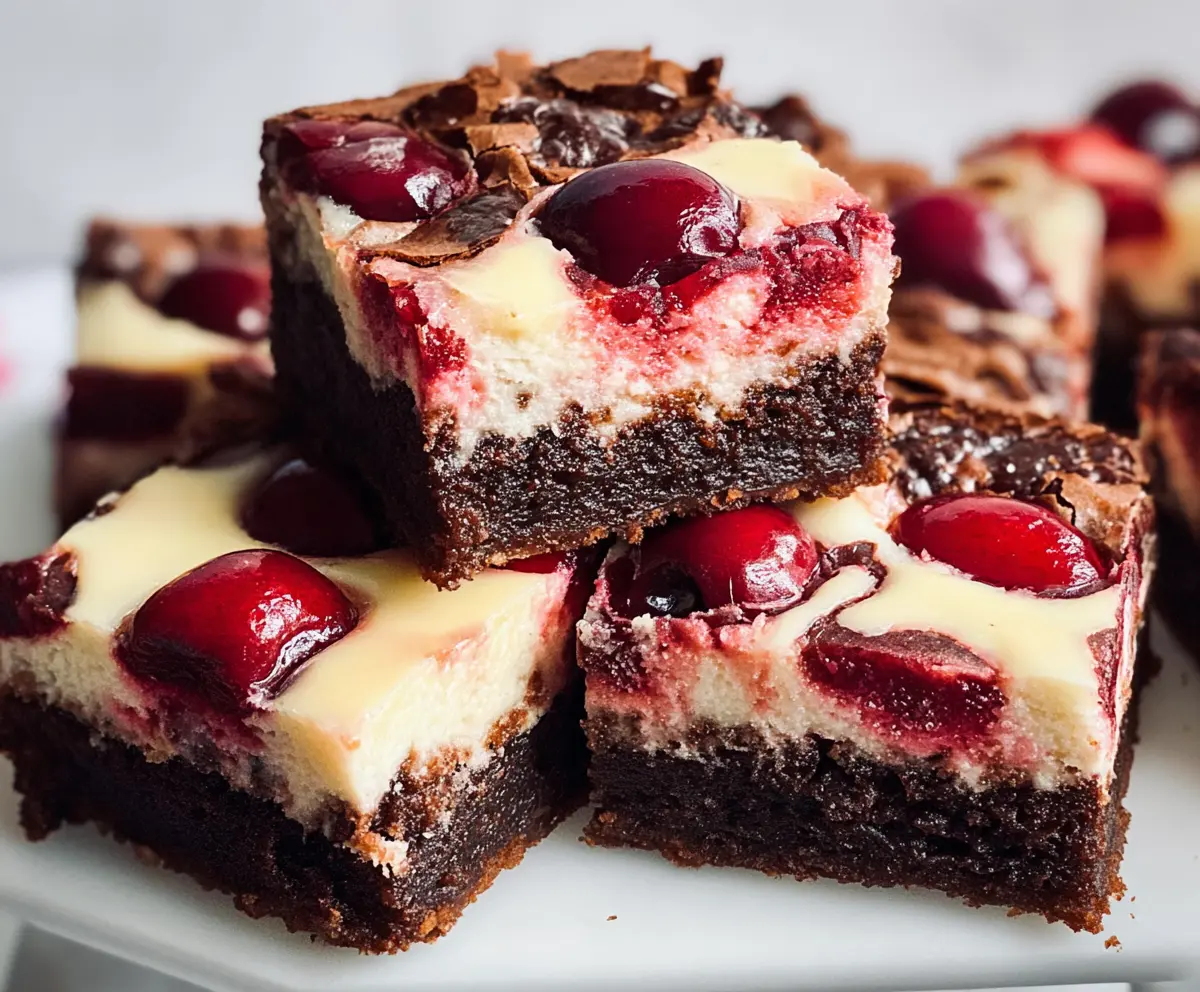
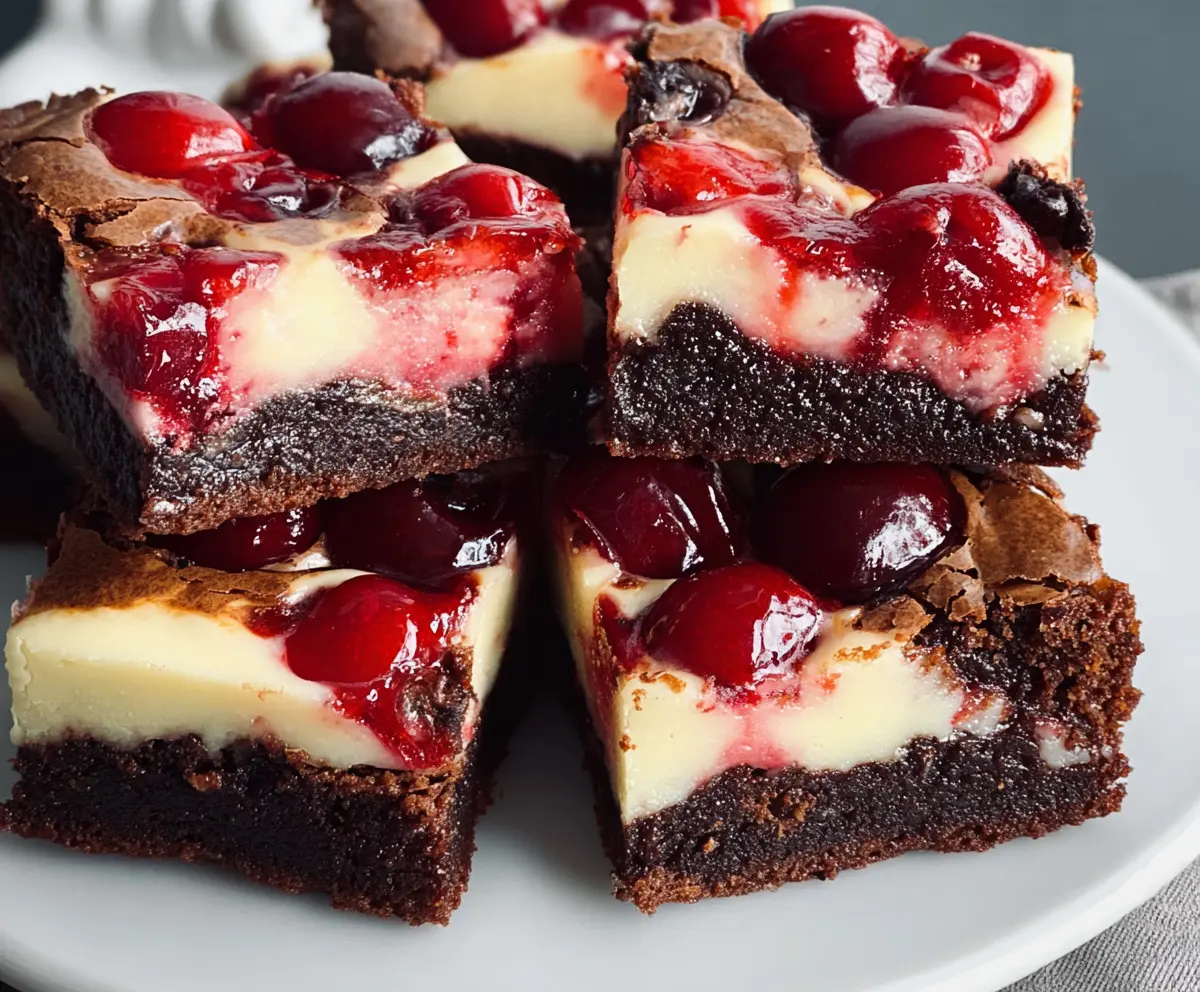
These Cherry Cheesecake Brownies are a fun mix of chocolatey goodness and creamy cheesecake. The sweet cherries on top bring a burst of flavor that makes each bite special!
Honestly, who can resist the combo of rich brownie and smooth cheesecake? I love serving these at parties. They’re a hit, and guests are always asking for more. 🍒🍫
Key Ingredients & Substitutions
Unsalted Butter: You need melted butter for richness in brownies. If you’re in a pinch, you can use coconut oil or vegetable oil as a substitute, but the flavor will differ slightly.
Granulated Sugar: This adds sweetness and helps create that lovely chewy texture. You can swap it with brown sugar for a deeper flavor, or use a sugar substitute if you’re watching your sugar intake.
Cocoa Powder: Unsweetened cocoa is essential for that rich, chocolate flavor in brownies. If you don’t have cocoa, you can use dark chocolate melted down (about 1 oz per tablespoon of cocoa) as an alternative.
Cream Cheese: For the cheesecake layer, full-fat cream cheese is best for creaminess. But for a lighter option, you could use low-fat cream cheese or a dairy-free cream cheese substitute.
Cherries: Fresh cherries are fantastic, but frozen cherries work just as well, especially when fresh isn’t in season. If you’re allergic or don’t like cherries, feel free to use blueberries or raspberries instead!
How Do I Get Perfectly Swirled Brownies and Cheesecake?
The technique of swirling the cheesecake into the brownie layer can be tricky! Start by dolloping the cheesecake mixture over the brownie batter in several spots. Don’t spread it out yet.
- Use a knife or skewer to swirl the cheesecake gently through the brownie batter.
- Be careful not to overmix; you want distinct layers that look pretty and taste great.
- A light hand with the swirling will keep some of the cheesecake on top.
Practice makes perfect, and you’ll end up with beautiful, marbled layers! Enjoy making these delightful treats!
How to Make Cherry Cheesecake Brownies
Ingredients You’ll Need:
For the Brownie Layer:
- 1/2 cup (115g) unsalted butter, melted
- 1 cup (200g) granulated sugar
- 2 large eggs
- 1 teaspoon vanilla extract
- 1/3 cup (35g) unsweetened cocoa powder
- 1/2 cup (65g) all-purpose flour
- 1/4 teaspoon salt
- 1/4 teaspoon baking powder
For the Cheesecake Layer:
- 8 oz (225g) cream cheese, softened
- 1/4 cup (50g) granulated sugar
- 1 large egg
- 1/2 teaspoon vanilla extract
For the Toppings:
- 1 cup pitted cherries (fresh or thawed frozen), halved or whole if small
How Much Time Will You Need?
This delightful treat takes about 20 minutes of prep time and about 35 to 40 minutes for baking. After that, you’ll want to chill the brownies in the fridge for at least 2 hours before cutting them into squares. So, plan for about 3 hours total from start to finish—most of it is just waiting for them to cool!
Step-by-Step Instructions:
1. Prepare the Oven and Pan:
First things first! Preheat your oven to 350°F (175°C). While that’s warming up, grease or line an 8×8 inch (20×20 cm) baking pan with parchment paper. Let the parchment hang over the sides a bit. This helps you lift out the brownies later!
2. Make the Brownie Batter:
In a medium bowl, mix the melted butter with sugar until it’s well combined. Add in the eggs and vanilla extract, and give it a good mix until it’s nice and smooth. It’s okay to use a whisk or a fork here—whatever you have on hand!
3. Add Dry Ingredients:
Now, it’s time to mix in the dry ingredients. Sift together the cocoa powder, flour, salt, and baking powder. Gradually fold this mixture into the wet ingredients. Be gentle! You want everything to just combine; overmixing can toughen the brownies.
4. Prepare the Cheesecake Layer:
In a new bowl, beat the cream cheese until it’s smooth and creamy. Then mix in the sugar, egg, and vanilla extract until everything is well blended and creamy too. This is going to be delicious!
5. Assemble the Layers:
Now, pour the brownie batter into your prepared pan and smooth it out with a spatula. Next, take dollops of the cheesecake mixture and spread it evenly over the brownie batter. Grab a knife or a skewer and gently swirl the cheesecake into the brownie mixture for a marbled effect.
6. Add Cherries:
Here comes the fun part! Press the pitted cherries evenly into the cheesecake layer. If they’re halved, it will give a lovely look and taste!
7. Bake:
Time to bake! Place your pan in the oven and let it bake for about 35 to 40 minutes. You’ll know it’s ready when the cheesecake layer is set, and the edges of the brownies start to pull away from the sides of the pan. A toothpick inserted in the brownie should come out with a few moist crumbs!
8. Cool and Serve:
Once baked, take the brownies out of the oven and let them cool completely in the pan on a wire rack. Once cool, cover them and pop them in the fridge for at least 2 hours before cutting them into squares. Serve chilled or at room temperature, and enjoy every rich bite of these Cherry Cheesecake Brownies!
Can I Use Different Fruits in This Recipe?
Absolutely! While cherries add a lovely flavor, you can substitute them with blueberries, raspberries, or even diced strawberries. Just make sure to adjust the sweetness if you’re using tart fruits!
How Should I Store Leftovers?
Store any leftover brownies in an airtight container in the refrigerator for up to 5 days. They can also be frozen for up to 3 months—just thaw them in the fridge overnight before enjoying!
What Can I Use Instead of Cream Cheese?
If you’re looking for a dairy-free option, you can use a plant-based cream cheese alternative. Silken tofu blended until smooth is another great substitute that will give a creamy texture.
Can I Make These Brownies Gluten-Free?
Yep! Just swap the all-purpose flour for a gluten-free flour blend. Make sure it’s a one-to-one blend to maintain the texture of the brownies!