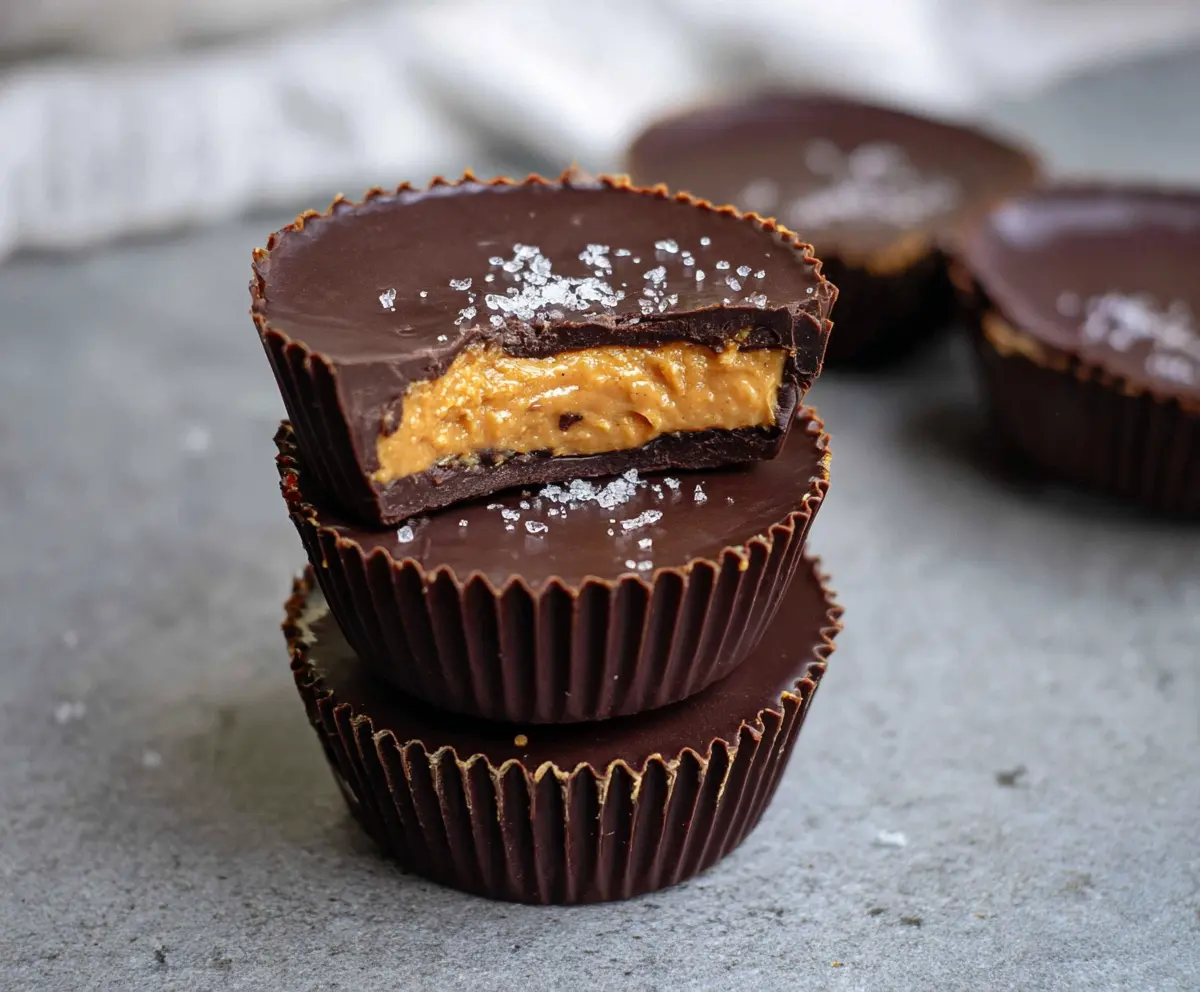
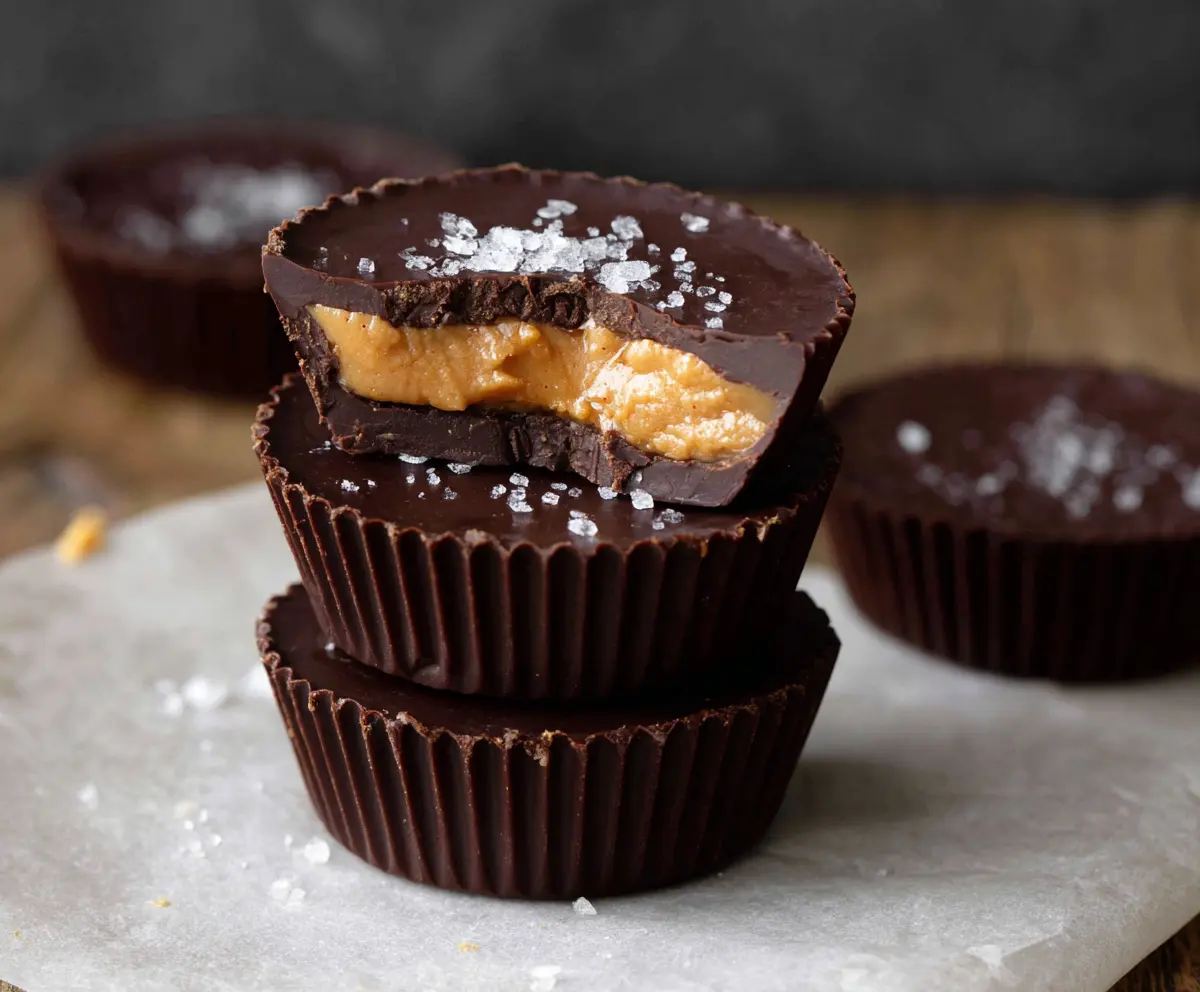
These Dark Chocolate Peanut Butter Cups are a tasty treat that combines creamy peanut butter with rich dark chocolate. They’re easy to make and perfect for a sweet snack!
Who can resist that mix of chocolate and peanut butter? I like to keep them in the fridge for a chilly crunch. And trust me, one is never enough! 😋
Key Ingredients & Substitutions
Dark Chocolate: I suggest using chocolate with at least 70% cacao for a rich flavor. If it’s hard to find, you can use semi-sweet chocolate chips. However, milk chocolate will make them sweeter, which some people love!
Peanut Butter: Creamy peanut butter gives a smooth texture, but you can also use crunchy for added bite. If you’re allergic, try almond or cashew butter for a similar taste. Just make sure it’s unsweetened!
Powdered Sugar: This helps sweeten the peanut butter filling. If you prefer, you can use honey or maple syrup as healthier alternatives—just adjust the amount to taste.
Butter: Unsalted butter keeps the flavor balanced. If you’re dairy-free, opt for coconut oil or a plant-based butter substitute.
How Do You Melt Chocolate Without Burning It?
Melted chocolate is a key part of these cups, and it’s easy to do if you follow a few simple steps. The goal is to melt the chocolate gently to avoid burning.
- Use a microwave-safe bowl and heat in 30-second bursts, stirring each time.
- Pay attention when it starts to melt; it takes just a few minutes.
- If you’re not in a rush, try using a double boiler with simmering water underneath—it melts slowly and evenly, reducing chances of burning.
With these tips, you’ll have beautifully melted chocolate ready for your delicious cups!
How to Make Delicious Dark Chocolate Peanut Butter Cups
Ingredients You’ll Need:
For the Chocolate Cups:
- 1 1/2 cups dark chocolate chips or chopped dark chocolate (70% cacao recommended)
For the Peanut Butter Filling:
- 3/4 cup creamy peanut butter (natural or regular)
- 2 tablespoons powdered sugar
- 2 tablespoons unsalted butter, softened
- 1/2 teaspoon vanilla extract
- A pinch of salt
For Garnish (Optional):
- Flaky sea salt
- Paper cupcake liners
How Much Time Will You Need?
This recipe takes about 15 minutes of prep time and an additional 30-45 minutes for chilling. In total, you’ll need about 1 hour to make and set your delicious peanut butter cups. Perfect for a sweet treat without spending all day in the kitchen!
Step-by-Step Instructions:
1. Prepare the Muffin Tin:
Line a muffin tin with paper cupcake liners. This makes it easy to remove the cups once they’re set and adds a nice touch for presentation. Set the tin aside while you melt the chocolate.
2. Melt the Chocolate:
In a medium microwave-safe bowl, melt 1 cup of the dark chocolate chips. Heat in the microwave in 30-second intervals, stirring after each interval until the chocolate is smooth and fully melted.
3. Create the Chocolate Base:
Spoon about 1 tablespoon of the melted chocolate into each cupcake liner, spreading it a little up the sides. This creates a nice chocolate shell for your peanut butter filling. Next, place the muffin tin in the refrigerator for about 10-15 minutes to let the chocolate set.
4. Make the Peanut Butter Filling:
While the chocolate is chilling, prepare the peanut butter filling. In a bowl, mix together the peanut butter, powdered sugar, softened butter, vanilla extract, and a pinch of salt. Stir until everything is nice and smooth, creating a creamy filling that will be the star of your cups!
5. Add the Peanut Butter Layer:
Once the chocolate base has set, take the muffin tin out of the fridge. Spoon about 1 tablespoon of the peanut butter mixture and place it in the center of each chocolate base. Gently flatten the peanut butter filling, but be sure to leave some space around the edges.
6. Top with More Chocolate:
Melt the remaining 1/2 cup of chocolate chips in the microwave, again using 30-second bursts and stirring until smooth. Once melted, pour the chocolate over the peanut butter layer, completely covering it. Use the back of a spoon to smooth it out, creating a lovely shiny top!
7. Garnish and Chill:
If you’d like, sprinkle a pinch of flaky sea salt on top for a delightful salty kick. Then, return the muffin tin to the refrigerator and chill the peanut butter cups for at least 30 minutes, or until they are completely set and firm.
8. Enjoy Your Treats:
Once they are set, gently remove each peanut butter cup from the liners. Now you’re ready to enjoy your delicious dark chocolate peanut butter cups! Store any leftovers in an airtight container in the fridge for up to a week.
These treats are rich, creamy, and absolutely addictive. What a sweet reward for your efforts!
Can I Use Milk Chocolate Instead of Dark Chocolate?
Yes, you can use milk chocolate if you prefer a sweeter flavor. Just keep in mind that it won’t have the same depth of taste as dark chocolate, but it will still be delicious!
How Do I Store These Peanut Butter Cups?
Store your peanut butter cups in an airtight container in the fridge for up to one week. If you want to keep them for longer, consider freezing them—just make sure they’re well-wrapped to prevent freezer burn.
Can I Substitute Crunchy Peanut Butter?
Absolutely! Using crunchy peanut butter will add a nice texture contrast and a bit of extra crunch to your cups. It’s a tasty variation if you’re a fan of that texture!
What If My Chocolate Isn’t Melting Smoothly?
If your chocolate isn’t melting smoothly, it may be overheating. Make sure to melt it in shorter intervals and stir well. If you do accidentally burn it, you may need to start over with new chocolate.