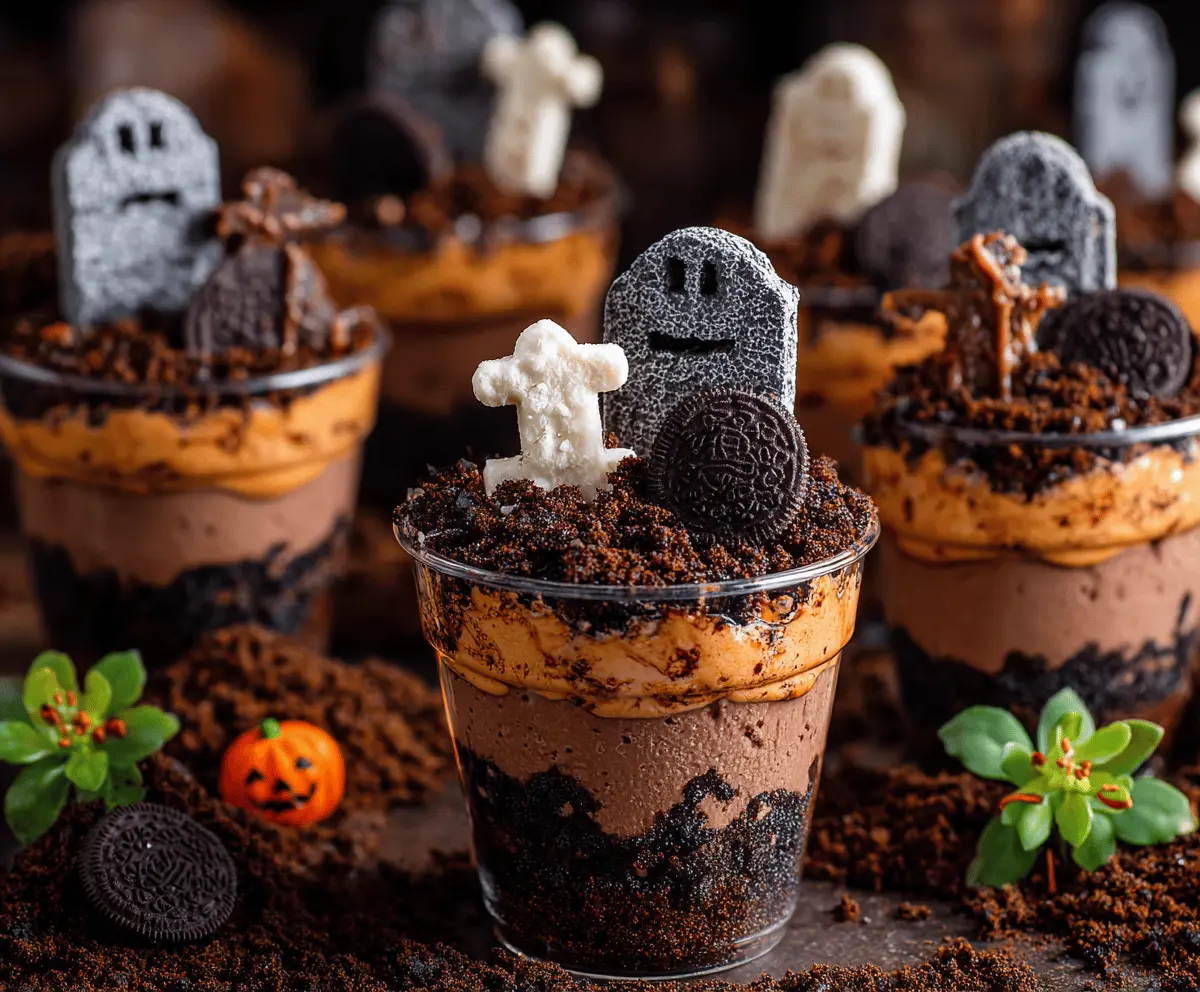
Graveyard Dirt Cups are a fun and spooky dessert perfect for Halloween! They are made with chocolate pudding, crushed cookies, and gummy worms, all layered to look like a spooky graveyard.
These cups are super easy to make and always bring smiles at parties. I like to add a bit of whipped cream on top for a ghostly touch—who wouldn’t want a ghost in their dessert? 🎃
Key Ingredients & Substitutions
Chocolate Pudding Mix: Instant pudding is crucial for that rich chocolate flavor. If you prefer a homemade version, you can make chocolate custard instead. Just be aware that it takes longer to prepare.
Milk: I like to use whole milk for creaminess, but you can swap it for almond or soy milk if you want a dairy-free option. Just ensure it’s unsweetened to control the sweetness.
Heavy Whipping Cream: For the best texture in whipped cream, heavy cream is the way to go. If you’re cutting calories, you can use whipped topping as a substitute, but it won’t taste as homemade.
Oreos: Crushed Oreos are a key player for that “dirt” look and taste. If you have dietary restrictions, gluten-free Oreos or chocolate graham crackers work as nice alternatives.
Decorations: The fun Halloween decorations really elevate the look! If you can’t find edible tombstones, you might use mini chocolate bars or even cookies shaped like tombstones. Be creative!
How Do I Layer & Assemble the Dirt Cups Without Making a Mess?
Layering is key for a beautiful display! Here are a few tips to help you layer without any spills:
- Use clear plastic cups to easily see the layers, making it visually appealing.
- Start with crushed Oreos at the bottom — this creates a solid base.
- Pour the pudding gently onto the cookies, using a spoon to drop it in rather than pouring directly, to avoid mixing the layers.
- For the orange pudding, repeat the layering process, being gentle again to keep the colors separate.
- Top it off with more crushed Oreos and your Halloween decorations to create a scary vibe.
Chill the cups after assembling to let them set, ensuring that all layers stay intact until serving.
Graveyard Dirt Cups
Ingredients You’ll Need:
For The Pudding:
- 2 packages (3.9 oz each) instant chocolate pudding mix
- 3 cups cold milk
For The Whipped Cream:
- 1 cup heavy whipping cream
- 1/4 cup powdered sugar
- 1 teaspoon vanilla extract
For The “Dirt”:
- 30 Oreo cookies, crushed (reserve some whole for decoration)
For The Coloring:
- Orange and black food coloring
For The Decorations:
- Halloween themed edible items:
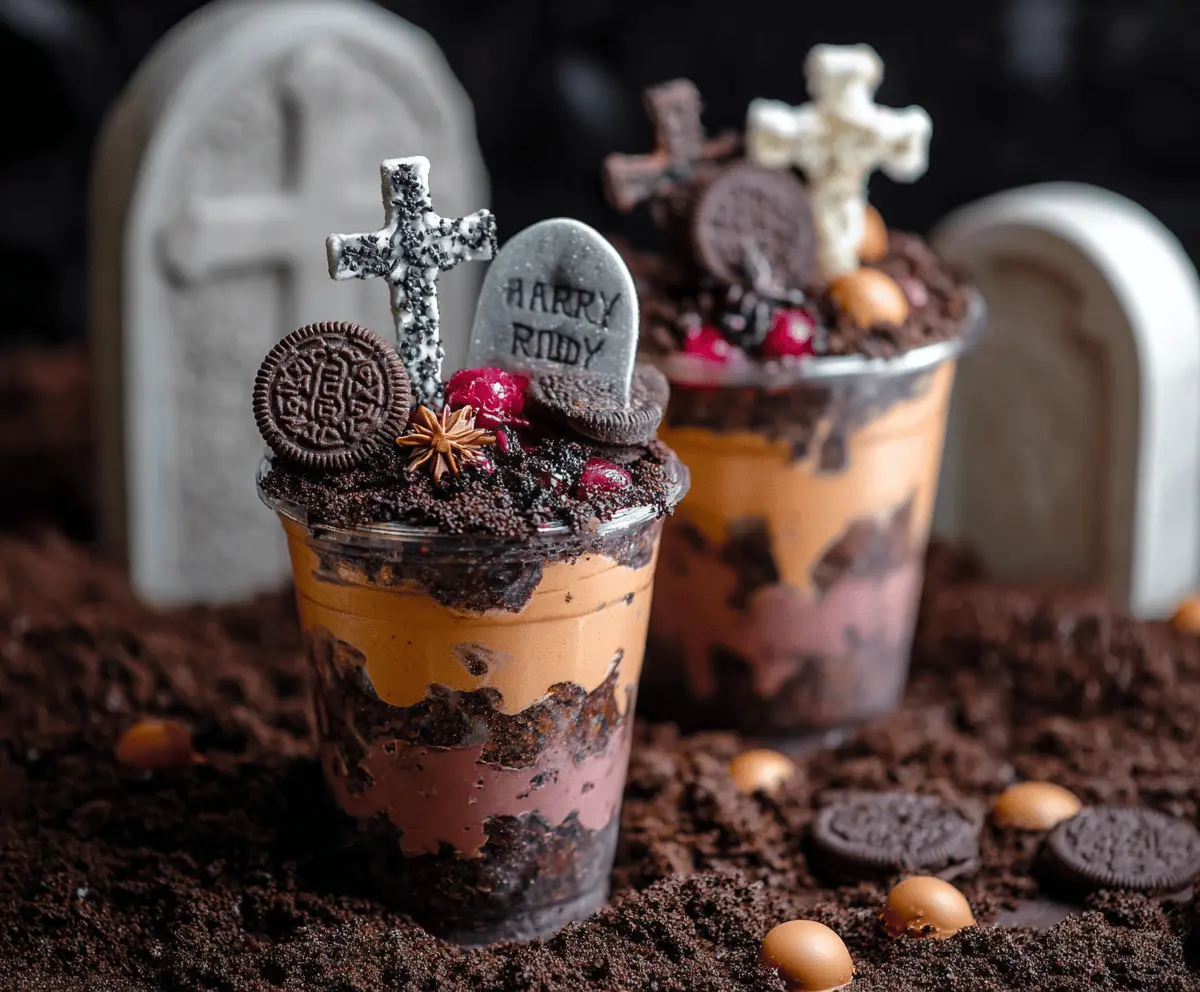
- Chocolate or candy crosses
- Edible tombstone decorations (homemade or store-bought)
- Red candy berries or cranberries
- Star anise (for a spooky effect)
- Optional: caramel or chocolate candy-coated chocolates
How Much Time Will You Need?
This delightful recipe will take about 20 minutes of prep time and requires at least 1 hour in the fridge to chill and set. So, expect a total of about 1 hour and 20 minutes before enjoying your spooky dessert!
Step-by-Step Instructions:
1. Prepare the Chocolate Pudding:
In a large bowl, combine the instant chocolate pudding mix with cold milk. Whisk well until the mixture is smooth and has thickened, which should take about 2 minutes. Once ready, divide this pudding mixture into two equal parts.
2. Add Some Color:
Take one half of the pudding and add a few drops of orange food coloring. Gently fold it in until you’ve achieved a vibrant orange color. Keep the other half as the original chocolate pudding color.
3. Whip the Cream:
In a separate bowl, whip the heavy cream along with the powdered sugar and vanilla extract until you see stiff peaks form. This means your whipped cream is ready! Next, fold half of this whipped cream into the orange pudding mixture and the other half into the chocolate pudding mixture to make them fluffy.
4. Crush the Oreos:
To make the dirt topping, place your Oreo cookies in a plastic bag and crush them into fine crumbs. Make sure to reserve a few whole Oreos to use as decorations on the top later!
5. Assemble the Cups:
Grab some clear plastic cups and start layering! Begin with a layer of crushed Oreos, followed by a layer of chocolate pudding, another layer of crushed Oreos, and then add the orange pudding. Finally, top it off with more crushed Oreos to create the look of dirt.
6. Get Creative with Decorations:
Now comes the fun part! Decorate the tops of each cup with the reserved whole Oreos, edible chocolate or candy crosses, and tombstone decorations labeled with spooky names (like “Harry Riddy”). Add some red candy berries or cranberries, star anise, and if you like, sprinkle caramel or chocolate candies to mimic rocks.
7. Chill Out:
Cover your graveyard cups and place them in the refrigerator to chill for at least 1 hour. This will help the layers set nicely!
8. Serve and Enjoy!
After chilling, serve the Graveyard Dirt Cups cold. Watch as your friends and family enjoy these deliciously spooky treats, perfect for any Halloween celebration!
This delightful dessert not only tastes amazing but also brings a fun, festive touch to any gathering with its rich chocolate pudding, crushed Oreo “dirt,” and playful decorations!
Can I Use Instant Vanilla Pudding Instead of Chocolate?
Absolutely! If you prefer vanilla pudding, it can be used as a base. Just make sure to adjust the decorations and flavors so that they complement the vanilla, like incorporating more chocolate-themed toppings for contrast!
How Long Can I Store Leftover Graveyard Dirt Cups?
Leftover cups can be stored in the refrigerator for up to 3 days in an airtight container. Just keep in mind that the crushed Oreos may lose some crunch over time!
What Can I Substitute for Oreos?
If you need a substitute for Oreos due to dietary restrictions or allergies, try using gluten-free chocolate sandwich cookies or chocolate graham crackers, which will work similarly in texture and flavor!
Can I Make This Dessert Ahead of Time?
Yes, you can prepare the pudding and layers in advance! Assemble the cups up to a day prior to serving and keep them refrigerated. Just add the decorations right before serving for a fresh look!