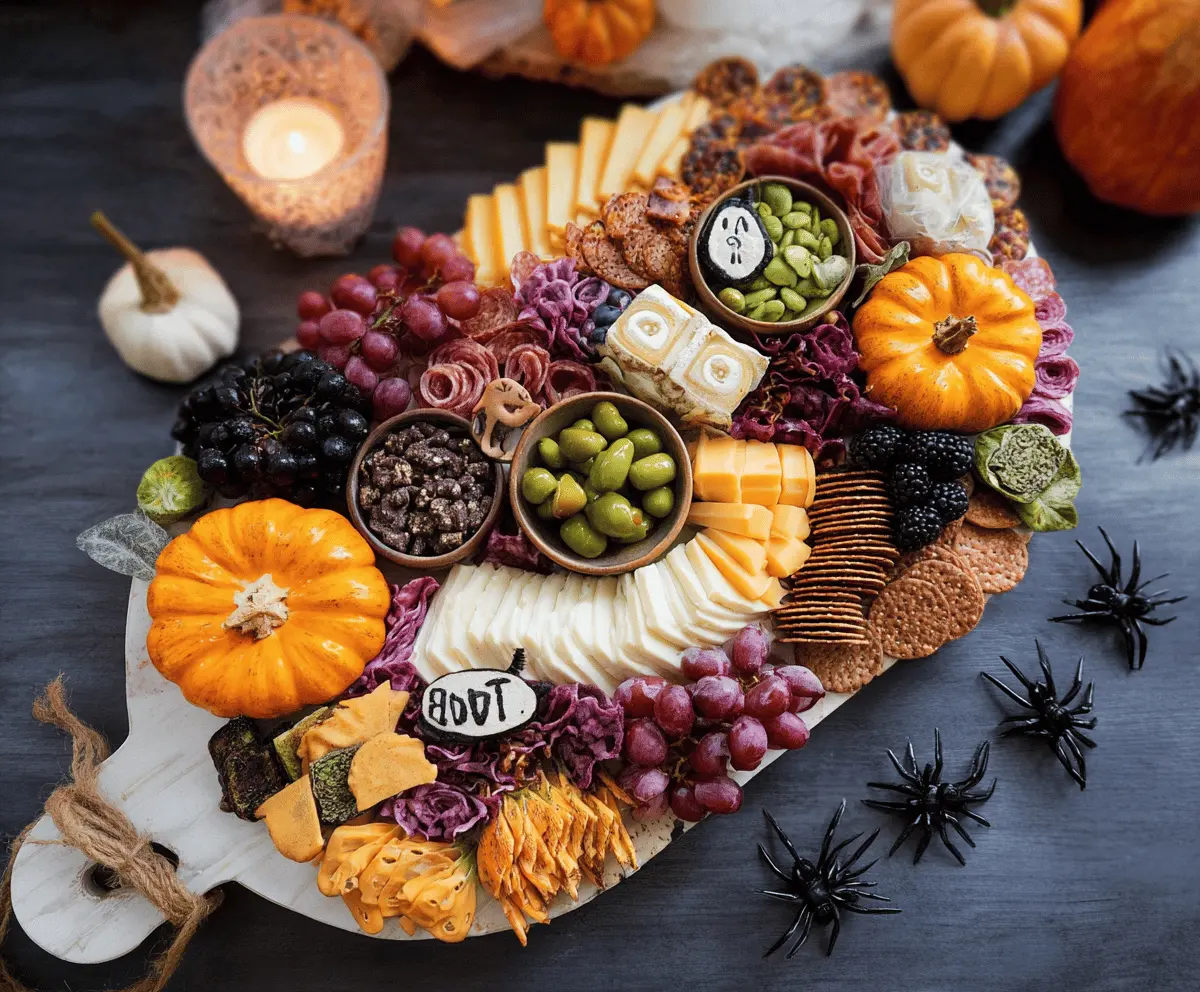
This Halloween Charcuterie Board is a fun and spooky way to enjoy treats! It’s filled with delicious meats, cheeses, and festive goodies like candy corn and pumpkin-shaped crackers.
Creating this board is like playing with your food! I love how you can mix spooky and savory. Just gather your favorites and let your imagination run wild—perfect for a Halloween party!
Key Ingredients & Substitutions
Cured Meats: I love using a mix of salami, prosciutto, and pepperoni for variety. If you’re looking for a lighter option, turkey or chicken deli meats work as great substitutes.
Cheeses: Goat cheese adds a creamy texture, but you can swap it for feta if you prefer. Cream cheese shaped like a ghost is fun but using store-bought cheese balls is quicker and still great. Cheddar and mozzarella are crowd pleasers, but feel free to add any cheese you love!
Crackers: Use a mix of crunchy and soft crackers. If you’re gluten-free, there are plenty of gluten-free options available in stores. I often choose a variety pack for fun!
Fruits: Grapes and blackberries are colorful, but any seasonal fruit works. Slices of apple or pear bring great flavor and visual appeal, too. Pomegranate seeds are optional if fresh fruit isn’t available.
Pumpkin Decorations: Mini pumpkins add a festive touch, but if you can’t find any, you can use colorful fall leaves or even spooky figurines. They’ll still bring that Halloween spirit!
How Do I Create a Balanced and Appealing Board?
Creating a stunning charcuterie board is all about balance and arrangement. Here’s how to make it visually appealing and functional:
- **Plan your layout**: Start with your largest items, placing cheese and bowls first for spacing.
- **Vary colors and textures**: Alternate meats, cheeses, and fruits in clusters to make it lively. Think contrast—dark olives next to light cheeses!
- **Use height**: Stack crackers and layer meats in rosettes for dimension. It makes your board more interesting to look at.
- **Fill empty spaces**: After the main items are arranged, add in smaller items like nuts and fruits to fill in gaps.
- **Add decorative touches**: Use seasonal decorations like mini pumpkins or Halloween-themed picks to make it festive.
Remember, the key is to have fun arranging your board! Enjoy making it as much as you will enjoy eating it.
Halloween Charcuterie Board
Ingredients You’ll Need:
For the Board:
- Assorted cured meats (salami, prosciutto, pepperoni), about 8-10 oz total
- Variety of cheeses:
- White goat cheese logs or rounds with herbs
- Cream cheese or soft cheese shaped with chocolate chips to look like a ghost face
- Cheddar cheese slices (about 6 oz)
- Fresh mozzarella or sliced cheese rounds (about 6 oz)
- Crackers (variety of types, about 2 cups total)
- Fresh fruit:
- Green grapes (1-2 bunches)
- Red grapes (1 bunch)
- Blackberries (1 cup)
- Pomegranate seeds (from 1 pomegranate half)
- Olives (black olives, 1/2 cup)
- Pumpkin seeds or pepitas (1/4 cup)
- Dried fruit such as dried black cherries or cranberries (1/2 cup)
- Assorted nuts or spiced nuts (1/2 cup)
- Small seasonal mini pumpkins for decoration (1-2)
- Candy corn or Halloween-themed candies (optional, a small handful)
- Small serving bowls for seeds, olives, and dried fruits
- Halloween-themed decorations like black bat pick sticks or fake spiders (optional)
How Much Time Will You Need?
This delightful Halloween Charcuterie Board takes about 30 minutes to prepare. Most of that time is spent arranging the ingredients just right. It’s perfect for a spooky gathering or a cozy night in!
Step-by-Step Instructions:
1. Prepare the Board:
Select a large wooden board or platter as your base. Start by placing bowls for the pumpkin seeds, olives, and dried fruit around the board to give structure and organization to your spread.
2. Place Cheeses:
Next, position the cheese varieties around the board in different spots for visual balance. To add a fun touch, shape the cream cheese into a ghost and use mini chocolate chips or black sesame seeds as eyes and a mouth!
3. Add Meats:
Now it’s time to add the cured meats! Fold or roll them into rosettes or layered fans, and arrange them next to the cheeses and fruits for an attractive presentation.
4. Add Crackers:
Fill in the gaps with your assorted crackers. You can stack or fan them out for easy access, making it look inviting while also practical for guests.
5. Arrange Fruits:
Cluster the green and red grapes separately on the board. Place blackberries near the cheeses for contrast, and add a sprinkling of pomegranate seeds in a bowl to draw the eye.
6. Add Olives, Nuts, and Seeds:
Fill the bowls with olives, pumpkin seeds, and nuts. Place these strategically to make everything easy to pick and enjoy.
7. Decorate with Pumpkins and Candy:
For a festive touch, place mini pumpkins on the board or in the surrounding area. Scatter a few candy corn pieces or Halloween-themed candies around for a sweet surprise!
8. Add Festive Touches:
Sprinkle small plastic spiders, bat picks, or other Halloween decorations on or around the board to give it that spooky flair.
9. Final Touch:
To set the mood, light a few candles nearby to create a warm atmosphere, and prepare small plates and napkins for your guests.
Enjoy your festive, delicious Halloween Charcuterie Board—perfect for sharing at your Halloween gatherings!
Can I Use Other Types of Meat?
Absolutely! If you’re not a fan of salami, prosciutto, or pepperoni, you can use turkey, chicken, or even vegetarian options like marinated tofu or plant-based deli slices for a different flavor profile.
How Do I Keep the Cheese from Melting?
To avoid melting, keep your cheese in the fridge until you’re ready to serve. It’s best to take it out about 30 minutes before serving to let it come to room temperature without getting too warm.
What If I Have Leftovers?
Store any leftover items in airtight containers. Most cheeses and cured meats can be refrigerated for a few days. Make sure to separate dried fruits and nuts to maintain their texture. Enjoy the leftovers on crackers or in salads!
Can I Make This Board Ahead of Time?
Definitely! You can prepare the majority of your board a few hours in advance. Just keep it covered in the fridge until you’re ready to serve, and add any decorations or candies just before presenting to keep everything fresh and appealing.