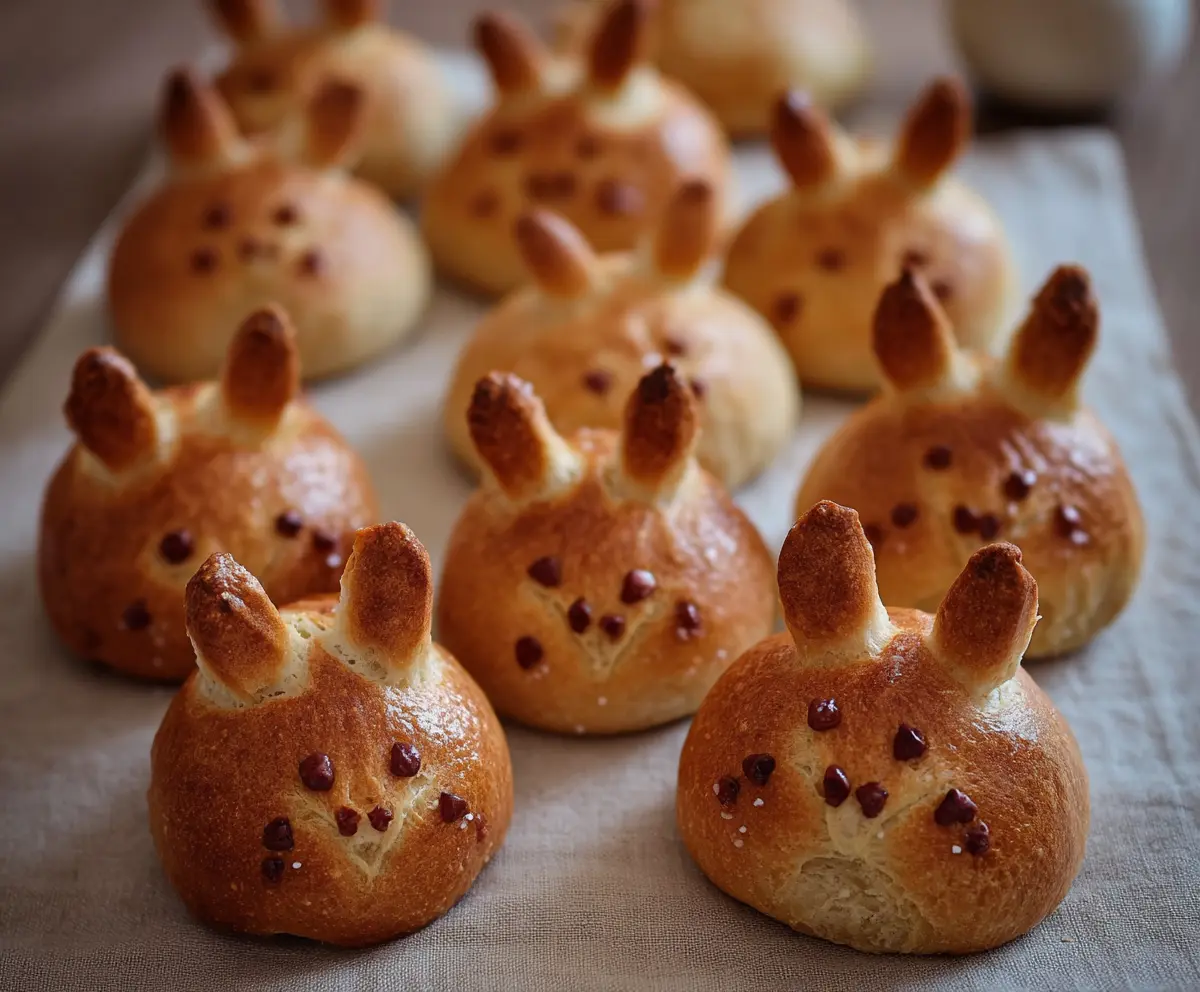
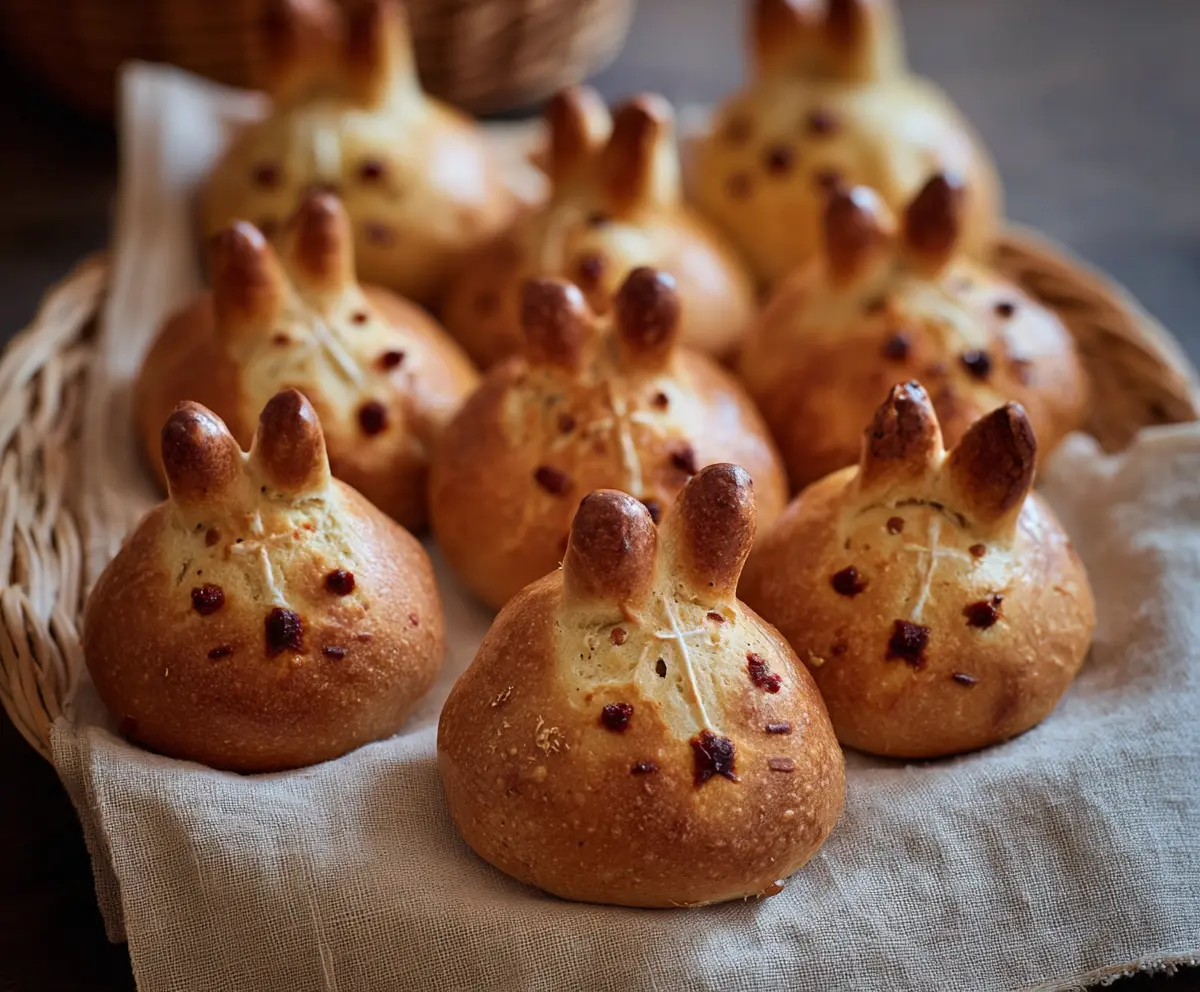
These adorable Hot Cross Bunny Rolls are soft, sweet, and shaped like little bunnies! Packed with spices and a hint of dried fruit, they make a fun treat for any occasion.
Just imagine biting into a fluffy bun that looks like a cute bunny! I love making these rolls with my kids; it turns baking into a playful adventure. 🐰
Key Ingredients & Substitutions
All-Purpose Flour: This is the main flour for the rolls. If you prefer, you can mix in some whole wheat flour for added nutrients, but reduce the total amount slightly, as whole wheat absorbs more liquid.
Active Dry Yeast: Yeast is crucial for rising. If you have instant yeast, you can substitute it 1:1 without needing to activate it in milk first. Just mix it directly with the dry ingredients!
Granulated Sugar: Sugar helps with browning and adds a touch of sweetness. If you want a less sweet roll, reduce the sugar or use honey or maple syrup instead. Just remember, these liquids will change the wet-to-dry ingredient balance.
Warm Milk: If you’re lactose intolerant, use almond, soy, or oat milk. Just warm them to the same temperature! The warm milk helps activate the yeast.
Unsalted Butter: Use margarine or coconut oil as a substitute for a dairy-free option. Butter adds richness, but these alternatives can work well for flavor.
Chocolate Chips or Raisins: Get creative! You can use nuts, dried cranberries, or even small candies. If you choose candy, keep in mind the melting point!
How Do I Ensure My Dough Raises Perfectly?
Getting the dough to rise is key for fluffy rolls. Start by ensuring your yeast is fresh; it should foam nicely when activated in warm milk. If it doesn’t, try again with new yeast!
- Keep your rising dough in a warm area (around 75-80°F is ideal).
- If it’s too cold, the dough won’t rise properly. Try placing it in an oven (turned off) with warm water for a cozy spot.
- Don’t rush the first rise; letting it double in size (about 1 to 1.5 hours) develops great flavor and texture.
How to Make Hot Cross Bunny Rolls
Ingredients You’ll Need:
For the Dough:
- 3 ½ cups (440g) all-purpose flour
- 2 ¼ tsp (1 packet) active dry yeast
- 1/4 cup (50g) granulated sugar
- 1 tsp salt
- 1 cup (240ml) warm milk (about 110°F/43°C)
- 1/4 cup (60g) unsalted butter, softened
- 1 large egg
- 1 tsp vanilla extract (optional)
For Topping:
- 1 tbsp melted butter (for brushing)
- Chocolate chips or raisins (for eyes, nose, and whisker dots)
- Coarse sea salt (optional, for garnish)
How Much Time Will You Need?
This delightful recipe will take you about 2 to 2.5 hours to complete, including preparation, waits for rising, and baking. You’ll spend about 15-20 minutes actively preparing the dough and shaping the bunny rolls!
Step-by-Step Instructions:
1. Activate Yeast:
In a small bowl, combine the warm milk and sugar, then sprinkle the yeast on top. Let it sit for 5-10 minutes. You’ll know it’s ready when you see a foamy layer on top, which means the yeast is actively working!
2. Prepare Dough:
In a large mixing bowl, mix together the all-purpose flour and salt. Add the softened butter, egg, and the foamy yeast mixture. If you decided to use vanilla extract, add that in as well.
3. Knead Dough:
Now it’s time to make the dough! Knead the mixture by hand or with a stand mixer fitted with a dough hook. Keep kneading for about 8-10 minutes until the dough is smooth and elastic. If it feels too sticky, don’t hesitate to add a bit more flour, just a tablespoon at a time.
4. First Rise:
Place your dough in a lightly greased bowl and cover it with a clean kitchen towel or some plastic wrap. Find a warm spot and let it rise until it’s doubled in size, which should take about 1 to 1.5 hours.
5. Shape Rolls:
Once the dough has risen, gently punch it down to release any air. Divide it into equal portions based on how many rolls you want to make. Roll each portion into a ball to form the bunny’s face.
6. Make Bunny Ears:
Take small pieces from the leftover dough and roll them into two bunny ears for each roll. Firmly press the ears onto the top of each dough ball so they don’t fall off during baking.
7. Second Rise:
Place your shaped bunny rolls on a parchment-lined baking sheet. Cover them again and let them rise for another 30-45 minutes until they look puffy and ready to bake.
8. Preheat Oven:
While your rolls are rising, preheat the oven to 375°F (190°C).
9. Add Features:
Using your chocolate chips or raisins, gently press them into the dough balls to make cute eyes, a nose, and maybe a few for whisker dots on the cheeks. Get creative!
10. Bake:
Before baking, brush the tops of the rolls with melted butter for a lovely golden color. Pop them into the preheated oven and bake for 15-20 minutes, or until they’re golden brown.
11. Cool and Serve:
Once baked, take the rolls out and let them cool for a few minutes on a wire rack. If you want, sprinkle a tiny bit of coarse sea salt on top for a delightful flavor contrast. Enjoy these fun and festive Hot Cross Bunny Rolls for your spring celebrations!
Can I Use Whole Wheat Flour Instead of All-Purpose Flour?
Yes! You can substitute whole wheat flour, but make sure to reduce the amount slightly since it absorbs more liquid. Start with about 3 cups of whole wheat flour and add a bit more if the dough is too sticky.
How Do I Know If My Yeast Is Active?
To check if your yeast is active, mix it with warm milk and sugar, then let it sit for about 5-10 minutes. If it becomes foamy and bubbly, your yeast is good to go!
Can I Make These Rolls Ahead of Time?
Absolutely! You can prepare the dough and let it rise, then shape the rolls and freeze them before the second rise. Just let them thaw and rise in the fridge overnight before baking.
What Should I Do If the Dough is Too Sticky?
If your dough feels sticky while kneading, that’s perfectly normal! Simply sprinkle a little more flour, a tablespoon at a time, until the dough becomes smooth and elastic.