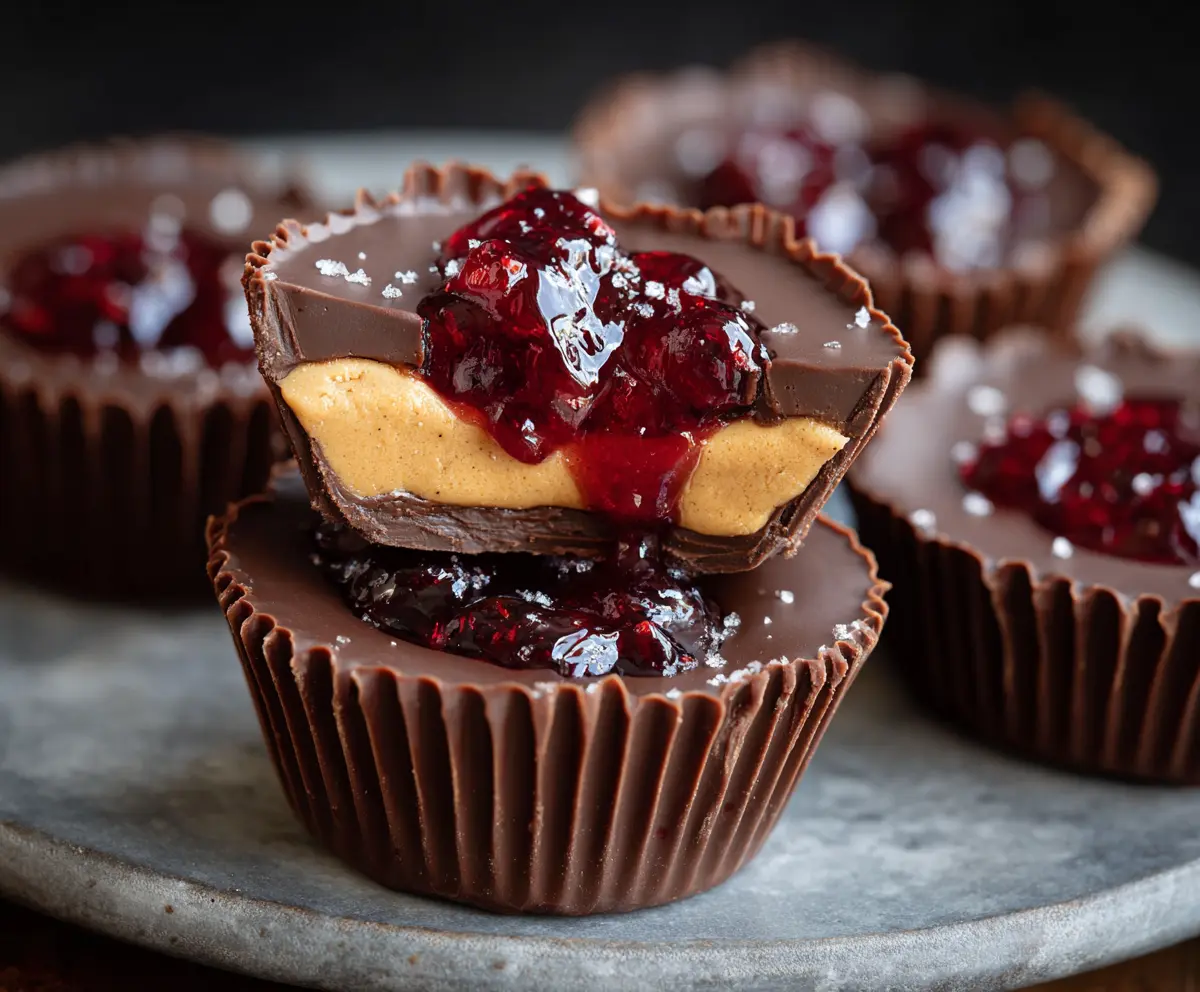
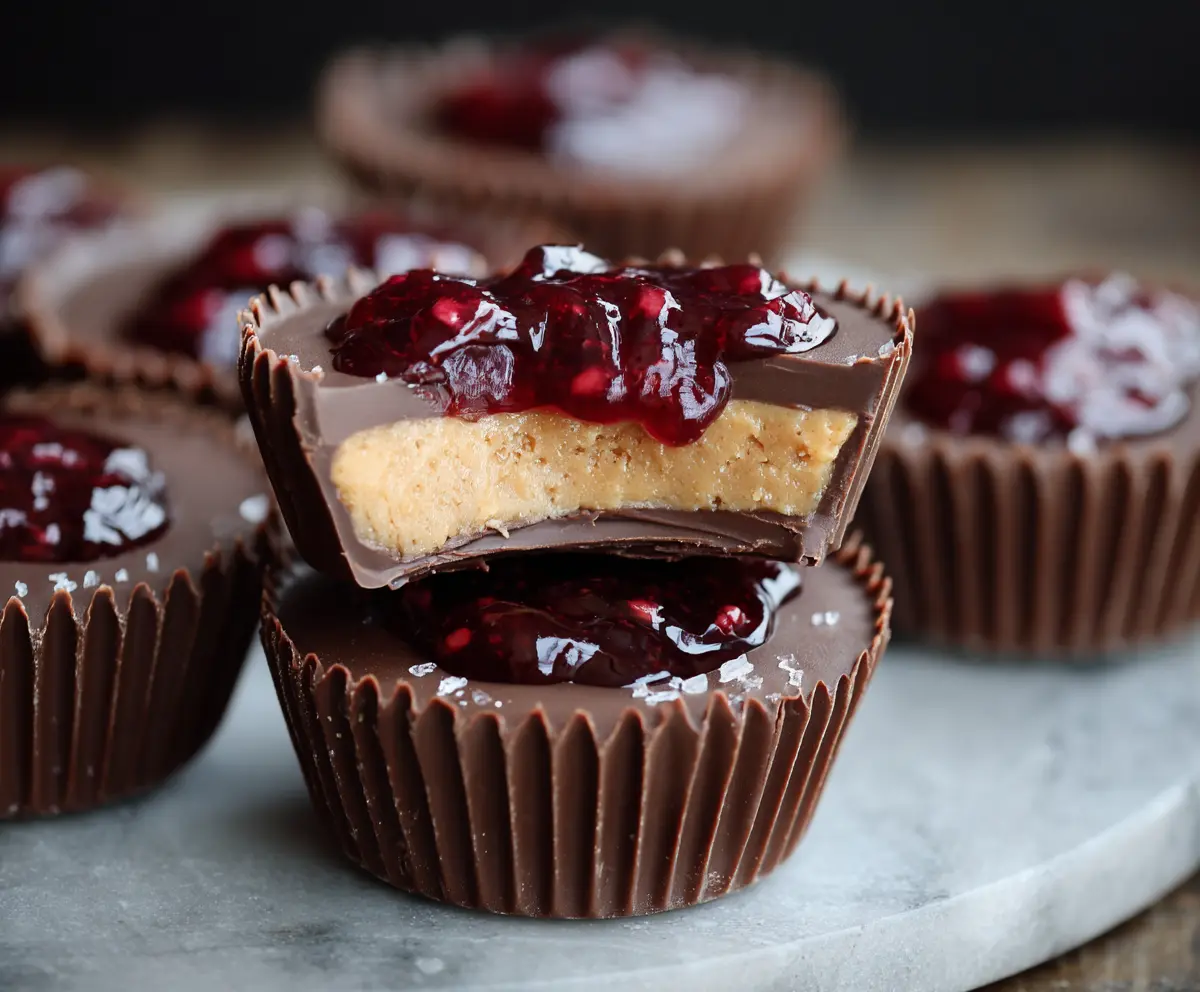
These Peanut Butter and Jelly Cups are like tiny desserts that bring back childhood memories! With a creamy peanut butter filling and a sweet jelly center, they’re oh-so-tasty.
Making them is as easy as pie! I love to pop them in the fridge for a bit and enjoy a cool treat. Just try not to eat them all at once—it’s hard to resist! 😄
Key Ingredients & Substitutions
Creamy Peanut Butter: This is the star of the show! I prefer creamy peanut butter for its smooth texture. If you want a crunchy bite, go for crunchy peanut butter instead. Allergy to peanuts? Try almond or sunflower seed butter!
Chocolate Chips: Semi-sweet chocolate chips give a nice balance of sweetness. You can use dark chocolate for a richer flavor, or milk chocolate if you prefer something sweeter. For a dairy-free option, look for vegan chocolate chips!
Butter: Unsalted butter helps control the saltiness. If you need a dairy-free substitute, coconut oil works great! Just make sure it’s melted and not too hot when mixing with other ingredients.
Jelly or Jam: I love raspberry jelly for its tartness, but grape jelly is a classic choice. Feel free to switch it up and use your favorite flavor or even a fruit spread if you prefer something less sugary.
What’s the Best Way to Melt Chocolate Smoothly?
Melted chocolate is crucial for these cups, so here’s how to do it without burning it. Use a microwave-safe bowl and microwave in short bursts of 30 seconds. Stir in between each burst to heat evenly.
- Always start with dry bowls and utensils; moisture can seize the chocolate.
- Once it’s melted, stir until it’s silky and smooth. If tiny lumps remain, they’ll melt with stirring.
- If you don’t have a microwave, you can use a double boiler. Just boil water in a pot and place your chocolate in a bowl on top, stirring until melted.
These tips will help you achieve that smooth chocolate layer for your Peanut Butter and Jelly Cups!
How to Make Peanut Butter and Jelly Cups
Ingredients You’ll Need:
- 1 cup creamy peanut butter
- 1/4 cup unsalted butter, softened
- 1/4 cup powdered sugar
- 2 cups semi-sweet chocolate chips (or chopped chocolate)
- 1/4 cup jelly or jam (like grape or raspberry)
- A pinch of flaky sea salt (optional)
How Much Time Will You Need?
This recipe takes about 20 minutes to prepare, plus an additional 40 minutes for chilling in the freezer, so plan for about 1 hour total. In no time at all, you’ll have delicious Peanut Butter and Jelly Cups ready to enjoy!
Step-by-Step Instructions:
1. Prepare the Muffin Tin:
Start by lining a mini muffin tin with paper liners. This will make it easier to remove the cups once they’re set, and it keeps everything nice and tidy!
2. Mix the Peanut Butter Filling:
In a medium bowl, combine the creamy peanut butter, softened butter, and powdered sugar. Mix everything together until it’s smooth and creamy. This will be your delicious filling!
3. Melt the Chocolate:
In a microwave-safe bowl, melt 1 cup of chocolate chips in 30-second increments. Stir the chocolate each time until it’s completely melted and smooth. This helps prevent burning and ensures a nice, shiny finish!
4. Create the Chocolate Base:
Take spoonfuls of the melted chocolate and pour it into each muffin liner. Just enough to cover the bottom. Use the back of your spoon to spread it evenly, creating a nice base for your cups.
5. Let the Base Set:
Place the muffin tin in the freezer for about 10 minutes, allowing the chocolate base to set up nicely.
6. Add the Peanut Butter Mixture:
Once the chocolate is firm, add about a teaspoon of the peanut butter mixture on top of each chocolate layer. Gently spread it out to cover the chocolate, making sure to leave some space at the top for the jelly.
7. Top with Jelly:
Now it’s time to add some sweetness! Spoon about 1/2 teaspoon of jelly on top of the peanut butter layer in each cup. Remember to keep them separate so you enjoy each layer!
8. Melt More Chocolate:
Take the remaining chocolate chips and melt them using the same method as before: in the microwave, in 30-second increments until melted.
9. Cover with Chocolate:
Pour the melted chocolate over the jelly layer in each cup, covering it completely. This will seal everything in and make each bite heavenly!
10. Freeze Again:
Put the muffin tin back into the freezer for at least 30 minutes, or until the cups are fully set. Patience is key here!
11. Serve Your Delicious Treats:
Once set, carefully remove the cups from the liners. If you’d like, sprinkle a tiny pinch of flaky sea salt on top for an extra yummy touch. Now, they’re ready to enjoy chilled!
These Peanut Butter and Jelly Cups are perfect for a sweet snack or dessert. They combine creamy peanut butter, sweet jelly, and rich chocolate in every bite. Enjoy your creation!
Can I Use Natural Peanut Butter Instead of Creamy Peanut Butter?
Yes, you can use natural peanut butter, but be aware that it may have a different consistency and taste. If using natural peanut butter, consider adding a bit more powdered sugar to help thicken it up and keep it from becoming too oily.
What Types of Jelly or Jam Can I Use?
You can use any flavor of jelly or jam that you love! Grape and raspberry are classic choices, but feel free to experiment with strawberry, blueberry, or even a mixed fruit spread for a unique twist.
How Long Can I Store the Peanut Butter and Jelly Cups?
These treats can be stored in an airtight container in the refrigerator for up to one week. For longer storage, you can freeze them for up to three months—just let them thaw in the fridge before enjoying!
What Can I Substitute for Chocolate Chips?
If you don’t have chocolate chips, you can chop up any chocolate bar or use carob chips for a caffeine-free alternative. Just remember, the chocolate will need to be melted before layering in your cups!