Tuna rice balls are a fun and tasty snack! Made with sticky rice and flavored tuna, these little bites are perfect for lunch or as a light treat.
They’re super easy to make! I like to add a bit of soy sauce for an extra kick. It’s always a hit when I share them, and they disappear fast! 🐟🍙
Key Ingredients & Substitutions
Short-grain rice: Use Japanese sushi rice for the right texture. If unavailable, you can substitute with Arborio rice, but avoid long-grain varieties as they won’t stick well.
Tuna: I prefer tuna packed in oil for a richer flavor, but water-packed tuna works just fine, making it a lighter option.
Mayonnaise: If you’re looking for a healthier version, swap mayo for Greek yogurt. It adds creaminess with less fat!
Nori seaweed: For a substitute, try using toasted seaweed snacks. Just crumble them over the finished rice balls. You can also skip it entirely, but it adds a nice touch.
Panko breadcrumbs: Regular breadcrumbs are an alternative, but panko gives a crispier texture, which I love. If you need gluten-free, check for gluten-free panko!
How Do I Form Perfect Rice Balls Without Making a Mess?
Forming the rice balls can get sticky if you’re not careful. Here are some tips to make it easier:
- Wet your hands with water before handling the rice mixture. This prevents sticking and helps shape the balls better.
- Don’t overwork the rice. Just enough pressure to form a ball is key—too much pressure can make them dense.
- Make sure your rice is cool, but not cold. Warm rice holds together better when forming.
These simple steps will help you create perfect Tuna Rice Balls every time! Enjoy crafting these tasty snacks.
How to Make Tuna Rice Balls
Ingredients
For the Rice Balls:
- 2 cups cooked short-grain rice (preferably Japanese sushi rice), cooled
- 1 can (5 oz) tuna in water or oil, drained
- 2 tbsp mayonnaise
- 1 tbsp soy sauce
- 1 tsp rice vinegar (optional)
- 1 tsp chili paste or finely chopped red chili (optional, for mild heat)
- 2 sheets nori seaweed, cut into thin strips
- 1/3 cup panko breadcrumbs
- 1 tbsp vegetable oil (for frying)
- 1 tbsp finely chopped chives or green onions (for garnish)
- Salt to taste
How Much Time Will You Need?
Making Tuna Rice Balls takes about 15-20 minutes for preparation and another 5-10 minutes for frying. Plus, it’s a fun and quick recipe that’s perfect for a delicious snack or light meal!
Step-by-Step Instructions
1. Prepare the Tuna Mixture:
In a mixing bowl, combine the drained tuna, mayonnaise, soy sauce, rice vinegar (if using), and chili paste (if desired). Mix everything together until you have a tasty tuna filling. It’s the star of your rice balls! 🎤
2. Mix in the Rice:
Next, add the cooled cooked rice and half of the nori strips into your bowl. Gently mix everything until well combined. You want the rice to be coated with that flavorful tuna, so it’s all nice and mixed together. Taste it and adjust salt according to your preference!
3. Shape the Rice Balls:
Now it’s time to get your hands a little messy! Wet your hands with water to keep the mixture from sticking. Take a small handful of the mixture and press it into a compact ball, about 1.5 to 2 inches in diameter. Aim for consistency—this helps them hold together while frying!
4. Coat with Panko:
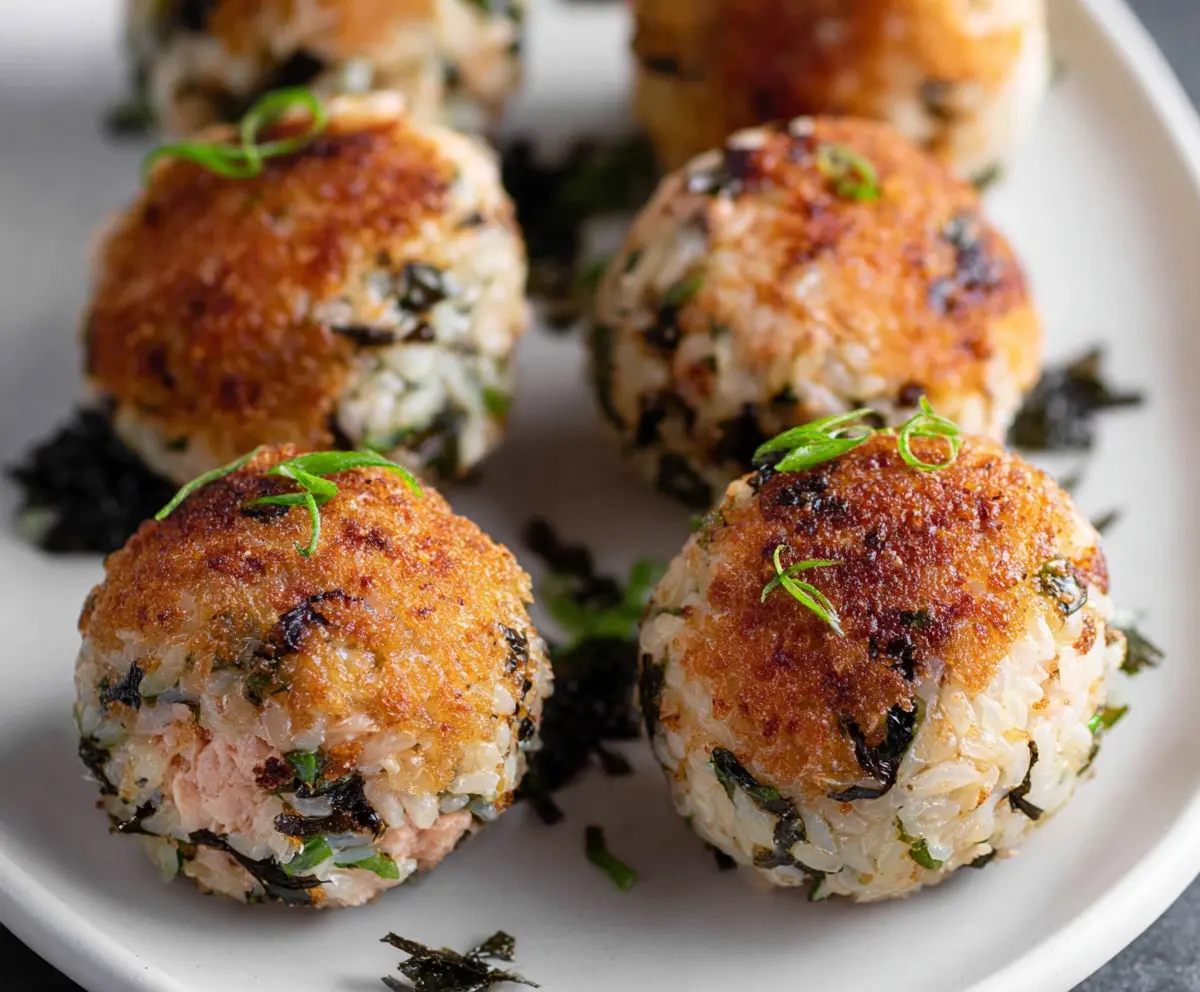
Once you’ve shaped the rice balls, take one and lightly press the formed side into the panko breadcrumbs to coat it. This gives it that crispy, crunchy exterior that everyone loves!
5. Fry the Rice Balls:
Heat the vegetable oil in a non-stick skillet over medium heat. Carefully place the breadcrumb-coated side of each rice ball down onto the skillet. Fry them for about 2-3 minutes or until they’re golden brown and crispy. If you’d like, you can flip them gently to crisp other sides too!
6. Drain and Garnish:
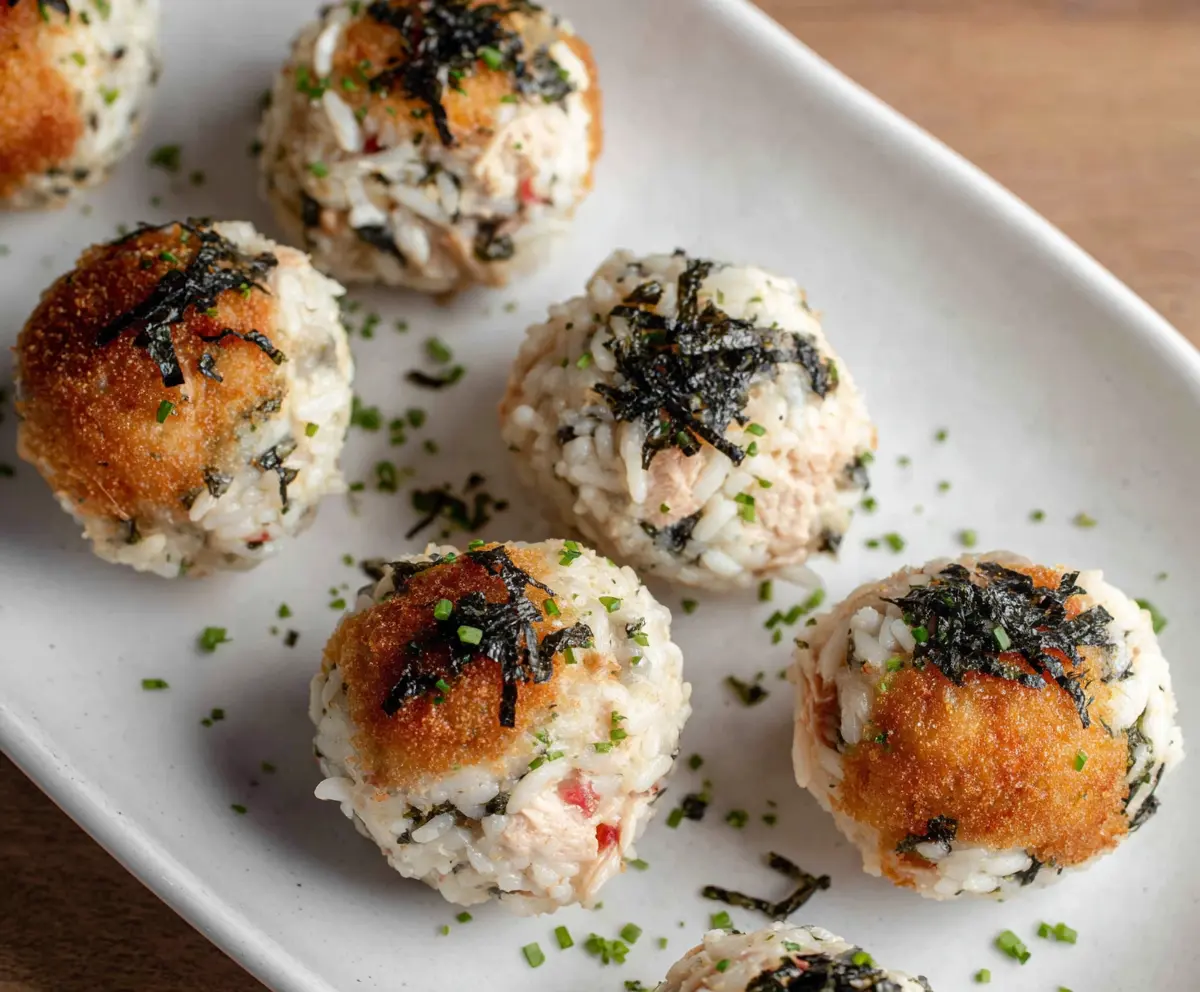
Once golden, remove the rice balls from the skillet and place them on paper towels to absorb any excess oil. This keeps them nice and light! Now, plate the tuna rice balls and sprinkle the remaining nori strips and chopped chives over the top for a fresh finish.
7. Serve and Enjoy:
These tuna rice balls are best served warm or at room temperature. Enjoy them as a delicious snack or mild meal. Don’t be surprised if they disappear quickly—they’re that good!
Enjoy your flavorful and crispy Tuna Rice Balls! 🐟🍙
Can I Use Leftover Rice for Tuna Rice Balls?
Absolutely! Leftover rice works great. Just ensure it’s sticky enough so that the rice balls hold together. If the rice seems a bit dry, consider adding a splash of water or a little bit of mayonnaise to help with moisture.
Can I Bake These Rice Balls Instead of Frying?
Yes, you can bake them for a healthier option! Preheat your oven to 400°F (200°C), place the rice balls on a baking sheet lined with parchment paper, and lightly spray them with cooking spray. Bake for about 15-20 minutes or until they’re golden brown, flipping halfway through for even cooking.
Are There Any Good Substitutions for Mayonnaise?
If you’re looking for a mayo substitute, Greek yogurt is a fantastic choice! It provides creaminess with a bit of tang. You could also try avocado for a different flavor profile or even a vegan mayo if you’re avoiding eggs.
How Do I Store Leftover Tuna Rice Balls?
Store any leftovers in an airtight container in the fridge for up to 2 days. To reheat, simply warm them in the microwave or in a skillet over low heat until heated through. You can also lightly crisp them again in a pan for a few minutes.