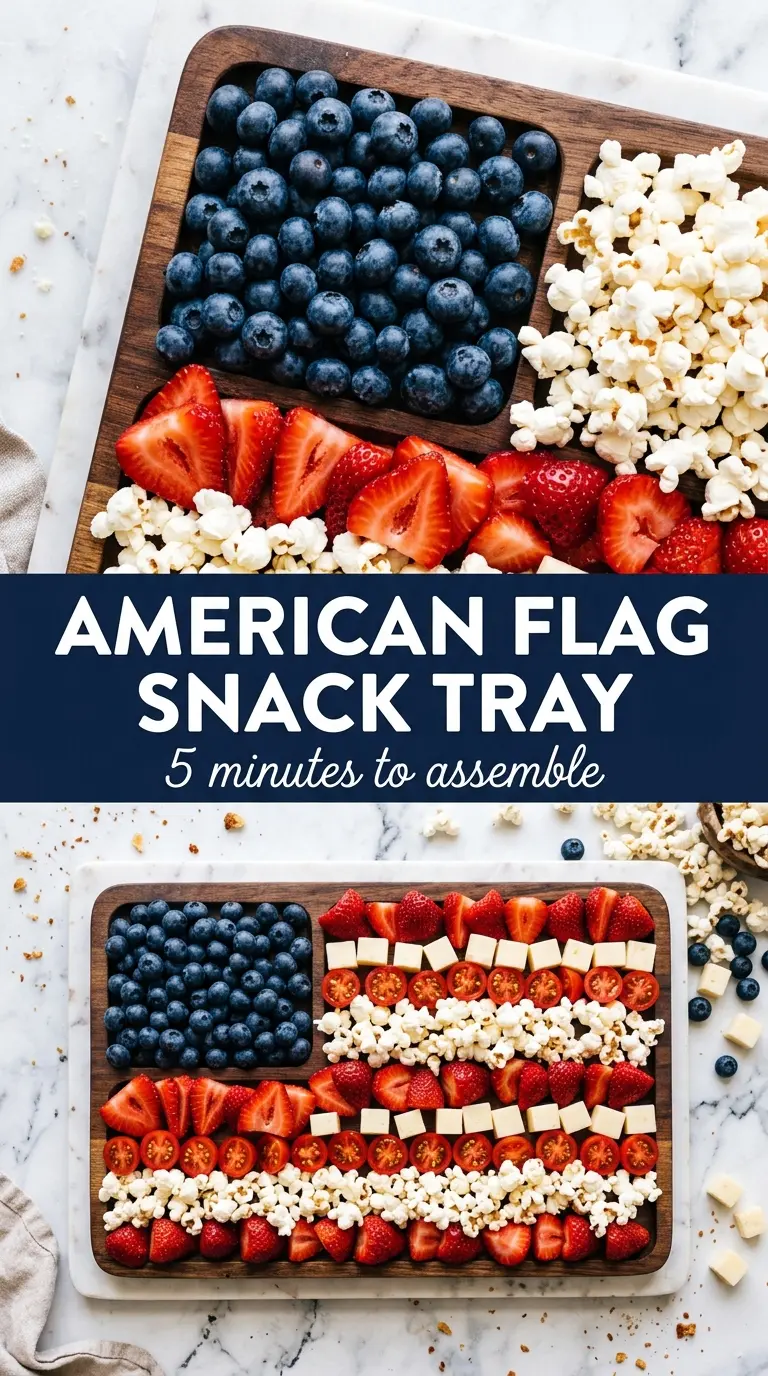
The American flag snack tray gets attention fast because it looks festive before anyone takes a bite, and then it disappears for the exact same reason. The contrast of glossy blueberries, juicy strawberries, salty pepperoni, and sharp white cheese gives every bite a little bit of everything: sweet, salty, creamy, and crisp. It’s the kind of party platter that doesn’t need extra explanation once it hits the table.
What makes this version work is the structure. A rectangular tray gives you clean edges, and the rows stay readable when you use evenly sized pieces instead of a scattered mix. I like cubed cheese here because it holds the white stripes together better than shredded cheese or slices, and folded pepperoni adds bulk without making the red sections look flat. The result is a board that looks intentional, not improvised.
Below, you’ll find the easiest way to keep the flag crisp while you build it, plus a few smart swaps if you want to use different crackers, cheeses, or a slightly different setup for your crowd.
I made this for our neighborhood cookout and the rows actually stayed in place all night. The blueberry corner looked sharp, and using cubed cheese instead of slices kept the white stripes from getting messy.
Save this American flag snack tray for your next 4th of July spread when you want a bold, easy appetizer with clean stripes and no cooking.
The Trick to Keeping the Flag Crisp Instead of Sloppy
The biggest mistake with a snack tray like this is overfilling it before you finish the pattern. Once the fruit starts leaking juice and the crackers pick up crumbs, the clean flag lines disappear. Build the design with tight, separate rows and add the dip at the end so the board stays sharp right up to serving time.
Another thing that helps is choosing ingredients that keep their shape. Whole or halved strawberries make better stripes than sliced berries that slide around, and cubed cheese gives you a blocky, stable look that reads as white from across the table. The blueberries work best when they’re packed closely in the corner so the blue field looks solid instead of spotted.
- Blueberries — These create the canton, and they need to be dry so they don’t stain the cheese or crackers. Pat them dry after rinsing; that extra minute matters.
- Strawberries — Halved berries give you a brighter red stripe than sliced berries, and they hold their shape better on a tray. If they’re large, quarter them so the rows stay even.
- White cheddar or mozzarella — Cubes give the cleanest white stripe and hold up far better than soft slices. Mozzarella is milder and softer; cheddar brings more flavor and keeps a firmer edge.
- Pepperoni — This adds a salty, savory layer that keeps the board from leaning too sweet. Folding the slices into halves or quarters helps them fill out the red stripes without taking over the tray.
- Crackers and pretzels — Use these to build width and to clean up the stripe edges where fruit or cheese alone won’t cover the space. Ritz-style crackers bring richness; pretzel sticks add structure and a sharper border.
What Each Ingredient Is Actually Doing in This Recipe
- Primary ingredient (the star) — Quality matters most. Choose the best you can find.
- Cooking medium (oil, butter, or broth) — This carries flavors and prevents dryness.
- Seasonings (salt, pepper, spices, herbs) — Layer flavors so nothing overpowers. Build depth gradually.
- Aromatics (garlic, onion, herbs) — Cook with fat to bloom flavors. Become the foundation.
- Supporting ingredients — Complement the main ingredient without overpowering it.
- Sauce or liquid (if applicable) — Brings flavors together. Balance richness with acid.
- Acid (lemon, vinegar, wine, or other) — Brightens and prevents flat-tasting results.
- Final finish (garnish, glaze, or sauce) — Prevents one-dimensional taste and adds visual appeal.
How to Build the Stripes So the Board Holds Its Shape
Setting the Framework
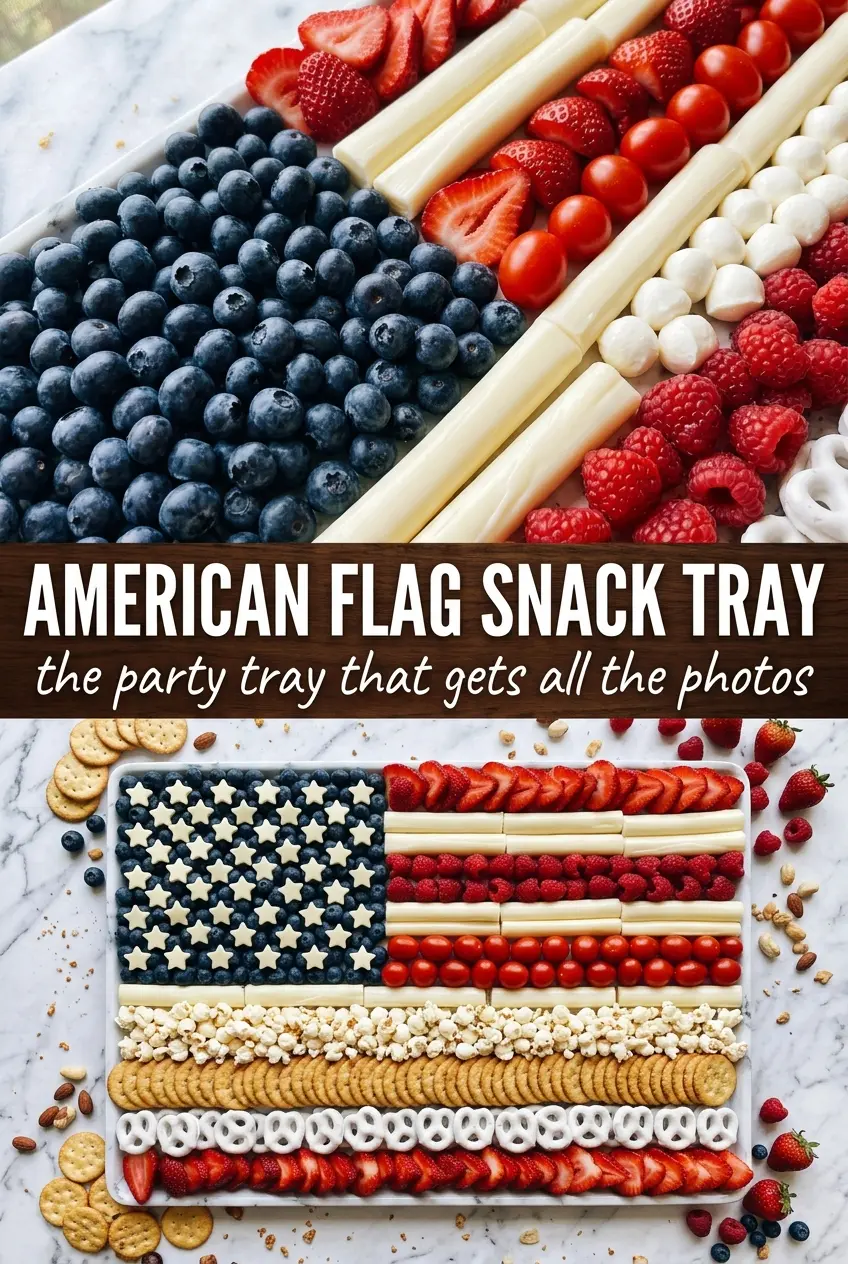
Start with a large rectangular board, sheet pan, or tray so the flag shape reads immediately. Think in rows before you think in ingredients, because the layout does the heavy lifting here. Leave a little space for the dip bowl if you’re using one, and decide where the blue corner will sit before you begin filling anything else.
Building the Blue Corner First
Fill the upper left corner tightly with blueberries, pressing them close enough that the area looks like a solid field of blue. If you scatter them loosely, the whole design looks unfinished. The corner should look denser than the rest of the tray so it anchors the flag visually.
Laying Down the Red and White Stripes
Work across the tray in alternating rows of strawberries, cheese, crackers, and pepperoni. Keep each stripe even in width, and don’t mix colors within a row unless you’re using the ingredient to extend the line cleanly. If a stripe starts to look patchy, add the same ingredient in the same section rather than trying to blend it with something else.
Finishing the Edges and Serving
Use pretzel sticks to tighten up the borders if a row looks uneven. Add the cream cheese or ranch dip in a corner at the very end so it doesn’t interrupt the flag pattern, and tuck in rosemary sprigs only if you want a little extra greenery around the edges. Serve it right away so the crackers stay crisp and the strawberries stay perky.
How to Adapt This for Different Crowds and Pantry Situations
Gluten-Free Flag Snack Tray
Swap the crackers and pretzel sticks for gluten-free crackers, rice crackers, or pretzel sticks made without wheat. The tray still holds its shape, but the border pieces may be a little more fragile, so build those sections last.
Vegetarian Version
Skip the pepperoni and replace those rows with extra strawberries, cheese cubes, or even cherry tomatoes if you want more color contrast. You’ll lose the salty, savory bite from the meat, so add a handful of salted nuts or a stronger cheese to keep the tray balanced.
Make It More Kid-Friendly
Use mild cheese cubes, sliced strawberries, and mini crackers so little hands can grab everything easily. If the pepperoni feels too strong for your crowd, leave it out and lean harder on fruit, cheese, and crackers for a softer snack board.
Storage and Make-Ahead Notes
- Refrigerator: Best assembled no more than 2 hours before serving. The crackers soften first, and the strawberries release juice if they sit too long.
- Freezer: This doesn’t freeze well. The fruit turns watery and the cheese texture changes after thawing.
- Reheating: Not needed. If you need to prep ahead, wash and dry the fruit, cube the cheese, and portion the ingredients separately, then assemble right before guests arrive.
Answers to the Questions Worth Asking
American Flag Snack Tray
Ingredients
Equipment
Method
- Use a large rectangular wooden board, sheet pan, or serving tray and place it on a flat surface. Keep a clear work area so the color rows stay crisp and evenly spaced as you build the flag.
- In the upper left corner, fill a rectangle densely with blueberries to form the canton. Press them in lightly for an even blue block with a sharp edge.
- Create the red stripes by arranging rows of halved strawberries and folded pepperoni slices across the length of the board. Lay them in straight lines so the stripes run evenly from left to right.
- Fill in the white stripes with rows of white cheddar cubes and crackers alternating between the red rows. Keep the pieces aligned like a grid so every stripe reads clearly.
- Use pretzel sticks to define the stripe borders if needed for clean lines. Place them straight along the edges so the red and white sections look perfectly segmented.
- Place a small bowl of cream cheese or ranch dip in one corner and tuck it at the side of the flag design. This keeps the center rows uninterrupted for a tidy, picture-ready layout.
- Tuck rosemary sprigs at the edges as garnish and serve immediately. Add them last so they stay fresh-looking against the fruit and cheese.