Apple cider braised pork shoulder turns into the kind of dinner that pulls apart in soft, juicy strands and tastes like it spent the afternoon getting more and more flavorful. The pork goes from sturdy and lean-looking to deeply tender, with sweet cider, mustard, herbs, and browned drippings building a sauce that clings to every bite instead of pooling thinly in the pot. It’s the sort of main dish that feels generous the second it hits the table.
What makes this version work is the balance. The cider gives sweetness and fruit, but the Dijon and apple cider vinegar keep it from tasting flat. Browning the pork first matters too — those dark, stuck-on bits become the base of the braising liquid, which is why the final sauce tastes layered instead of one-note. The apples soften just enough to melt into the juices without disappearing completely.
Below, I’ve included the timing and texture cues that matter most, plus a few practical swaps if you need to work with what’s in the pantry.
The pork came out unbelievably tender and the cider sauce reduced into this glossy gravy that coated the mashed potatoes perfectly. I let it braise the full 4 hours and it shredded with a spoon.
Save this apple cider braised pork shoulder for the nights when you want fall-apart pork, caramelized apples, and a braising liquid that turns into its own gravy.
The Browning Step That Gives the Braise Its Backbone
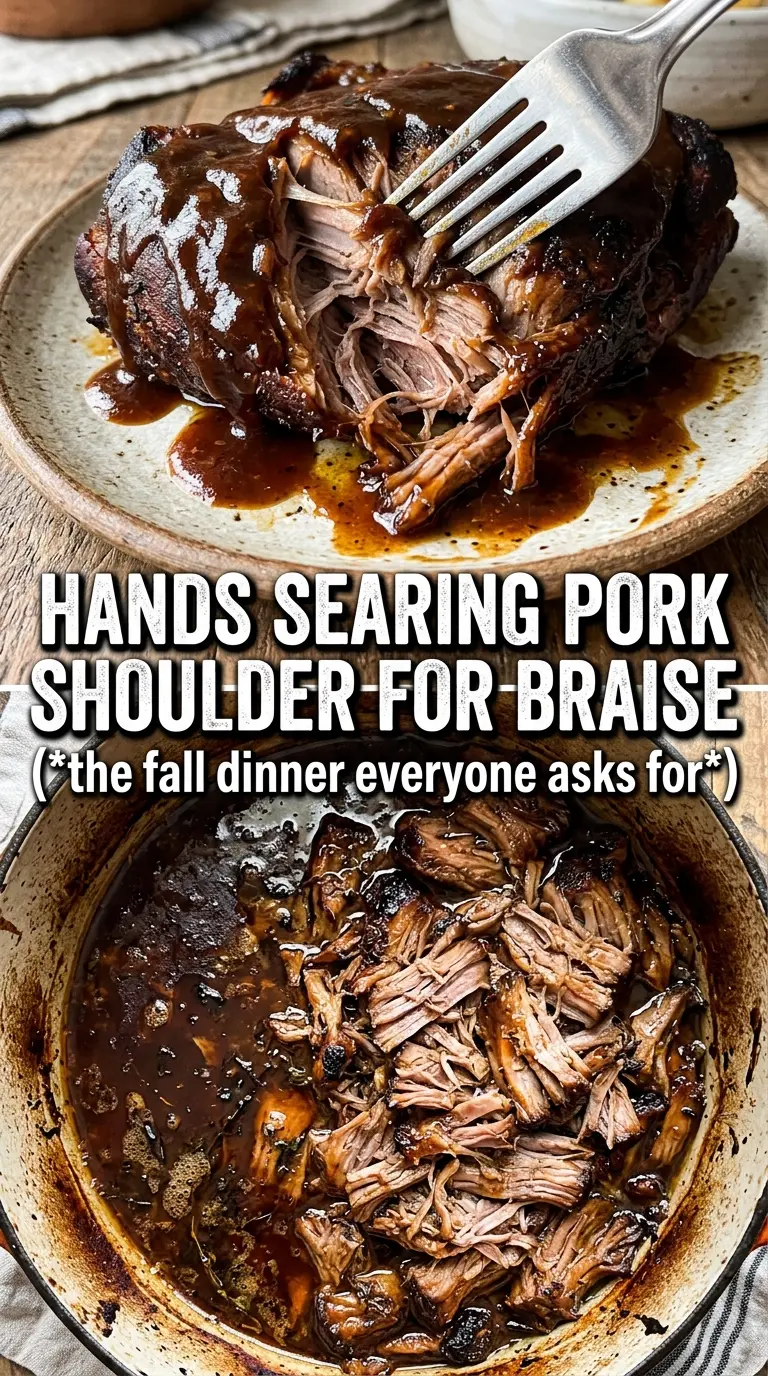
Pork shoulder can go tender without a proper sear, but it won’t taste nearly as deep. The browning here is not cosmetic; it’s where the savory backbone of the whole dish starts. If the meat goes into the oven pale, the braising liquid has to do all the work, and the result tastes thinner and sweeter than it should.
Use a Dutch oven and let the pork sit on each side until it releases on its own and takes on a dark mahogany crust. If it’s sticking hard, it is not ready to turn yet. After that, the onion and garlic pick up the browned bits, and the cider mixture loosens everything from the bottom of the pot, which is where the sauce gets its depth.
What Each Ingredient Is Actually Doing in the Pot
- Pork shoulder — This cut has enough fat and connective tissue to turn silky over a long braise. Leaner pork won’t shred the same way and tends to dry out before it gets tender.
- Apple cider — Fresh cider gives the braise sweetness and fruit without tasting sharp. Hard cider works too, and it adds a little more complexity, but don’t use apple juice unless that’s all you have; it can make the sauce taste one-dimensional.
- Dijon mustard — This is the quiet ingredient that keeps the sauce from turning cloying. It brings acidity and body at the same time, so the braising liquid tastes balanced instead of sugary.
- Apples — Quartered apples hold their shape long enough to add texture, then soften at the edges and turn jammy in spots. Use a firm, tart-sweet apple if you can, because mealy apples disappear fast.
- Brown sugar and apple cider vinegar — The sugar rounds out the cider, while the vinegar sharpens everything and keeps the final sauce lively. That tiny hit of acid matters more than people expect in a long braise.
- Thyme and rosemary — These herbs make the dish taste savory and woodsy instead of dessert-like. Fresh is best here because dried rosemary can get dusty and loud during a long cook.
How to Braise It So the Pork Shreds Instead of Slicing
Getting the Sear Right
Heat the olive oil until it shimmers, then lay the pork in without crowding the pot. You want a deep brown crust on all sides, not a light tan surface. If the pork starts steaming, the pot is too full or the heat is too low, and you’ll miss the flavor that should carry the sauce.
Building the Braising Liquid
After the onion and garlic soften, whisk the cider, broth, Dijon, brown sugar, and vinegar together before it goes into the pot. That keeps the mustard from clumping and helps the sugar dissolve before the oven heat has a chance to scorch it. Scrape the bottom of the pot well; those browned bits should disappear into the liquid.
The Slow Oven Finish
Return the pork to the pot, tuck the apples around it, cover tightly, and braise until a fork slides into the meat with almost no resistance. Start checking around 3 1/2 hours, but don’t stop just because the outside looks done. The pork is ready when it shreds easily and the braising liquid has reduced into a glossy, savory-sweet sauce.
Shredding in the Juices
Pull the pork apart right in the pot so every strand picks up the cider sauce. If the liquid looks thin, let the shredded meat sit uncovered for a few minutes in the hot pot so it can tighten up slightly. That last pause makes the difference between wet pork and pork that feels coated and finished.
How to Adapt This Braise When You Need a Different Path
Dairy-Free by Default
This recipe already works without dairy in the braise itself. Serve it over olive oil mashed potatoes or roasted potatoes if you want to keep the whole meal dairy-free, and spoon plenty of sauce over the top so nothing feels missing.
Using Hard Cider Instead of Fresh Cider
Hard cider gives the braise a drier, slightly more complex finish. It’s a good swap if you want less sweetness, but keep the brown sugar in place unless your cider is already sweet; otherwise the sauce can turn too sharp after the long cook.
Making It Ahead for Company
This braise tastes even better the next day because the pork has time to absorb the sauce. Chill it overnight, then reheat gently on the stove or in a covered oven-safe dish with a splash of broth if the sauce has tightened too much.
Swapping the Serving Base
Mashed potatoes are the classic move because they catch the sauce, but polenta or buttered egg noodles work too. Choose something soft and broad enough to hold the juices; this is not the place for a dry side that competes with the braise.
Storage and Reheating
- Refrigerator: Store in an airtight container for up to 4 days. The sauce will thicken as it chills, which is exactly what you want.
- Freezer: Freezes well for up to 3 months. Cool completely, portion with plenty of sauce, and thaw overnight in the fridge before reheating.
- Reheating: Warm gently on the stove over low heat or covered in a 325°F oven until hot. The biggest mistake is blasting it over high heat, which tightens the meat and can dry out the edges before the center is warm.
Questions I Get Asked About This Recipe

Apple Cider Braised Pork Shoulder
Ingredients
Equipment
Method
- Preheat oven to 325°F, then season the pork generously with salt and pepper. Heat the Dutch oven over the stovetop as the oven comes up to temperature.
- Add olive oil to the Dutch oven and sear the pork on all sides until deeply browned, about 8 to 12 minutes total. Transfer the pork to a plate.
- Sauté the onion and garlic in the remaining drippings for 3 minutes. Stir until the garlic is fragrant and the onion begins to soften.
- Whisk apple cider, chicken broth, Dijon mustard, brown sugar, and apple cider vinegar, then pour into the pot. Scrape up any browned bits from the bottom.
- Return the pork to the Dutch oven, then add apples, thyme, and rosemary. Make sure the pork is partly covered by the liquid so it braises evenly.
- Cover and braise in the oven at 325°F for 3-1/2 to 4 hours until the pork is fall-apart tender. Use a fork to check—there should be little resistance and the juices should be bubbling gently.
- Shred the pork in the juices right in the Dutch oven so it soaks up the caramelized cider sauce. Stir to distribute apples and herbs throughout.
- Serve the shredded pork and sauce over mashed potatoes. Spoon extra sauce on top so each bite is glossy and saucy.