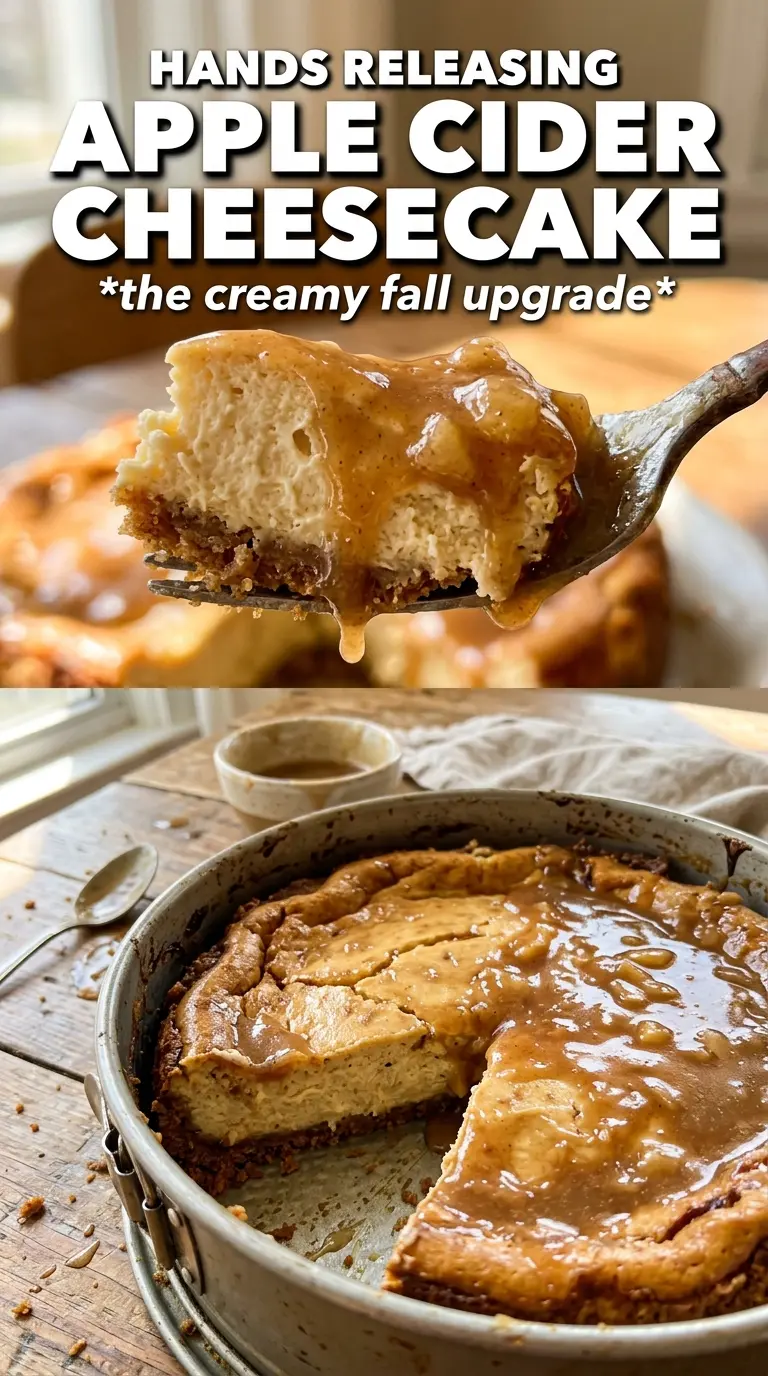
Apple cider cheesecake tastes like a classic bakery cheesecake that got dressed up for fall without losing its clean, creamy center. The filling stays dense and silky, the graham cracker crust gives every bite a little crunch, and the cider reduction brings a sharp, spiced apple note that keeps the whole dessert from feeling heavy.
What makes this version work is the balance between concentrated cider and dairy. Reducing the cider first keeps the flavor present after baking, instead of watering down the batter. A water bath also matters here because cheesecake needs gentle heat to set evenly; skip that part and the edges tend to overbake before the middle is ready. The result is a slice that holds its shape but still melts on the tongue.
Below you’ll find the small details that keep the filling smooth, the crust tidy, and the topping glossy instead of sticky. If you’ve ever had a cheesecake crack or taste flat, the technique here fixes both problems at once.
The cider flavor came through beautifully, and the filling set up with that perfect slight wobble in the center. I chilled it overnight and the slices were clean and neat the next day.
Like this apple cider cheesecake? Save it to Pinterest for the silky slices, spiced cider drizzle, and graham crust you’ll want on repeat.
The Water Bath Is What Keeps the Center Creamy, Not Gummy
Cheesecake cracks for two main reasons: too much heat and too little moisture. The water bath softens the oven environment, which lets the filling set gradually instead of tightening too fast around the edges. That slow bake is what gives you a smooth top and a center that still has a slight wobble when the timer goes off.
The other trap is overbaking. The middle should jiggle a little when you nudge the pan, like set gelatin under the surface. If it looks fully firm in the oven, it’s already gone too far. It will finish setting as it cools, then firm up fully in the refrigerator.
- Room-temperature cream cheese — Cold cream cheese leaves tiny lumps no matter how long you beat it. Let it soften until a finger pressed into the block leaves a clear dent.
- Reduced apple cider — This is the difference between a cheesecake that tastes faintly of spice and one that tastes unmistakably like apple cider. Reduce it until syrupy and cool it before adding it to the batter so it doesn’t loosen the filling.
- Sour cream — It gives the cheesecake a little tang and keeps the texture plush. Full-fat works best here because low-fat versions can bake up looser.
- Water bath — Wrap the pan well and use hot water that comes partway up the sides. If water sneaks into the crust, the texture turns soggy, so keep the foil tight.
What Each Ingredient Is Actually Doing in This Cheesecake
- Graham cracker crumbs — They give the crust its familiar, toasty base and keep the dessert from feeling overly rich. If you don’t have graham crackers, digestive biscuits or vanilla wafers will work, though both change the flavor a bit.
- Brown sugar — This deepens the filling and topping with a caramel note that fits the cider better than white sugar would. In the crust, you can use either brown or white sugar, but brown sugar gives it a warmer taste.
- Apple cider — Fresh cider has a brighter, fuller apple flavor than apple juice. Reduce it before mixing so the taste survives baking instead of disappearing into the dairy.
- Eggs — They set the cheesecake. Add them one at a time and stop mixing as soon as each one disappears, because overbeating adds air that can puff and crack in the oven.
- Sour cream — This keeps the filling from tasting flat and gives it a smooth finish. If you need a swap, full-fat Greek yogurt is the closest match, though it brings a little more tang.
- Cinnamon and nutmeg — These support the cider without burying it. Nutmeg can take over fast, so stay measured with it.
Building the Filling So It Stays Smooth and Sets Cleanly
Pressing the Crust
Mix the crust ingredients until the crumbs look evenly moistened, then press them firmly into the bottom of the springform pan. The best crust feels compact, not sandy, and it should hold together when you tap the pan. If it seems loose, it will crumble apart when you slice the cheesecake.
Reducing the Cider First
Cook the cider until it looks slightly thicker and coats the back of a spoon. That concentrated flavor is what keeps the cheesecake from tasting mild after baking. Let it cool before adding it to the batter, because hot cider can soften the cream cheese and throw off the texture.
Mixing Without Adding Air
Beat the cream cheese and brown sugar until the mixture is completely smooth, then switch to a lower speed once the eggs go in. You want the filling glossy and thick, not whipped and fluffy. Too much air makes the cheesecake rise, then sink and crack as it cools.
Baking to the Right Jiggle
Pull the cheesecake when the edges are set and the center still has a small wobble. The top should look matte, not wet, and the pan should move as one piece. Cool it slowly, then chill it for at least 6 hours so the structure firms up before you add the cider topping.
Make it with a gingersnap crust
Swap the graham crackers for gingersnap crumbs if you want a bolder spice note. The crust will be darker and a little firmer, and it gives the cheesecake a more dramatic contrast against the creamy filling.
Dairy-free version
Use dairy-free cream cheese and a thick coconut yogurt in place of the sour cream. The texture will be a little softer and the flavor slightly less tangy, but the cider and spices still carry the dessert well.
Gluten-free crust
Use certified gluten-free graham crackers or gluten-free vanilla cookies. The filling doesn’t need any changes, and the finished cheesecake tastes nearly identical as long as the crumb base is packed firmly.
Storage and Reheating
- Refrigerator: Store covered for up to 5 days. The texture stays best on day 1 through day 3, with the crust softening a bit by day 4.
- Freezer: This freezes well without the topping. Wrap slices tightly and freeze for up to 2 months, then thaw overnight in the refrigerator.
- Reheating: Cheesecake is best served cold or just barely cool from the fridge. Don’t microwave it, since that makes the filling wet and uneven; if you want a softer bite, let a slice sit at room temperature for 20 to 30 minutes.
Answers to the Questions Worth Asking

Apple Cider Cheesecake
Ingredients
Equipment
Method
- Preheat oven to 325F. Combine graham cracker crumbs, sugar, cinnamon, and melted unsalted butter, then press firmly into a 9-inch springform pan (press evenly along the base and slightly up the sides).
- In a small saucepan, reduce 1/2 cup apple cider over medium heat until syrupy, about 10-15 minutes. Cool the syrup completely so it won’t scramble the eggs.
- Beat cream cheese and brown sugar until completely smooth, scraping the bowl as needed. Stop when there are no lumps visible.
- Mix in the reduced cider until fully incorporated. The batter should look cohesive and glossy.
- Add eggs one at a time, mixing on low just until each egg disappears. The batter should remain smooth without overmixing.
- Mix in sour cream, cinnamon, nutmeg, and vanilla extract until uniform. The batter should be thick but pourable.
- Pour the batter over the crust and smooth the top. Tap the pan lightly to release large air bubbles.
- Bake in a water bath at 325F for 55-60 minutes, until the center is just set with a slight wobble. Turn off the oven and let the cheesecake sit briefly inside the water bath before removing.
- Cool completely at room temperature, then refrigerate for 6 hours or overnight. The filling should feel firm when gently pressed.
- Simmer 1 cup apple cider with 2 tablespoons brown sugar and 1/4 teaspoon cinnamon until syrupy, about 15-20 minutes. Cool slightly so the syrup thickens for easy drizzling.
- Slice the cheesecake and drizzle the spiced cider syrup over each portion. Serve chilled for the cleanest, creamiest texture.