Apple pie cake pops hit that sweet spot between nostalgic and clever: tender cake crumbs mixed with apple butter, a little cream cheese for body, and a cinnamon-kissed coating that sets into a crisp shell. They taste like the best part of apple pie and cake in one bite, with just enough spice to keep them from reading overly sweet.
The texture comes from balancing moist crumbs with enough binder to roll cleanly without turning pasty. Apple butter works especially well because it brings concentrated apple flavor without adding extra liquid, while cream cheese gives the mixture a slight tang and helps the pops stay firm after chilling. If the mixture feels sticky, it usually needs a few more crumbs or a longer chill; if it crumbles, it needs a touch more apple butter or cream cheese.
Below you’ll find the small details that keep the balls from falling off the sticks and the coating from cracking. Those are the two spots where cake pops usually go sideways, and both are easy to fix once you know what to look for.
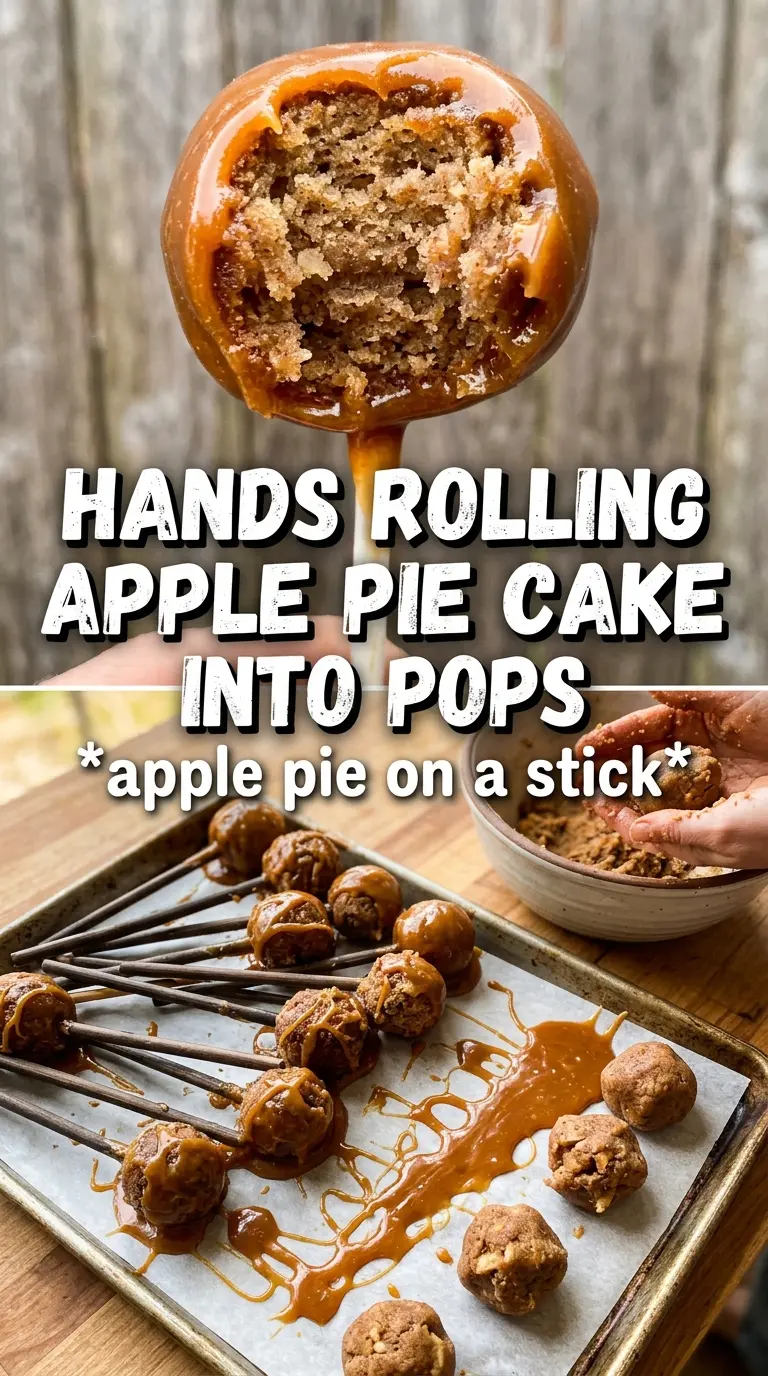
The cake balls held together perfectly after chilling, and the cinnamon sugar on top gave them that apple pie finish without making the coating too thick.
Love these apple pie cake pops? Save them for an easy dessert with cinnamon sugar sparkle and a soft apple pie center.
The Sticky Part Is the Point: Getting Cake Pops to Hold
Most cake pops fail because the mixture is either too dry to pack tightly or too wet to stay on the stick. This version uses cream cheese and apple butter for structure, but the real trick is stopping as soon as the crumbs hold when pressed. You want a mixture that looks a little rough in the bowl and then compacts into a smooth ball in your hands.
Chilling matters here. Warm cake mixture slides off sticks and softens the coating, so the first rest gives the balls enough firmness to survive dipping. If the pops start cracking after coating, the balls were too cold and the candy coating was too hot; let the pops sit at room temperature for a few minutes and cool the melted candy slightly before dipping the rest.
What Each Ingredient Is Actually Doing in This Recipe
- Primary ingredient (the star) — Quality matters most. Choose the best you can find.
- Cooking medium (oil, butter, or broth) — This carries flavors and prevents dryness.
- Seasonings (salt, pepper, spices, herbs) — Layer flavors so nothing overpowers. Build depth gradually.
- Aromatics (garlic, onion, herbs) — Cook with fat to bloom flavors. Become the foundation.
- Supporting ingredients — Complement the main ingredient without overpowering it.
- Sauce or liquid (if applicable) — Brings flavors together. Balance richness with acid.
- Acid (lemon, vinegar, wine, or other) — Brightens and prevents flat-tasting results.
- Final finish (garnish, glaze, or sauce) — Prevents one-dimensional taste and adds visual appeal.
What the Apple Butter Does That Apples Alone Can’t
- Apple butter or thick apple pie filling — Apple butter gives the cleanest apple flavor because it’s concentrated and doesn’t add extra moisture. If you use pie filling, drain it well and chop the apples finely so the mixture doesn’t turn loose.
- Cream cheese — This is the binder that keeps the crumbs plush instead of sandy. Use it softened so it blends evenly; cold cream cheese leaves little lumps that make rolling harder.
- White chocolate or candy melts — Candy melts are the easiest choice because they set faster and stay smoother for dipping. White chocolate tastes richer, but it needs careful melting and a little patience so it doesn’t seize.
- Cinnamon sugar and sprinkles — Add them right after dipping, while the coating is still tacky. Waiting even a minute can mean the decorations bounce right off.
Building the Pops Without Cracks or Slip-Offs
Crumbling and Mixing the Base
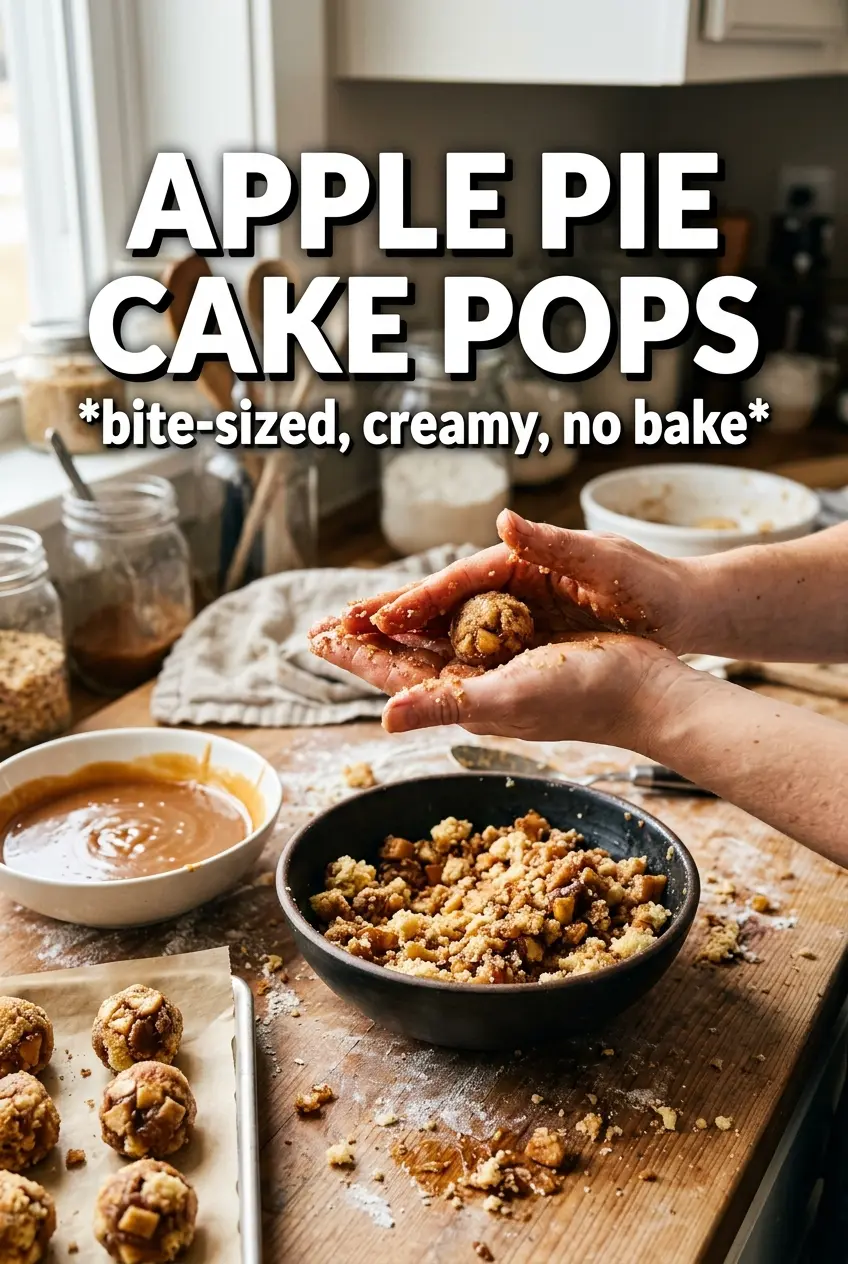
Break the cooled cake into fine crumbs first, then add the apple butter, cream cheese, and cinnamon. Mix until the crumbs clump when squeezed but still look like cake, not frosting. If the bowl starts looking glossy or heavy, you’ve gone too far and the pops will taste dense instead of soft.
Rolling and Chilling the Balls
Use about 1.5-inch portions and roll them firmly so there are no seams or ragged edges. That smooth surface helps the coating go on cleanly later. The fridge time firms the center enough that the stick won’t tear the ball apart when you insert it.
Anchoring the Sticks
Dipping the tip of each stick in melted candy before inserting it acts like edible glue. Push the stick only about halfway into the cake ball; if it goes too deep, the pop can split. Chill them again after the sticks go in, because this extra set is what keeps the pops from spinning or sliding during dipping.
Dipping and Decorating Fast
Melt the candy slowly and stir in the cinnamon until smooth. Dip each chilled pop straight down and lift it out without twisting, which helps keep the coating even and prevents the cake ball from breaking loose. Let the excess drip off, then decorate immediately with cinnamon sugar and sprinkles before the shell firms up.
How to Tweak These for Different Kitchens and Crowds
Dairy-Free Version
Swap the cream cheese for a dairy-free cream cheese block and use dairy-free candy melts. The texture stays close to the original, but you may need an extra chill because some vegan cream cheese styles are softer than regular cream cheese.
Gluten-Free Cake Pops
Use a gluten-free spice cake or yellow cake made in a 9×13 pan. The rest of the method stays the same, but gluten-free crumbs can be a little drier, so add the apple butter gradually and stop as soon as the mixture packs well.
More Apple Flavor, Less Sweetness
Use apple butter instead of pie filling and add a tiny pinch of salt to the cake mixture. That small change sharpens the apple flavor and keeps the pops from tasting one-note sweet, especially if your cake mix is already very sugary.
Storage and Reheating
- Refrigerator: Store in a single layer or separated with parchment for up to 4 days. The coating may lose a little shine, but the centers stay soft.
- Freezer: Freeze the undecorated cake balls, not the finished pops, for up to 2 months. Thaw in the fridge before dipping so condensation doesn’t ruin the coating.
- Reheating: These aren’t meant to be reheated. Let chilled pops sit at room temperature for 10 to 15 minutes before serving so the center softens slightly and the coating doesn’t feel hard.
Questions I Get Asked About This Recipe
Apple Pie Cake Pops
Ingredients
Equipment
Method
- Crumble the cooled cake into fine crumbs, then mix with apple butter, cream cheese, and cinnamon until the mixture holds together when pressed.
- Roll the mixture into 1.5-inch balls and refrigerate for 30 minutes to firm.
- Melt the white chocolate or vanilla candy melts with cinnamon for the candy melts until smooth, then dip the end of each lollipop stick and insert it into a cake ball.
- Refrigerate the pops for 15 minutes, then dip each cake pop fully in melted chocolate and let excess drip back to the bowl.
- Decorate immediately with cinnamon sugar and sprinkles before the chocolate sets.