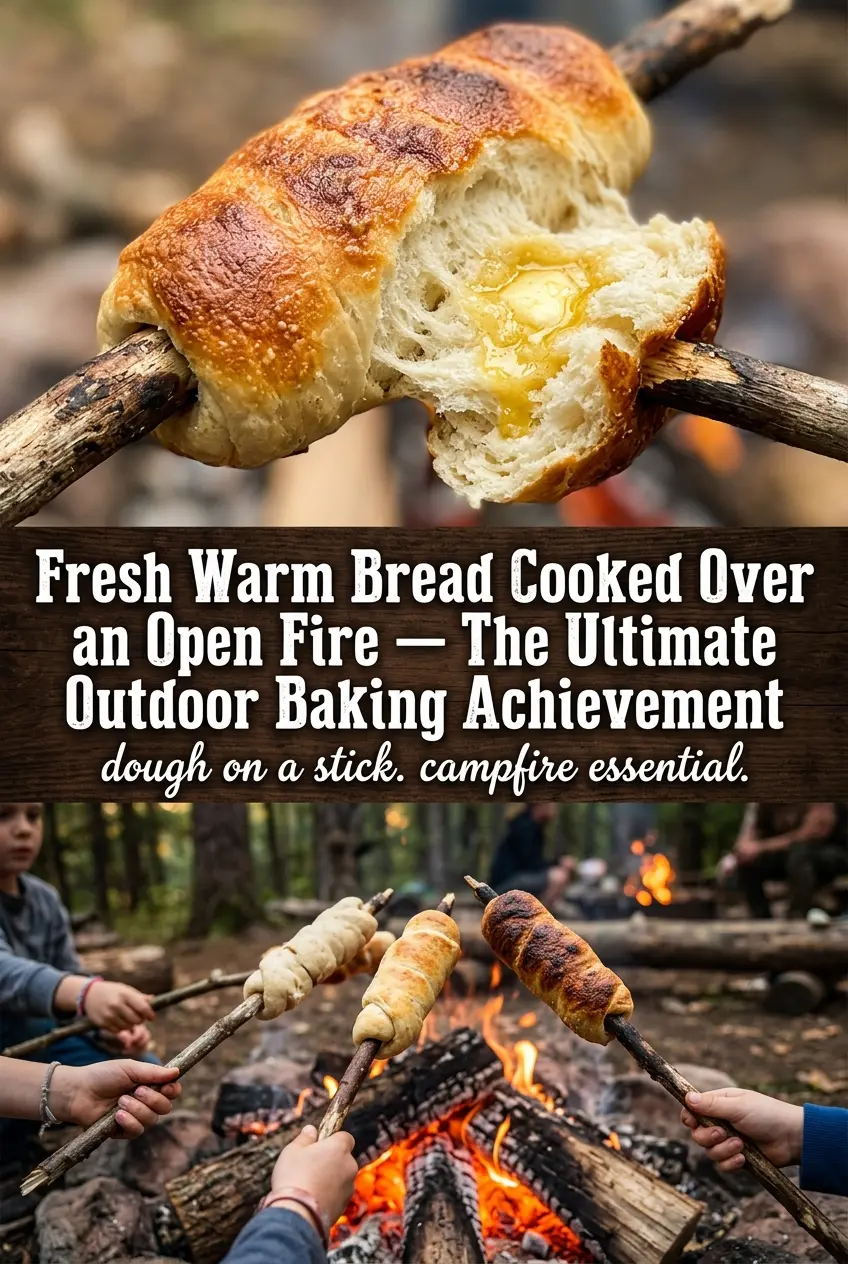
Campfire bread turns a handful of pantry ingredients into warm, golden sticks of bread with a crisp outside and a soft, steamy center. The dough wraps around the roasting stick in a spiral, so every turn gets close to the heat and bakes into those toasty ridges people always reach for first. It’s the kind of outdoor side that disappears fast, especially when it comes off the fire still warm enough for butter to melt right in.
What makes this version work is the balance in the dough. A little sugar helps with browning, powdered milk adds a touch of richness, and baking powder keeps the bread light without needing yeast or rising time. The dough should be slightly sticky when it’s mixed; that tackiness helps it cling to the stick instead of slipping while it roasts. If it feels dry and tough, it will bake up dense and miss that fluffy interior everyone wants.
Below, I’ll walk you through the small details that matter most: how to mix the dough so it’s easy to handle, how to wrap it so it cooks evenly, and how to keep it over coals without scorching the outside before the center is done.
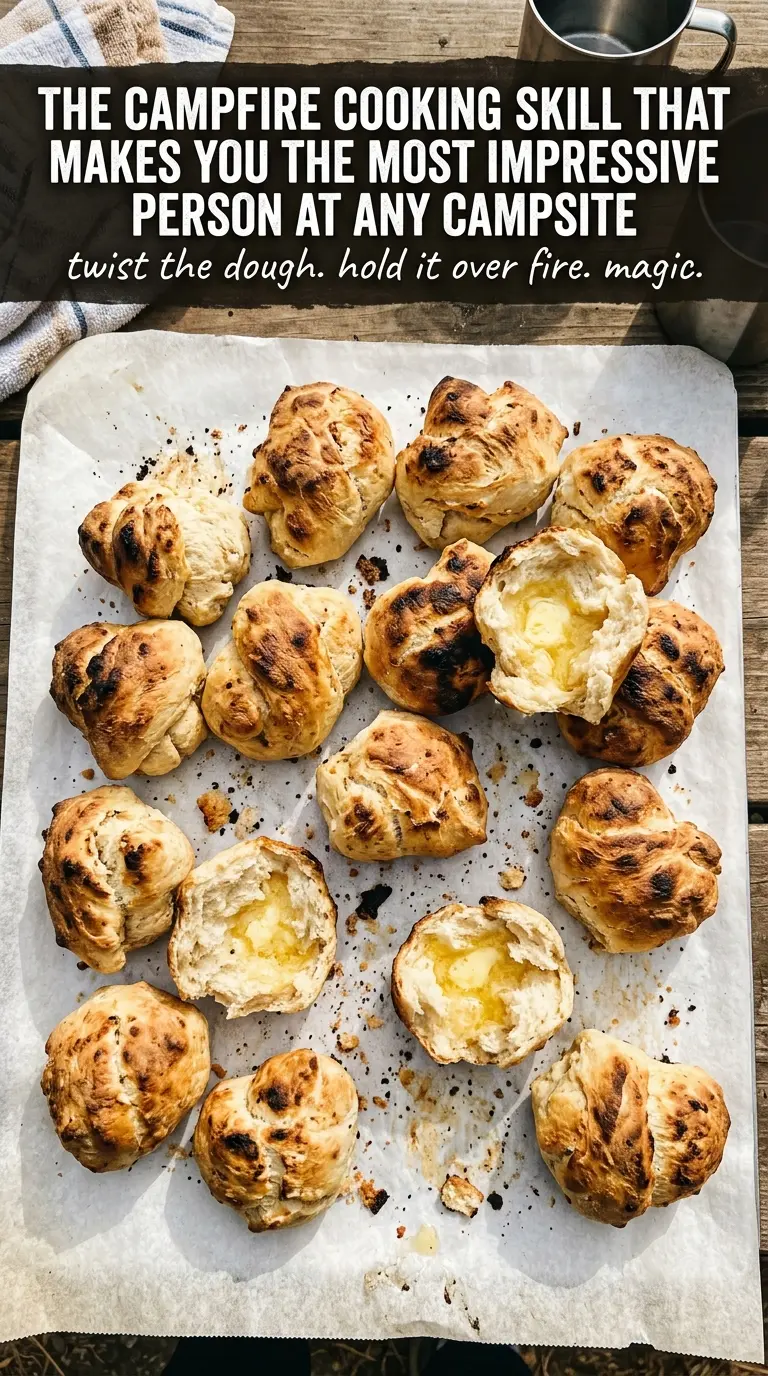
The dough stayed on the stick without sliding, and the inside cooked through before the outside got too dark. We brushed the finished bread with butter and it was gone in minutes.
Save this campfire bread for your next cookout or camping trip when you want golden, spiral-wrapped bread cooked over the coals.
The Trick to Cooking Bread Over Coals Without Burning the Outside
Campfire bread fails when people park it over flames instead of coals. Flames are too aggressive and they char the spiral before the center has a chance to set. Coals give steady heat, which lets the dough bake through while the outside builds that deep golden crust.
The other common mistake is wrapping the dough too thickly. A rope that’s about 1 inch thick bakes evenly; anything much bulkier tends to stay raw in the middle. Rotate the stick constantly and keep the bread moving. If you let one side sit too long, you’ll get black spots before the rest of the dough has even started to color.
- Heat level matters — low, even coals are the difference between a crisp crust and a burnt shell with dough inside.
- Thin ropes cook best — they give the heat a chance to reach the center before the exterior dries out.
- Constant turning is non-negotiable — it’s what creates that even spiral color all the way around.
What the Powdered Milk and Sugar Are Actually Doing Here
- All-purpose flour — This gives the bread enough structure to stay wrapped on the stick, but it’s still tender enough to bite through easily once cooked. Bread flour makes the dough tougher than it needs to be here.
- Baking powder — This is the lift. Since there’s no yeast or rise time, baking powder keeps the crumb from turning flat and dense over the fire.
- Powdered milk — It adds a subtle richness and helps the bread brown better than plain flour dough. If you skip it, the bread still works, but the crust won’t taste as round or toasty.
- Sugar — A small amount helps with color and gives the bread that campfire-side sweetness that plays well with butter or jam.
- Water — Add it gradually and stop once the dough comes together. Too much water makes the dough hard to wrap; too little leaves it dry and prone to cracking.
- Roasting sticks — Use clean, sturdy sticks or skewers designed for fire cooking. Thin, flimsy sticks flex too much and make the spiral harder to keep in place.
Building the Dough and Roasting It to a Deep Golden Finish
Mixing the Dry Ingredients First
Stir the flour, baking powder, salt, sugar, and powdered milk together before adding water. That even distribution matters because clumps of baking powder leave some bites bready and others flat. If you’re using a zip-top bag, shake it well before the liquid goes in so everything is fully blended.
Bringing the Dough Together
Add the water and mix until a soft dough forms. It should feel slightly sticky and a little rough, not dry or stiff. If it’s cracking when you press it, add a teaspoon of water at a time. If it gets gummy, dust in a little flour and stop as soon as it’s workable.
Shaping the Spirals
Divide the dough into 10 portions and roll each one into a rope about 1 inch thick. Wind it around the end of the stick in a steady spiral, keeping the turns close but not overlapping too heavily. Press the first and last end gently so it grips the stick; loose ends are what unravel over the fire.
Roasting Over Coals
Hold the bread over campfire coals, not flames, and rotate it constantly for 12 to 15 minutes. You’re looking for an even golden brown color with no wet patches hiding between the spirals. If the outside is browning too fast, move it higher above the coals. If it looks pale after several minutes, the heat is too low and the bread needs to sit a little closer.
Sliding Off and Serving Warm
Once the bread is cooked through, slide it off the stick carefully and serve it warm. The center should be fluffy, not doughy, and the crust should release without tearing if it has roasted long enough. Butter melts best on the bread right away, but jam works too if you want a sweet finish.
How to Adapt Campfire Bread for Different Camps and Diets
Dairy-Free Campfire Bread
Swap the powdered milk for an equal amount of additional flour. You’ll lose a little richness and browning, but the bread still holds its shape and roasts well. Brush the finished bread with dairy-free butter for the best payoff.
Sweeter Breakfast-Style Bread
Add an extra tablespoon of sugar and serve it with cinnamon butter or jam. The crumb stays the same, but the crust browns a little faster, so keep the bread moving over the coals.
Gluten-Free Version
Use a cup-for-cup gluten-free flour blend that includes xanthan gum. The dough may feel a little more fragile, so keep the ropes slightly thicker and handle them gently when wrapping them around the stick. The texture will be a bit more tender and less chewy.
Storage and Reheating
- Refrigerator: Store leftovers in an airtight container for up to 2 days. The crust softens as it sits.
- Freezer: Freeze fully cooled bread for up to 1 month, wrapped tightly and sealed in a freezer bag. The texture is best fresh, but freezing works if you need to prep ahead.
- Reheating: Warm in a 325°F oven for 5 to 8 minutes. Don’t microwave it unless you want a rubbery crust and a damp center.
Questions I Get Asked About This Recipe
Campfire Bread
Ingredients
Method
- Mix all-purpose flour, baking powder, salt, sugar, and powdered milk in a large bowl or zip-top bag until evenly combined. The mixture should look uniform with no visible clumps.
- Add water and mix until dough forms, keeping in mind it will be slightly sticky. Keep mixing just until no dry flour remains.
- Divide the dough into 10 portions. Each portion should be similar in size so the bread cooks evenly.
- Roll each portion into a long rope about 1 inch thick. Stretch and smooth the surface so it wraps neatly around the stick.
- Wrap each dough rope around the end of a roasting stick in a spiral pattern. Leave a little space between turns so the outside browns without burning.
- Hold the sticks over campfire coals (not flames), rotating constantly, for 12-15 minutes until golden brown and cooked through. Look for a deep golden exterior and no wet dough in the center when you check near the thickest part.
- Slide the campfire bread off the stick and serve warm. Finish with butter or jam while the interior stays fluffy.