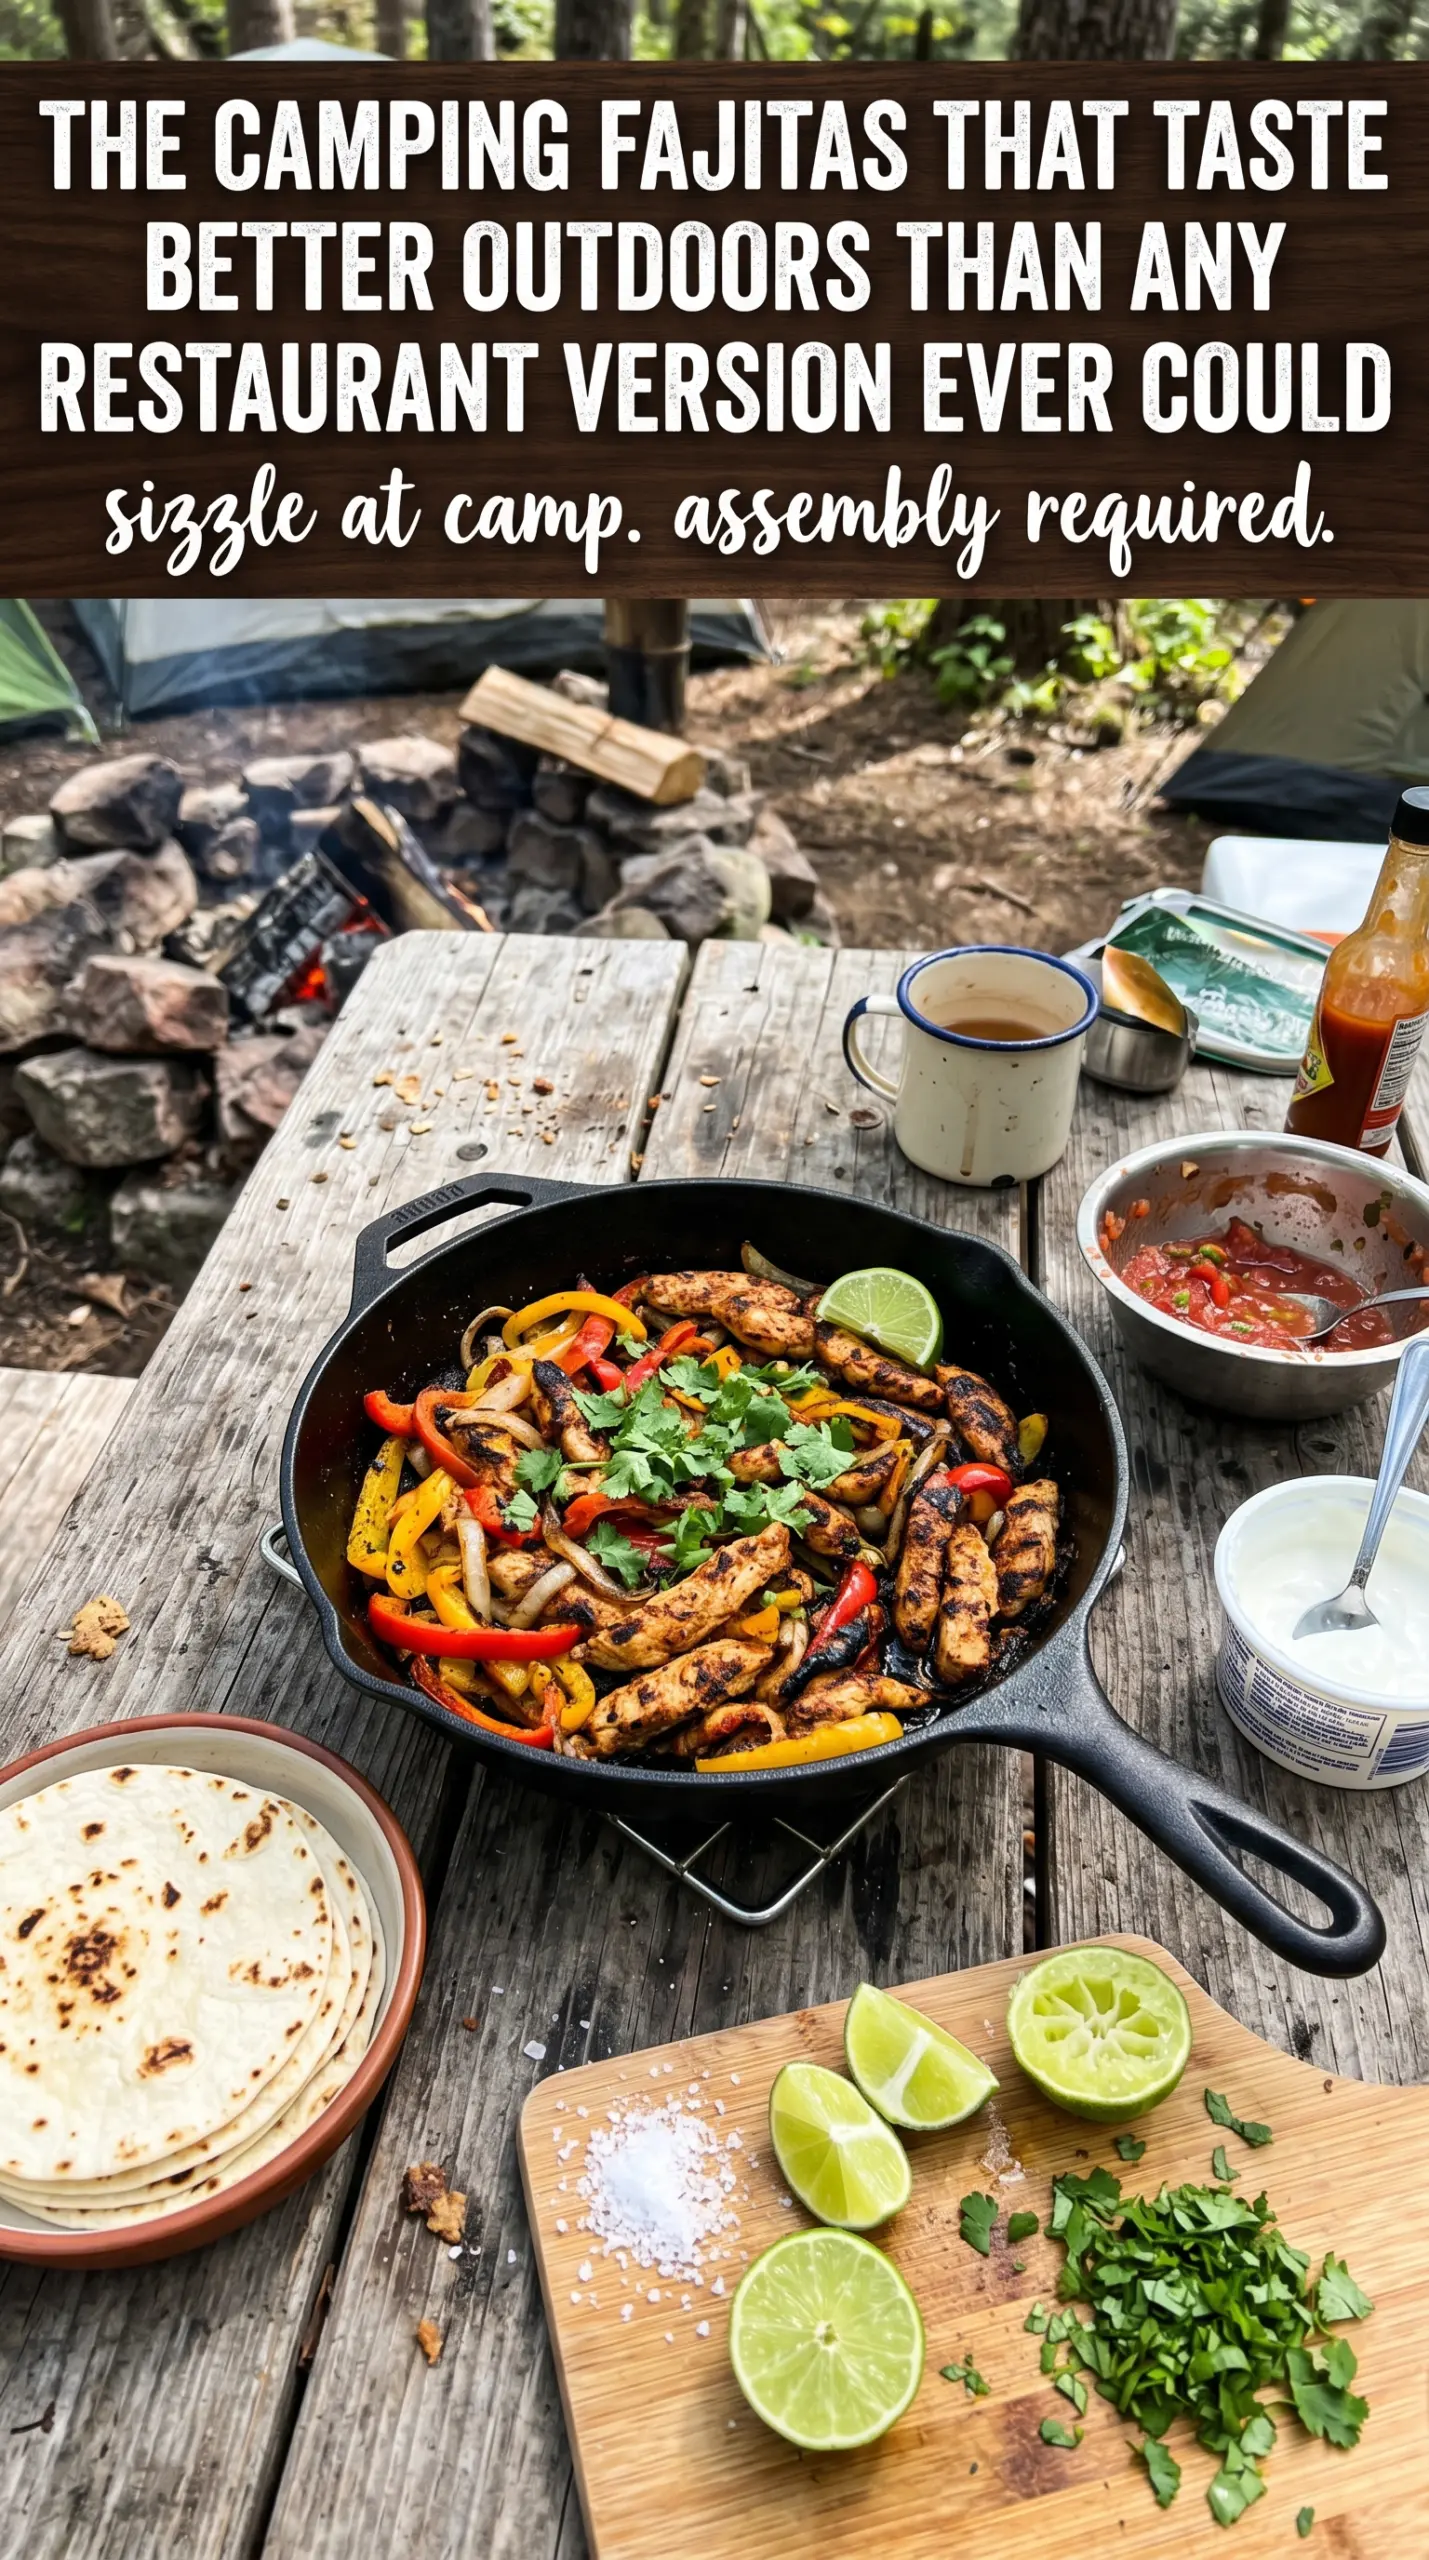
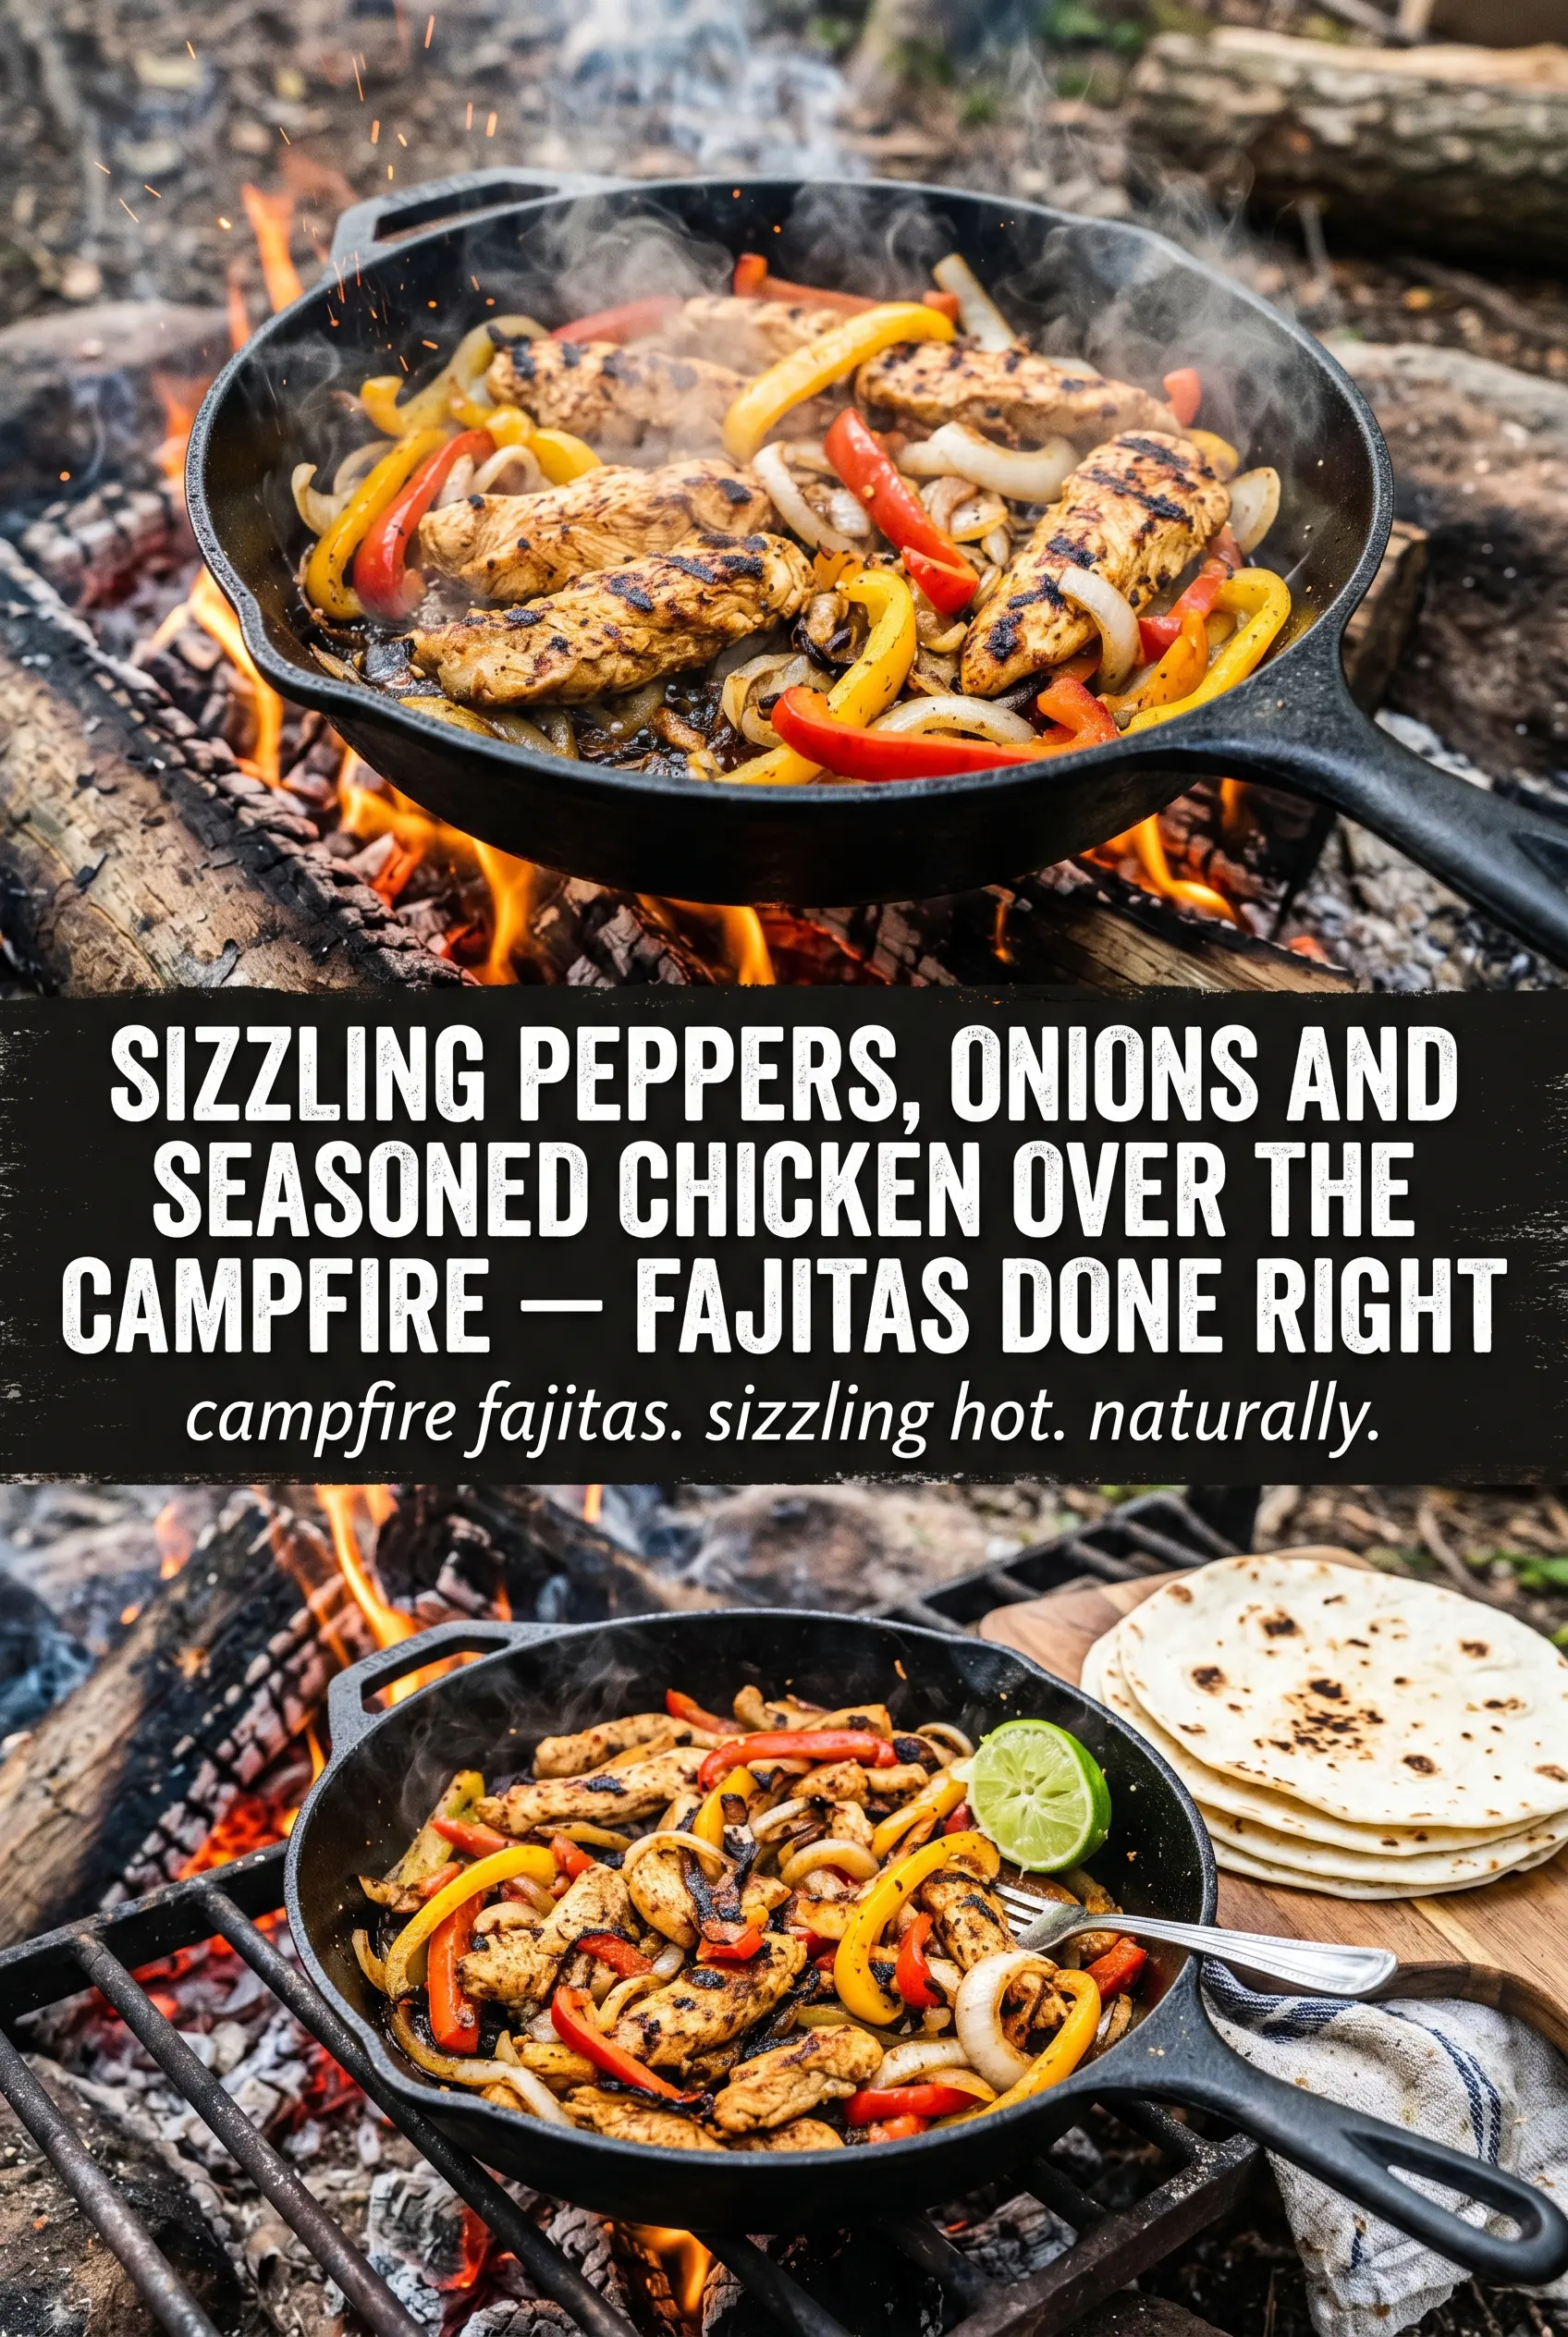
Sizzling campfire fajitas earn their place in the rotation because the skillet does all the work once the fire is hot. The meat picks up a fast brown crust, the peppers stay a little crisp at the edges, and the onions soften just enough to turn sweet without going mushy. Everything lands in one cast iron pan, which means the fajitas come out smoky, juicy, and ready to pile into warm tortillas the second they hit the table.
This version works because the meat goes into a hot skillet before the vegetables, so it can brown instead of steaming. Thin slicing matters here; it keeps the chicken or steak tender and helps it cook through before the peppers overcook. The fajita seasoning gets a chance to toast in the oil, and that makes the whole pan smell like dinner before the fire has even died down.
Below, you’ll find the timing that keeps the vegetables from turning limp, the best way to handle the heat of an open fire, and a few easy swaps if you’re cooking with what you’ve packed instead of what you’d normally reach for.
The chicken stayed juicy and the peppers got those charred edges without turning soft. I used steak the second time and both versions were gone before I could even warm the last tortillas.
Love these smoky campfire fajitas? Save them to Pinterest for the nights when you want one skillet, bold seasoning, and dinner fast.
The Part Most People Miss: Getting Color Without Overcooking the Meat
The biggest mistake with fajitas over a campfire is crowding the skillet or starting with a fire that’s too cool. If the pan isn’t hot enough, the meat gives off liquid and steams in it. You end up with gray chicken or steak and soft vegetables instead of that browned, smoky edge that makes fajitas worth the trouble.
Thin slicing is what saves this recipe. It gives the meat enough surface area to sear quickly before it dries out, and it lets the peppers and onions cook in a second pass without turning the whole pan to mush. Once the meat comes out, the vegetables get the space they need to blister and pick up color.
- Chicken breast or steak — Both work, but they behave a little differently. Chicken stays lighter and should be cooked just until no pink remains, while steak gives you a deeper, beefier flavor and handles a slightly hotter fire better. Slice either one thin and across the grain so the finished fajitas stay tender.
- Fajita seasoning — This carries the whole dish, so use a blend you like the smell of. If yours is salt-heavy, use a lighter hand at first and taste before serving. A homemade mix works just as well, but pre-made seasoning is fine when you’re camping and trying to keep the setup simple.
- Bell peppers and onions — These need room and direct heat. A mix of colors gives you sweeter and sharper notes in the same skillet, and the onions should soften and brown at the edges rather than collapse. If you slice them too thin, they’ll disappear before the meat is ready to go back in.
- Flour tortillas — Flour tortillas hold up better over a campfire than corn tortillas here because they’re more flexible and less likely to crack when you load them up. Warm them just enough to soften; if they dry out, they’ll split as soon as you fold them.
- Lime wedges and toppings — The lime wakes up the smoky meat and peppers, and the cold toppings balance the heat from the skillet. Sour cream or guacamole adds richness, salsa adds acidity, and cilantro gives the whole plate a fresh finish.
What Each Ingredient Is Actually Doing to Get Color
- Meat (pat dry before cooking) — Moisture prevents browning. Dry meat develops a crust; wet meat steams instead.
- High heat (very hot pan or grill) — High heat creates Maillard reaction that browns the meat. Medium heat just cooks it gray.
- Oil or fat (just enough to prevent sticking) — Oil helps heat transfer and browning. Too much oil prevents direct contact with the hot surface.
- No moving the meat (let it sit) — The meat needs time to develop a crust. Moving it constantly prevents browning and toughens the exterior.
- Flip sparingly (once is ideal) — Each flip breaks the developing crust. One good flip creates an even crust on both sides.
- Proper internal temperature (use a thermometer) — The only way to know it’s done is to check. Guessing leads to either overcooked or undercooked meat.
- Resting time (5-10 minutes before cutting) — The meat must rest after cooking so juices redistribute. Cutting right away leaves it dry.
- Optional: finishing sauce or butter (adds richness without extra cooking) — Brush with butter or sauce after resting to add richness and glossiness without affecting doneness.
Building the Skillet So the Vegetables Char, Not Steam
Heating the Pan Over the Fire
Set the cast iron skillet over steady heat and let it warm before any oil goes in. Cast iron holds heat well, but it still needs a minute to come up to temperature, especially over a campfire where the flame can shift under you. The oil should shimmer quickly when it hits the pan. If it looks calm and still, the skillet isn’t hot enough yet.
Brown the Meat First
Add the seasoned chicken or steak in a single layer and leave it alone long enough to take on color. Moving it too early keeps it pale and wet. You want browned edges and cooked-through pieces, not a pile of gray strips. Once it’s done, pull it out right away so the meat doesn’t keep cooking while the vegetables go in.
Cook the Peppers and Onions Until They Char in Spots
The vegetables need direct contact with the hot skillet, not a crowded pan full of meat juices. Stir them only enough to keep the edges from burning completely; some blackened spots are good here. That’s the smoke and sweetness you’re after. If the pan starts to look dry, a small splash of oil helps the vegetables blister instead of sticking.
Bring Everything Back Together
Return the meat to the skillet and toss it through the peppers and onions just until everything is hot again. This is the last place people overdo it. Once the meat is cooked, it only needs a minute or two with the vegetables, or it starts drying out. Serve it as soon as the tortillas are warm so the filling stays juicy.
How to Change These Campfire Fajitas for What You Packed
Make It Dairy-Free Without Losing the Finish
Skip the sour cream and use guacamole, salsa, and extra cilantro instead. The fajitas still land with plenty of richness from the meat and oil in the skillet, and the lime keeps them bright. If you want a creamy topping without dairy, a mashed avocado-lime mix works better than most store-bought substitutes.
Swap in Steak for a Deeper Campfire Flavor
Use flank steak, skirt steak, or sirloin cut thin across the grain. Steak handles a harder sear than chicken and picks up a little more char before it goes back into the vegetables. Keep the cook time short so it stays tender; overcooked steak turns chewy fast in a skillet like this.
Turn It Into a Vegetarian Skillet
Swap the meat for sliced portobello mushrooms and extra peppers. Mushrooms release moisture, so cook them in a hot skillet and give them space until that liquid cooks off and they start to brown. The result is less rich than the meat version, but the smoky seasoning and char still make it feel like real camp food.
Use Corn Tortillas for a Gluten-Free Version
Corn tortillas work well as long as you warm them gently so they stay pliable. Wrap them in foil and set them near the heat instead of directly over the flame, because dry corn tortillas crack fast. You’ll get a slightly more rustic texture, but the fajita filling still carries the meal.
Storage and Reheating
- Refrigerator: Store the fajita filling for up to 3 days. The peppers soften a little more after chilling, but the flavor holds up well.
- Freezer: The cooked meat freezes better than the peppers and onions. If you freeze the full mixture, expect softer vegetables after thawing; freeze in airtight containers for up to 2 months.
- Reheating: Reheat the filling in a skillet over medium heat until hot, not in a microwave if you can avoid it. A skillet brings back some of the browned edges, while the microwave tends to make the meat rubbery and the vegetables watery.
Questions I Get Asked About This Recipe
Campfire Fajitas
Ingredients
Equipment
Method
- Heat the oil in a large cast iron skillet over the campfire until it shimmers and looks hot.
- Season the sliced chicken breast or steak with fajita seasoning, then add it to the hot skillet in a single layer where possible.
- Cook for 8-10 minutes, stirring occasionally, until browned and cooked through, then remove the meat and set it aside.
- Add the bell peppers and onions to the skillet and cook for 8-10 minutes, stirring occasionally, until tender and slightly charred.
- Return the browned meat to the skillet and toss everything together until the peppers and onions coat the meat.
- Warm the flour tortillas over the fire until soft and pliable, about 30-60 seconds per side.
- Serve the fajita mixture with warm tortillas and your desired toppings: sour cream, guacamole, salsa, cheese, and cilantro, with lime wedges on the side.