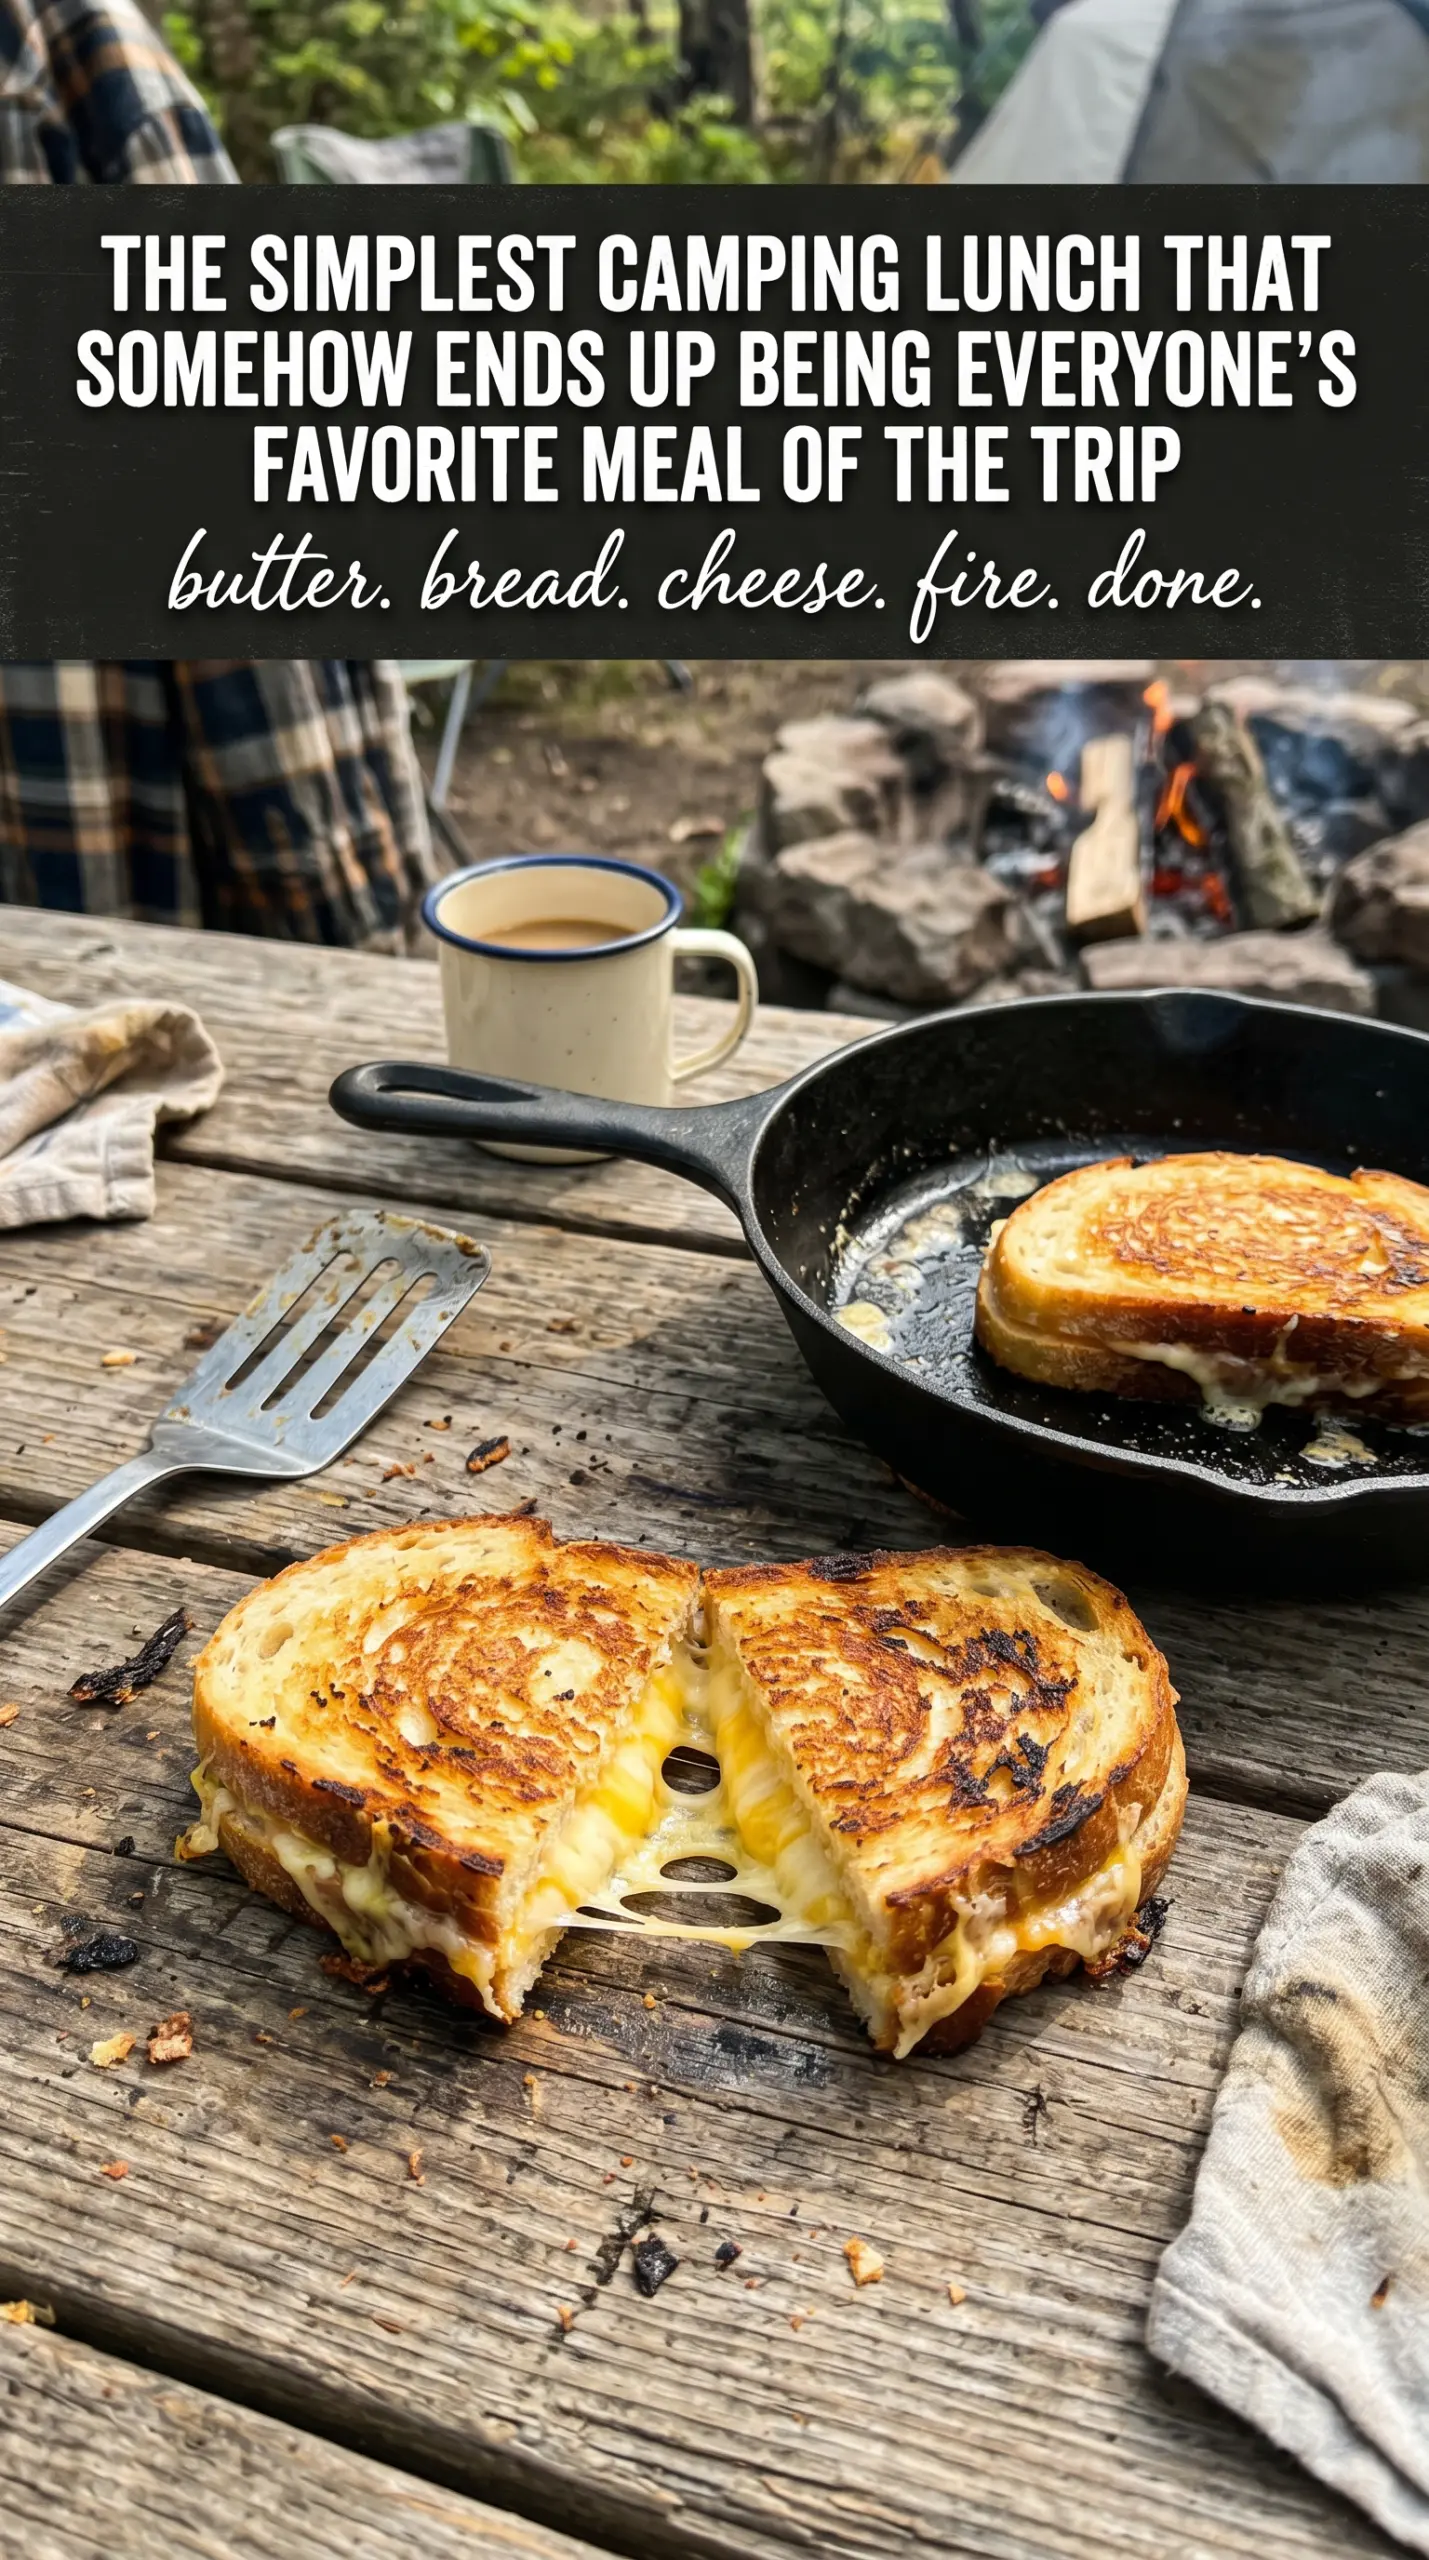
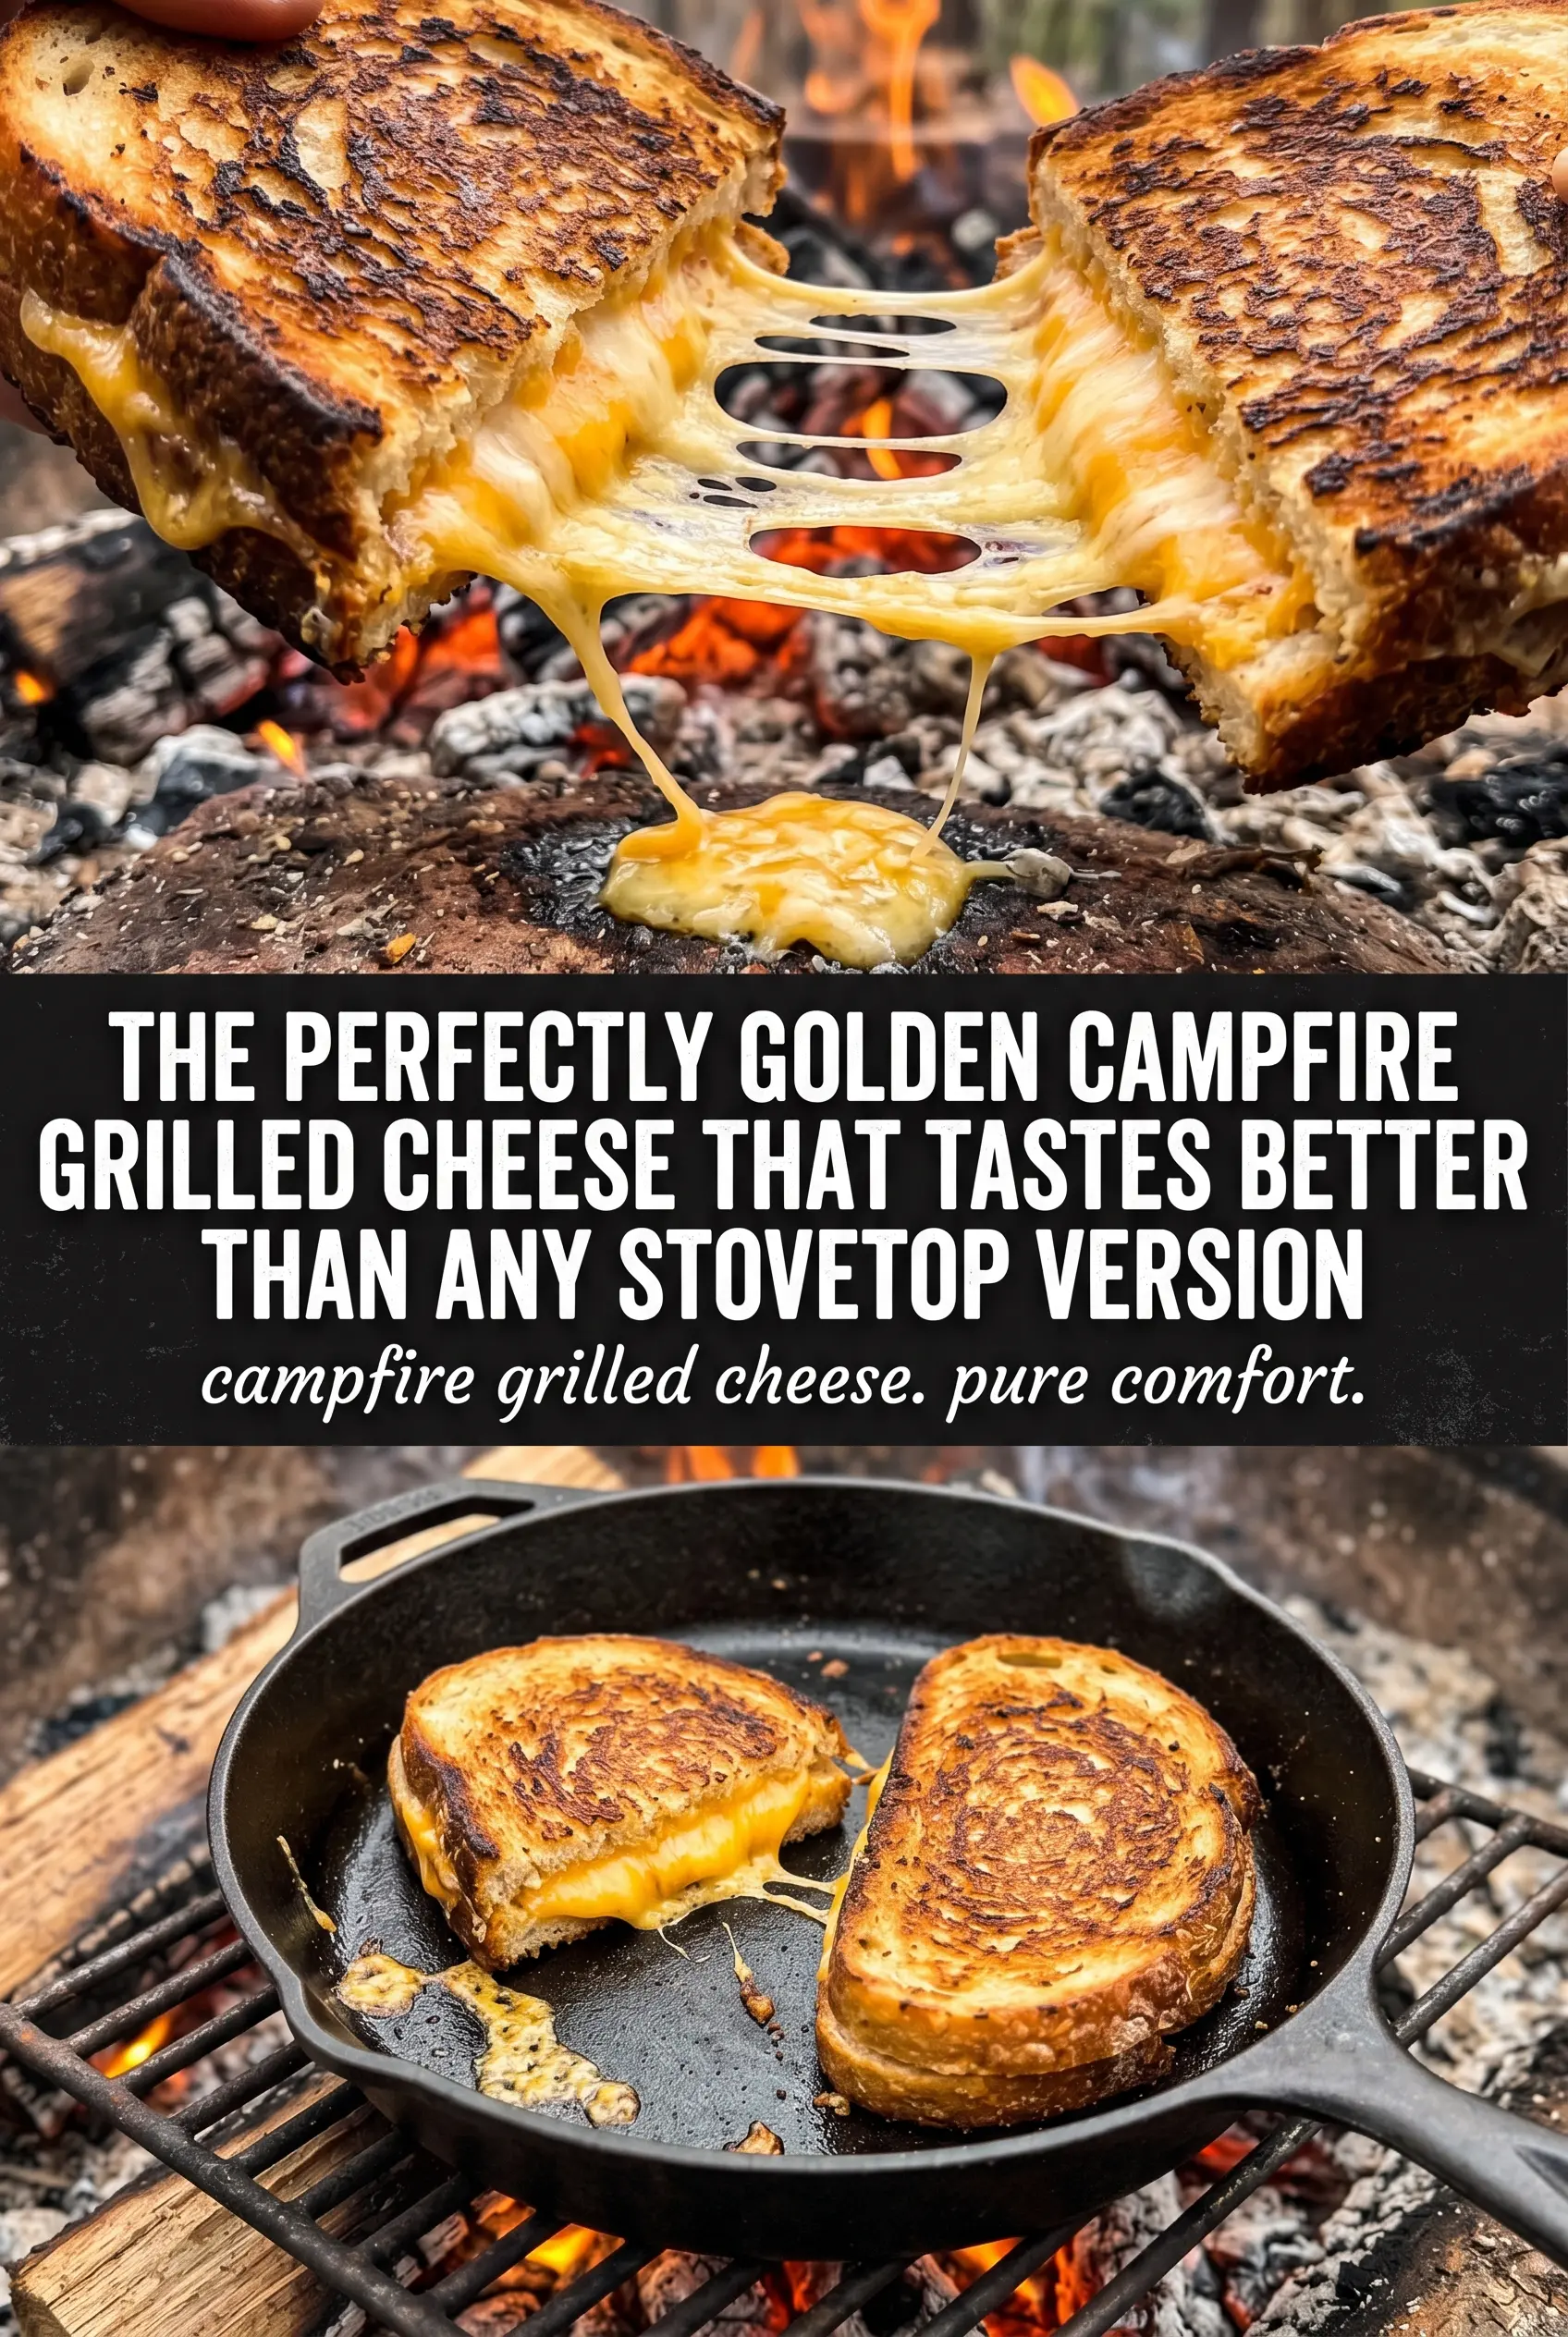
Golden grilled cheese over a campfire hits a little differently than the stovetop version. The bread takes on a deeper toast, the cheese melts into a stretchy middle, and that hint of smoke makes the whole sandwich taste bigger than the few ingredients that go into it. It’s the kind of meal that disappears fast, with crisp edges and a center that turns molten the second you cut it open.
What makes this version work is the heat control. Campfire cooking can go from perfect to burnt in a minute, so the key is steady medium heat, not open flames licking at the bread. Softened butter on the outside gives the sandwich an even, golden crust, and choosing a cheese with good melt keeps the inside from turning greasy or clumpy before the bread is done.
Below, I’ll walk through the small details that matter most, including the best way to keep the sandwiches from scorching and a few smart swaps if you’re cooking at a campsite with limited supplies.
The bread browned evenly over the grate and the cheese melted all the way through without the outside burning. My kids were fighting over the last half.
Save this campfire grilled cheese for smoky, melty sandwiches that come off the grate with a crisp crust and a gooey center.
The Trick to Campfire Grilled Cheese That Browns Before It Burns
The biggest mistake with grilled cheese over a fire is treating the flame like a burner. Direct flames scorch the bread before the cheese has a chance to melt, which leaves you with black spots and a cold middle. Medium heat over glowing coals or a stable grill grate gives you time to build a crust slowly, and that slow pace is what makes the sandwich worth eating.
Butter on the outside matters here because it protects the bread and helps it brown evenly. If the butter is too cold, it tears the bread instead of spreading cleanly, so soften it first. A cast iron skillet gives you the most control, but a grate works fine if you keep the sandwiches moving and watch for hot spots.
What the Bread, Butter, and Cheese Are Each Doing Here
- Bread — A sturdy sandwich bread holds up best over campfire heat. Thin soft bread can collapse once the cheese starts melting, while a heartier slice gets that crisp edge without falling apart. White sandwich bread is classic, but sourdough or Texas toast gives you a little more structure.
- Cheese — American cheese melts the smoothest and gives you that classic stretch. Cheddar adds a sharper bite, while Swiss melts cleanly but needs a little more heat to get fully fluid. If you use cheddar, slice it thin so it melts before the bread overbrowns.
- Butter — Softened butter spreads evenly and creates a better crust than cold butter straight from the fridge. You can swap in mayonnaise on the outside if you want extra browning and a slightly tangier finish, but butter gives the most familiar grilled cheese flavor.
Building the Sandwich So the Center Melts at the Same Pace the Bread Browns
Butter the Outside First
Spread softened butter generously on one side of each bread slice. That outside layer is what hits the heat, so leave no bare corners or the edges will dry out and toast unevenly. If the butter is patchy, the bread browns in stripes instead of turning evenly golden.
Stack the Cheese in the Middle
Place the cheese between the unbuttered sides of the bread and press the sandwich together gently. Don’t overfill it, or the cheese will ooze out before the bread has time to toast. Thin slices melt more evenly than thick slabs, especially over a campfire where the heat can be uneven.
Cook Slowly Over Stable Heat
Set the sandwiches on a campfire grate or in a cast iron skillet over medium heat. Cook for 4 to 5 minutes per side, watching for a deep golden crust and cheese that starts to soften at the edges. If the bread darkens too fast, pull the pan to a cooler spot; the cheese needs a little time, and rushing this stage is how the sandwich burns before the middle melts.
Cut and Serve Right Away
Let the sandwiches come off the heat and cut them in half while the cheese is still molten. The steam that escapes helps tell you the inside is fully melted, and serving immediately keeps the crust crisp. If they sit too long, the bread steams itself soft.
How to Adjust Campfire Grilled Cheese for Different Campsites and Different Eaters
Dairy-Free Grilled Cheese
Use a good dairy-free butter and a plant-based meltable cheese slice. Some vegan cheeses melt slower than dairy cheese, so keep the heat gentler and give the sandwich another minute if needed. The crust will still brown nicely, but the center may be a little less stretchy.
Sourdough or Texas Toast Swap
A thicker bread gives you more protection over an open fire and a sturdier bite. Sourdough adds tang and a crisp chew, while Texas toast gives you a softer, richer center with more room for cheese. Both handle campfire heat better than thin sandwich bread.
Sharp Cheddar Version
Sharp cheddar gives the sandwich a stronger flavor, but it doesn’t melt as silkily as American. Slice it thin and cook over lower heat so it has time to soften without the bread getting too dark. The payoff is a more pronounced, savory finish.
Storage and Reheating
- Refrigerator: Store cooked sandwiches for up to 2 days, wrapped tightly. The bread softens as it sits, so expect a less crisp crust.
- Freezer: Grilled cheese freezes poorly once cooked. If you need to plan ahead, assemble the sandwiches and freeze them uncooked between layers of parchment, then cook from thawed for the best texture.
- Reheating: Reheat in a skillet over low heat until the bread crisps back up and the cheese loosens again. The common mistake is using high heat, which burns the outside before the center warms through.
Questions I Get Asked About This Recipe
Campfire Grilled Cheese
Ingredients
Equipment
Method
- Butter one side of each bread slice generously, so the outside browns as it toasts. Visual cue: the buttered sides should look glossy and evenly coated.
- Layer cheese between two buttered bread slices with the butter on the outside. Visual cue: the cheese should be fully covered so it melts in the center.
- Place sandwiches on a campfire grate or in a cast iron skillet over medium heat. Visual cue: the surface should be ready to sizzle without burning.
- Cook for 4-5 minutes per side, until bread is golden brown and cheese is melted. Visual cue: edges turn crisp and the cheese pulls when you lift a corner.
- Remove from heat, cut each sandwich in half, and serve hot. Visual cue: show the melted cheese stretch between the halves.