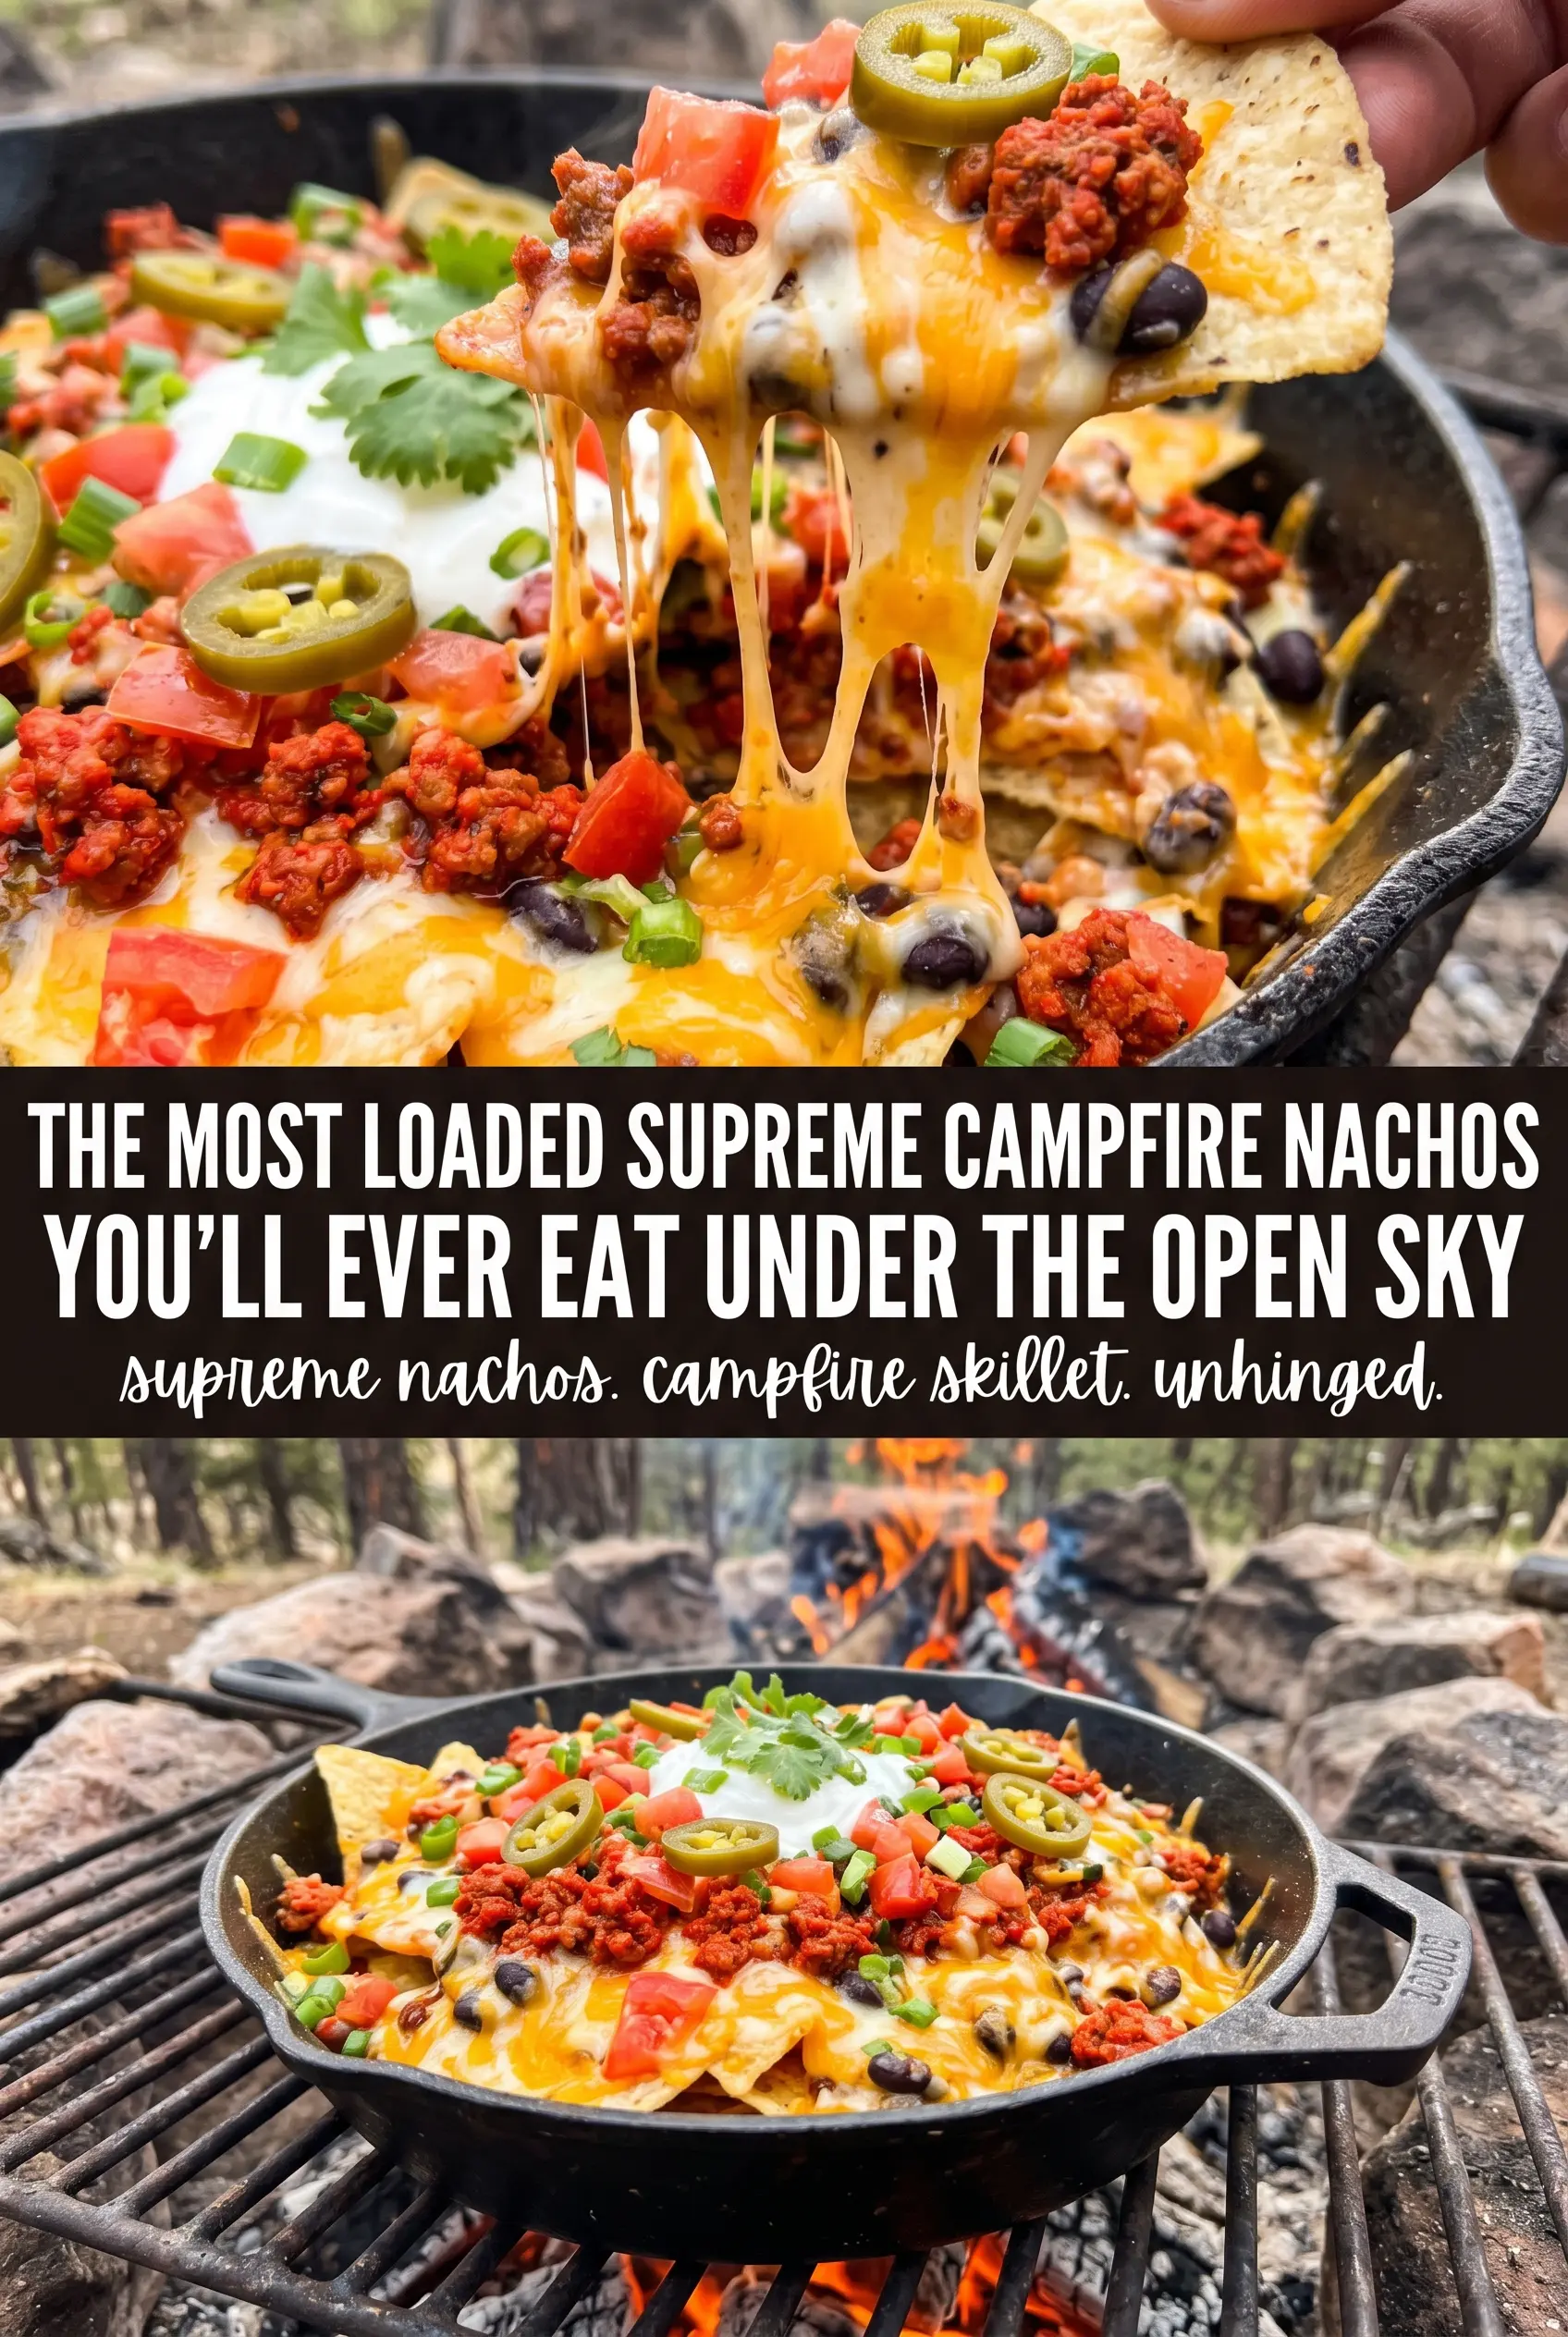
Campfire nachos supreme are the kind of appetizer that disappears before the skillet even makes it back to the table. The chips stay sturdy underneath a heavy layer of seasoned beef, black beans, corn, and melted cheese, while the cold toppings on top keep every bite balanced. When they’re done right, you get crunchy edges, gooey center sections, and just enough heat from the jalapeños to keep people reaching back in for one more chip.
The trick is layering. A single pile of chips on the bottom turns soggy fast, but splitting everything into two layers gives the cheese a chance to bind the nachos together without burying the chips. Using a cast iron skillet over medium campfire heat helps the cheese melt evenly without scorching the bottom layer, and adding the tomatoes, sour cream, guacamole, and cilantro after the skillet comes off the fire keeps those fresh toppings bright.
Below, I’ve included the detail that matters most for keeping campfire nachos crisp, plus a few smart swaps for making them work with what you’ve got at the campsite.
The two-layer setup kept the chips from getting soggy, and the cheese melted all the way through without burning the bottom. My kids kept saying the skillet was the best part of the camping trip.
Save these campfire nachos supreme for your next night by the fire when you want a skillet full of melty cheese, crisp chips, and bold toppings.
The Layering Trick That Keeps the Chips from Going Soft
Campfire nachos fail in one predictable way: the toppings all sink to the middle, and the bottom chips turn limp before the cheese has even melted. The fix is to build the skillet in two thin rounds instead of dumping everything in one pile. That gives the heat a chance to move through the whole pan, and it keeps some chips on the top layer exposed long enough to stay crisp around the edges.
Cast iron helps here because it holds steady heat over a grate and melts the cheese without hot spots. If your fire is too fierce, the bottom layer will toast before the cheese softens, so keep the skillet over medium heat and move it if the edges start darkening too fast. You want bubbling cheese and warmed-through filling, not a scorched crust underneath.
What Each Topping Is Actually Doing Here
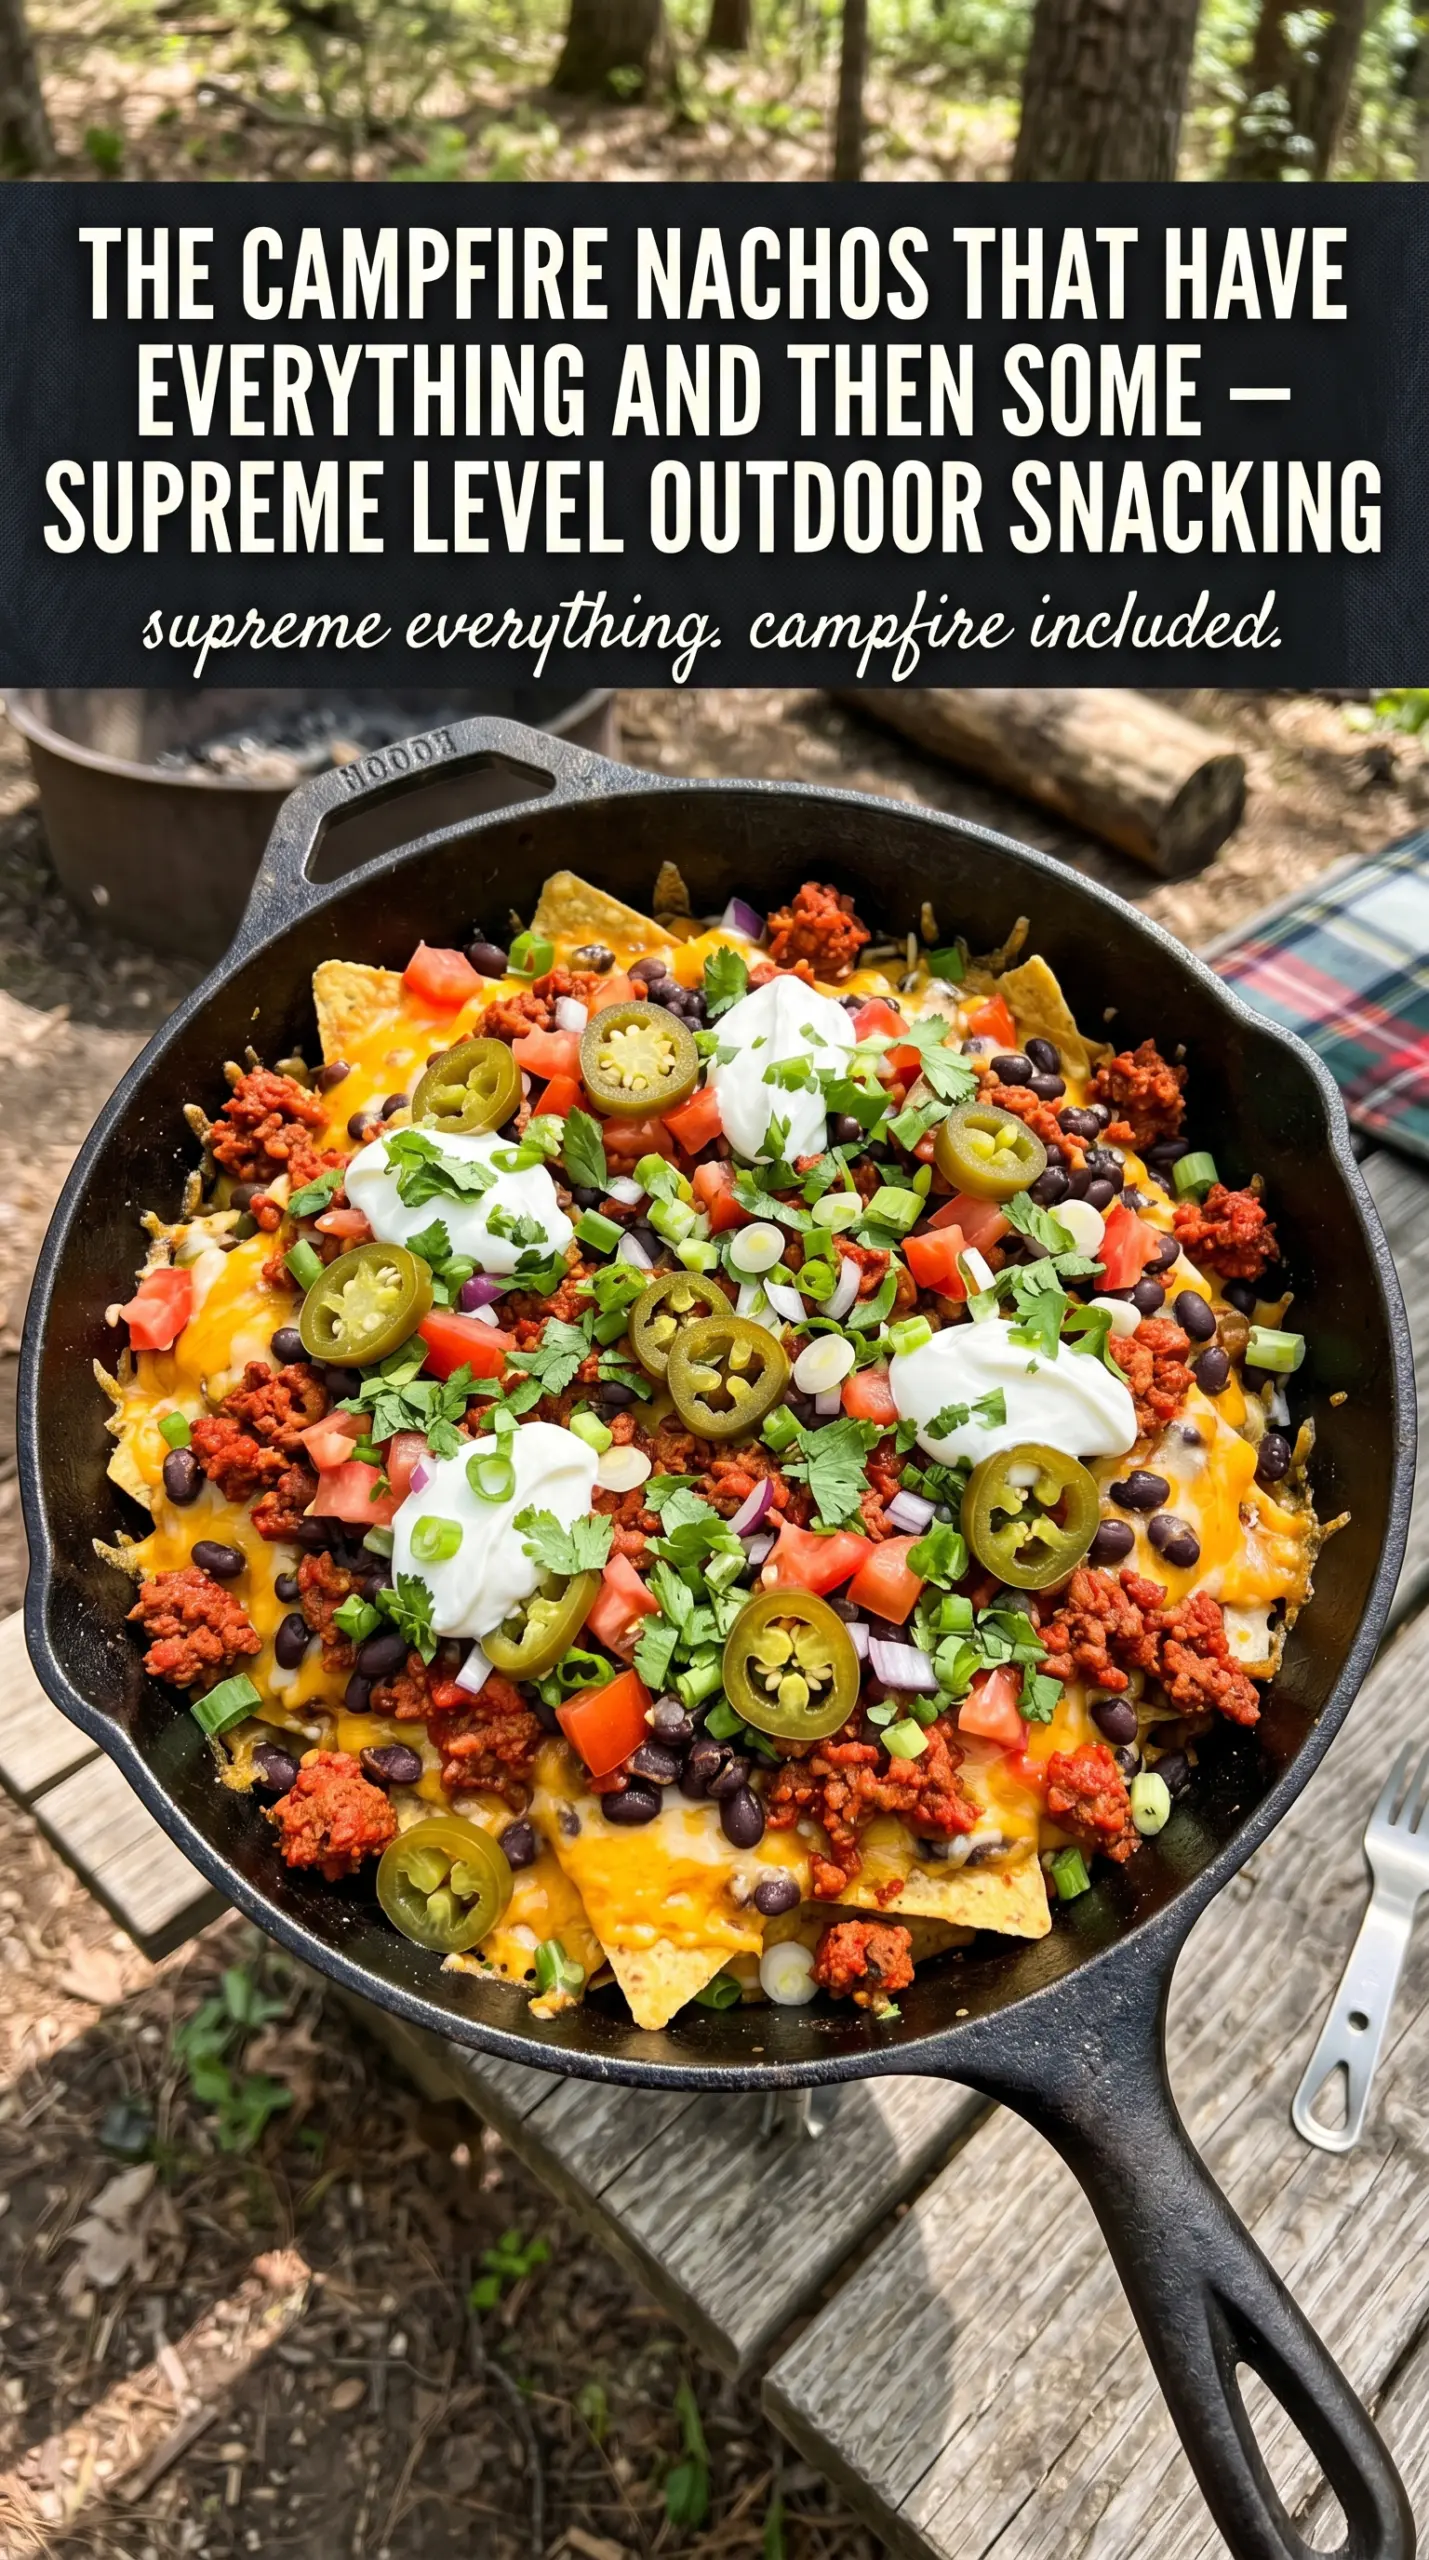
- Tortilla chips — Use sturdy restaurant-style chips, not thin ones. Thin chips shatter under the weight of the beef and beans, while thicker chips hold up long enough to scoop cleanly.
- Ground beef — This is the main savory layer, so season it well and cook off any excess grease before it goes into the skillet. If the beef is wet, it softens the chips fast.
- Mexican cheese blend — A blend melts more smoothly than a single hard cheese and gives you those stretchy, bubbly pockets everyone wants. Pre-shredded works fine here, though freshly shredded cheese melts a little more evenly.
- Black beans and corn — These add bulk and give the nachos some sweetness and texture. Drain them well so they don’t steam the chips.
- Sour cream, guacamole, tomatoes, and cilantro — These finish the dish after the heat is off, which keeps the toppings fresh and cool against the hot skillet. Adding them too early makes them wilt or break down.
Building the Skillet So It Melts, Not Burns
Start with a Thin Base
Lay down half the chips in a cast iron skillet or sturdy aluminum pan, then add half the beef, beans, corn, and cheese. Keep the layer even instead of mounding it in the center. The goal is full coverage so the cheese can glue the chips together without trapping a wet pile in one spot.
Add the Second Layer Before the Heat Hits
Repeat with the remaining chips and toppings before the pan goes over the fire. This second layer protects the bottom from direct heat and gives you a more stable nacho stack. If you only build one layer, the chips under the cheese get soggy while the outer edges burn.
Watch for the Melt, Not the Clock
Set the skillet over medium heat for 12 to 15 minutes, but watch the cheese. It should go glossy first, then start bubbling at the edges and melting fully across the top. If the chips on the rim are darkening before the cheese is ready, pull the skillet a little farther from the flame and let the residual heat finish the job.
Finish Off the Fire
Take the skillet off the heat before adding tomatoes, sour cream, guacamole, and cilantro. That keeps the fresh toppings bright and stops the sour cream from melting into the cheese. A final squeeze of lime over the top wakes up the whole pan and cuts through the richness.
How to Adapt These Nachos for Different Campers and Different Fires
Make them gluten-free without changing the method
These nachos are naturally gluten-free as long as your taco seasoning and tortilla chips are certified gluten-free. The rest of the build stays the same, so you don’t lose any texture or flavor by making that swap.
Use ground turkey for a lighter skillet
Ground turkey works well if you season it generously and cook it until it’s no longer pale or wet. It gives you a milder, leaner base, but you’ll want the cheese and toppings to do more of the flavor work.
Make a vegetarian version that still eats like a full meal
Skip the beef and double the beans, or add seasoned sautéed mushrooms and peppers if you’ve got a camp stove nearby. You’ll lose some of the heavy, meaty richness, but the beans and cheese still give you a hearty skillet that holds together well.
Use a foil pan when cast iron isn’t practical
A heavy-duty aluminum pan works in a pinch, especially for larger crowds, but it won’t hold heat as steadily as cast iron. Keep the fire a touch gentler and check the bottom sooner, since thin metal can go from melted to scorched faster.
Storage and Reheating
- Refrigerator: Store leftovers in an airtight container for up to 3 days. The chips will soften, but the flavor still holds up.
- Freezer: Freezing isn’t a great fit for assembled nachos because the chips and fresh toppings don’t thaw well. If you want to prep ahead, freeze the cooked beef separately.
- Reheating: Reheat the beef mixture on its own, then build a fresh batch of chips and cheese. Reheating the whole skillet makes the chips soggy and the sour cream and guacamole separate.
Questions I Get Asked About This Recipe
Campfire Nachos Supreme
Ingredients
Equipment
Method
- Layer half the tortilla chips in a large cast iron skillet or aluminum pan to form an even base with visible crunch.
- Top the chips with half the cooked ground beef, black beans, corn, and Mexican cheese blend, distributing the toppings to cover the surface.
- Add the remaining tortilla chips and repeat the layers with the remaining ground beef, beans, corn, and Mexican cheese blend for an all-in topping stack.
- Place the skillet on a campfire grate over medium heat for 12-15 minutes until the cheese fully melts and turns glossy with bubbly spots.
- Remove the skillet from the heat to stop further melting and keep the chips from getting soggy.
- Top immediately with the diced tomatoes and sliced jalapeño for a fresh, bright finish.
- Add sour cream and guacamole in spoonfuls so they create creamy pockets across the melted cheese.
- Sprinkle chopped cilantro over the top for color and herbal aroma right before eating.
- Serve right away with lime wedges on the side for squeezing over each bite.