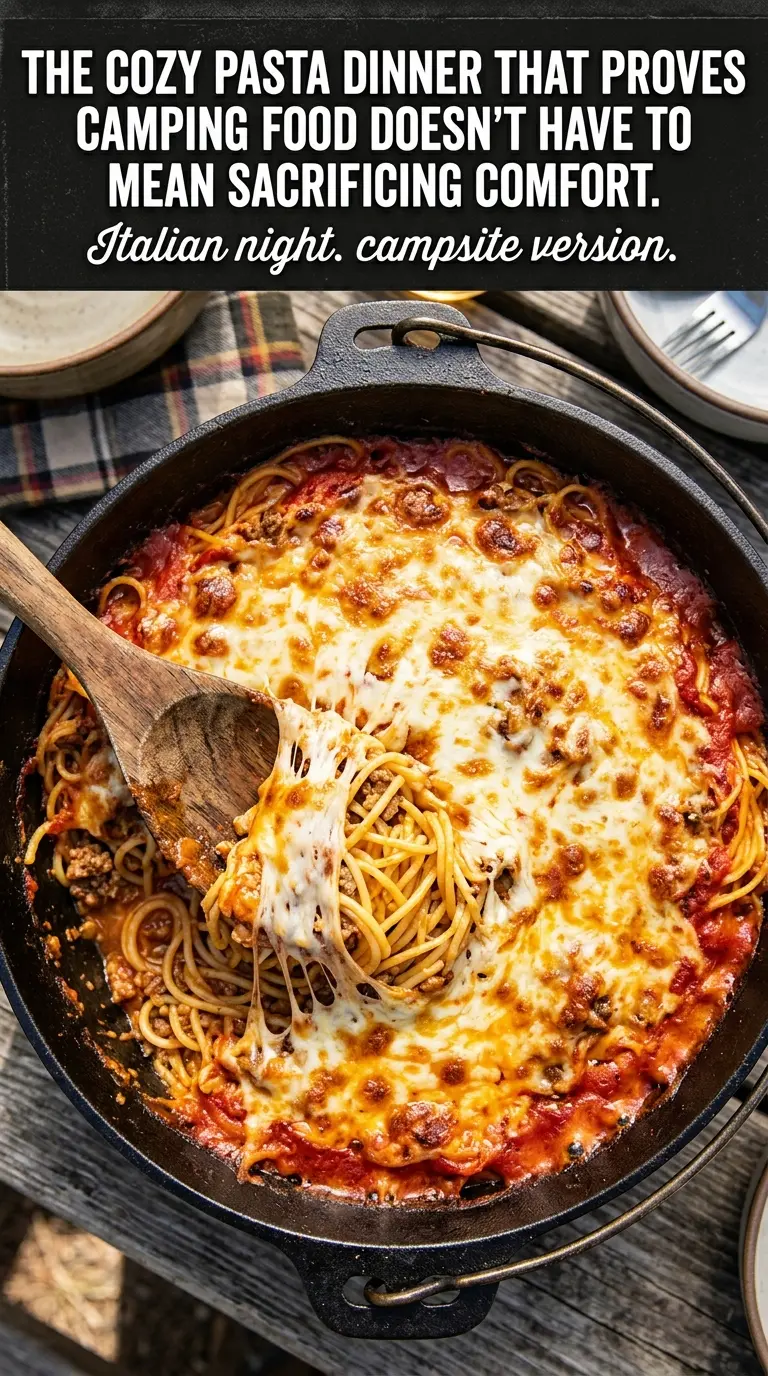
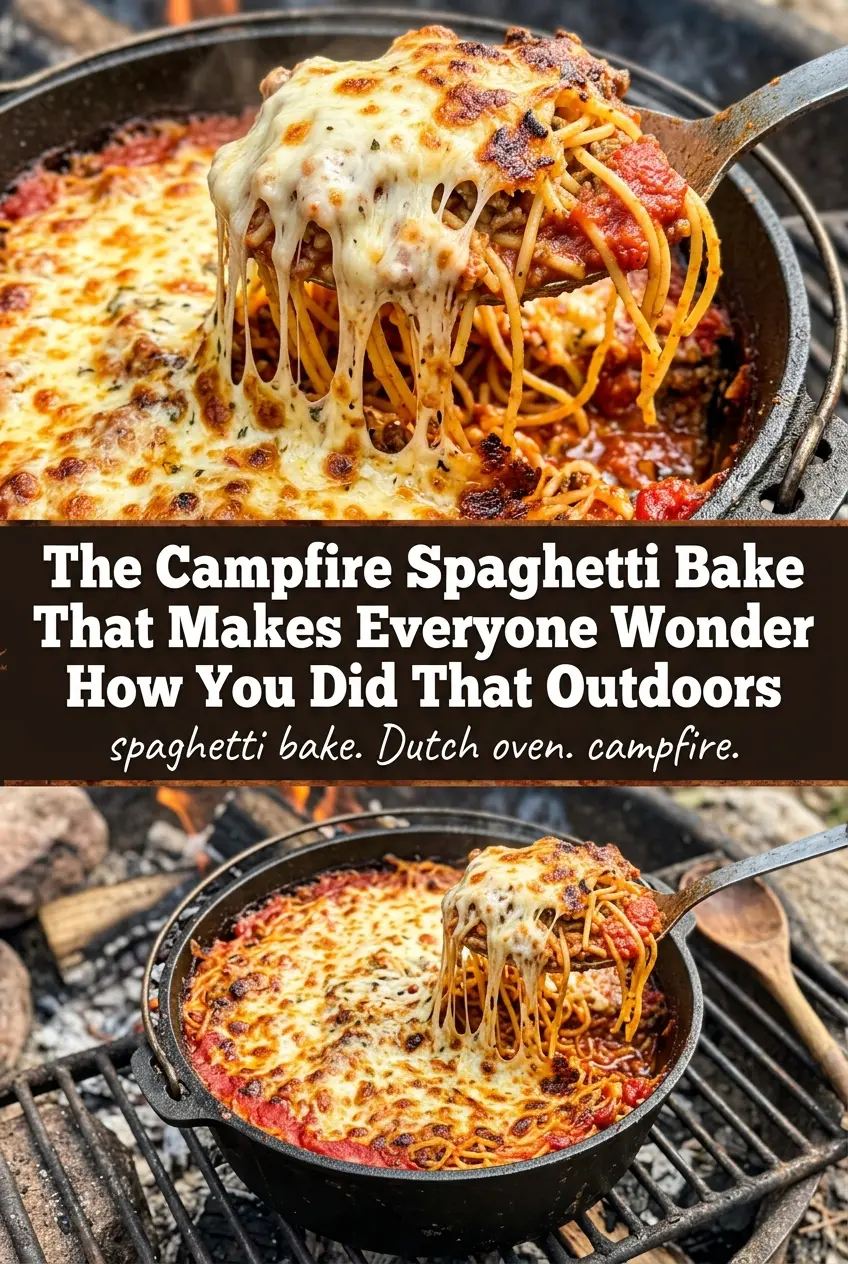
Cheesy baked spaghetti with a bubbling top and a saucy, sturdy center is the kind of campfire dinner people remember. It holds together on the spoon, feeds a crowd without fuss, and delivers the kind of comfort that tastes even better after a long day outside. The cheese melts into the pasta instead of sitting on top in a separate layer, and that matters here because every bite should feel cohesive, not pieced together.
This version works because the spaghetti is already cooked before it goes into the Dutch oven, which keeps the pasta from turning mushy while it finishes over the coals. The beef gets browned first so the sauce has a deeper, savory base, and the mix of mozzarella and Parmesan gives you stretch, salt, and a little browned edge if the heat is right. A covered Dutch oven traps the heat from both directions, which is what turns this from a skillet pasta into a proper bake.
Below, I’ve included the small details that keep the bottom from scorching and the cheese from turning greasy. There’s also a few useful swaps for making it work with what you’ve got at camp or at home.
The cheese went golden on top and the pasta stayed tender instead of getting mushy. I used a 12-inch Dutch oven over coals and it fed eight of us with seconds.
Love that bubbly mozzarella top and hearty Dutch oven finish? Save this Campfire Spaghetti Bake for your next camping dinner.
The Part That Keeps Campfire Pasta From Turning Soft
The biggest mistake with a Dutch oven pasta bake is starting with underdone pasta or too much liquid. The noodles keep cooking in the covered pot, so they need to be fully cooked before they go in. If they’re even a little firm, they’ll finish perfectly under the cheese; if they’re raw, they’ll stay chalky in the center while the sauce around them turns heavy.
The other thing that matters is heat control. Campfire coals don’t behave like an oven, so you need steady heat from the bottom and the lid. That’s what gives you melted cheese without burning the base. If the bottom is too hot, the sauce can catch before the center gets hot enough, and that’s where a lot of campfire bakes go wrong.
What Each Ingredient Is Actually Doing in This Bake
- Ground beef — This gives the bake its savory backbone. Brown it well so you get some deeper flavor before the sauce goes in; gray meat makes a flatter-tasting casserole. If you want a lighter version, ground turkey works, but add a little extra seasoning because it tastes milder.
- Spaghetti sauce — A good jarred sauce is fine here because it’s carrying the tomato base and some of the seasoning for the whole dish. Use one you’d actually eat on its own. If the sauce is thin, the finished bake can get loose, so choose a thicker jarred sauce when possible.
- Spaghetti — Cook it until just al dente. That extra firmness keeps it from breaking down during the Dutch oven cook. Long pasta holds up better than short shapes in this style of bake because it mixes and slices cleanly.
- Mozzarella and Parmesan — Mozzarella gives the stretch and the browned top, while Parmesan sharpens the flavor and keeps the cheese layer from tasting flat. Freshly grated Parmesan melts better than the shelf-stable kind, but either works in a pinch. Don’t skimp on the mozzarella if you want that dramatic, pull-apart top.
How to Build the Dutch Oven Bake So It Cooks Evenly
Browning the Beef First
Cook the beef in a skillet over the campfire until it’s no longer pink and you’ve got a little browning on the edges. That browning is what gives the sauce depth, so don’t rush this part by moving the meat around constantly. Drain off excess fat once it’s cooked; if you leave too much behind, the finished bake can turn slick and heavy.
Mixing the Pasta With the Sauce
Combine the hot cooked spaghetti, beef, sauce, half the mozzarella, Italian seasoning, and garlic powder while the pasta is still warm. Warm noodles take on the sauce better and help the cheese start to melt into the mixture instead of sitting in clumps. The mixture should look well coated but not soupy; if it looks wet in the bowl, it’ll bake up loose in the Dutch oven.
Stacking the Cheese for the Finish
Grease the Dutch oven well, then add the pasta mixture and smooth it into an even layer. Scatter the remaining mozzarella over the top, then finish with Parmesan so you get both melt and color. Cover the pot and place coals under and on top of the lid; that top heat is what melts the cheese all the way through instead of leaving you with a hot bottom and a pale lid.
Knowing When It’s Done
After 30 to 35 minutes, lift the lid and look for bubbling around the edges and a melted, lightly bronzed cheese top. If the center still looks cold or the cheese is only barely softened, give it a few more minutes with the lid back on. Let it rest for 5 minutes before serving so the sauce settles and the slices hold together instead of sliding apart.
How to Change This Campfire Spaghetti Bake Without Losing the Point
Make It with Ground Turkey
Ground turkey works well if you want a lighter bake, but it doesn’t bring as much built-in flavor as beef. Brown it a little longer and season it well so the filling doesn’t taste bland. A splash of olive oil in the pan helps keep it from drying out.
Gluten-Free Pasta That Still Holds Up
Use a sturdy gluten-free spaghetti and cook it just to al dente, then mix and bake right away. Gluten-free pasta can soften faster than wheat pasta, so don’t overcook it on the front end or it’ll collapse in the Dutch oven. A thicker sauce helps keep the texture stable.
Dairy-Free Version
Use your favorite dairy-free mozzarella-style shreds and skip the Parmesan, or replace it with a dairy-free hard cheese alternative. The top won’t brown quite the same way, but the bake still holds together and gets that comforting casserole feel. A little extra seasoning helps make up for the missing salt and tang from the cheese.
Storage and Reheating
- Refrigerator: Store leftovers in an airtight container for up to 4 days. The pasta will firm up as it chills, which is normal.
- Freezer: It freezes well for up to 2 months. Portion it before freezing so it thaws and reheats more evenly.
- Reheating: Reheat covered in the oven at 350°F until hot, or warm single servings in the microwave with a spoonful of sauce or water to loosen them. The common mistake is blasting it uncovered, which dries out the pasta before the center heats through.
Answers to the Questions Worth Asking
Campfire Spaghetti Bake
Ingredients
Equipment
Method
- Brown the ground beef in a skillet over campfire until it is no longer pink and the fat is rendered. Drain off excess fat so the bake won’t be greasy.
- In a large bowl, mix the cooked spaghetti, browned beef, spaghetti sauce, half the mozzarella, Italian seasoning, and garlic powder until evenly combined. Stop mixing when the sauce is distributed and the pasta looks glossy.
- Spray the Dutch oven with cooking spray, then add the spaghetti mixture and spread it into an even layer. Aim for a flat surface so the cheese melts uniformly.
- Top with the remaining mozzarella and the grated Parmesan so the whole surface is covered. You should see cheese all the way to the edges.
- Cover the Dutch oven and place it on campfire coals with additional coals on top of the lid. Cook for 30-35 minutes until the cheese is melted and visibly bubbly.
- Let the spaghetti bake cool for 5 minutes before serving so it sets slightly and slices cleaner. Visual cue: the bubbling should slow and the top should look set but still glossy.