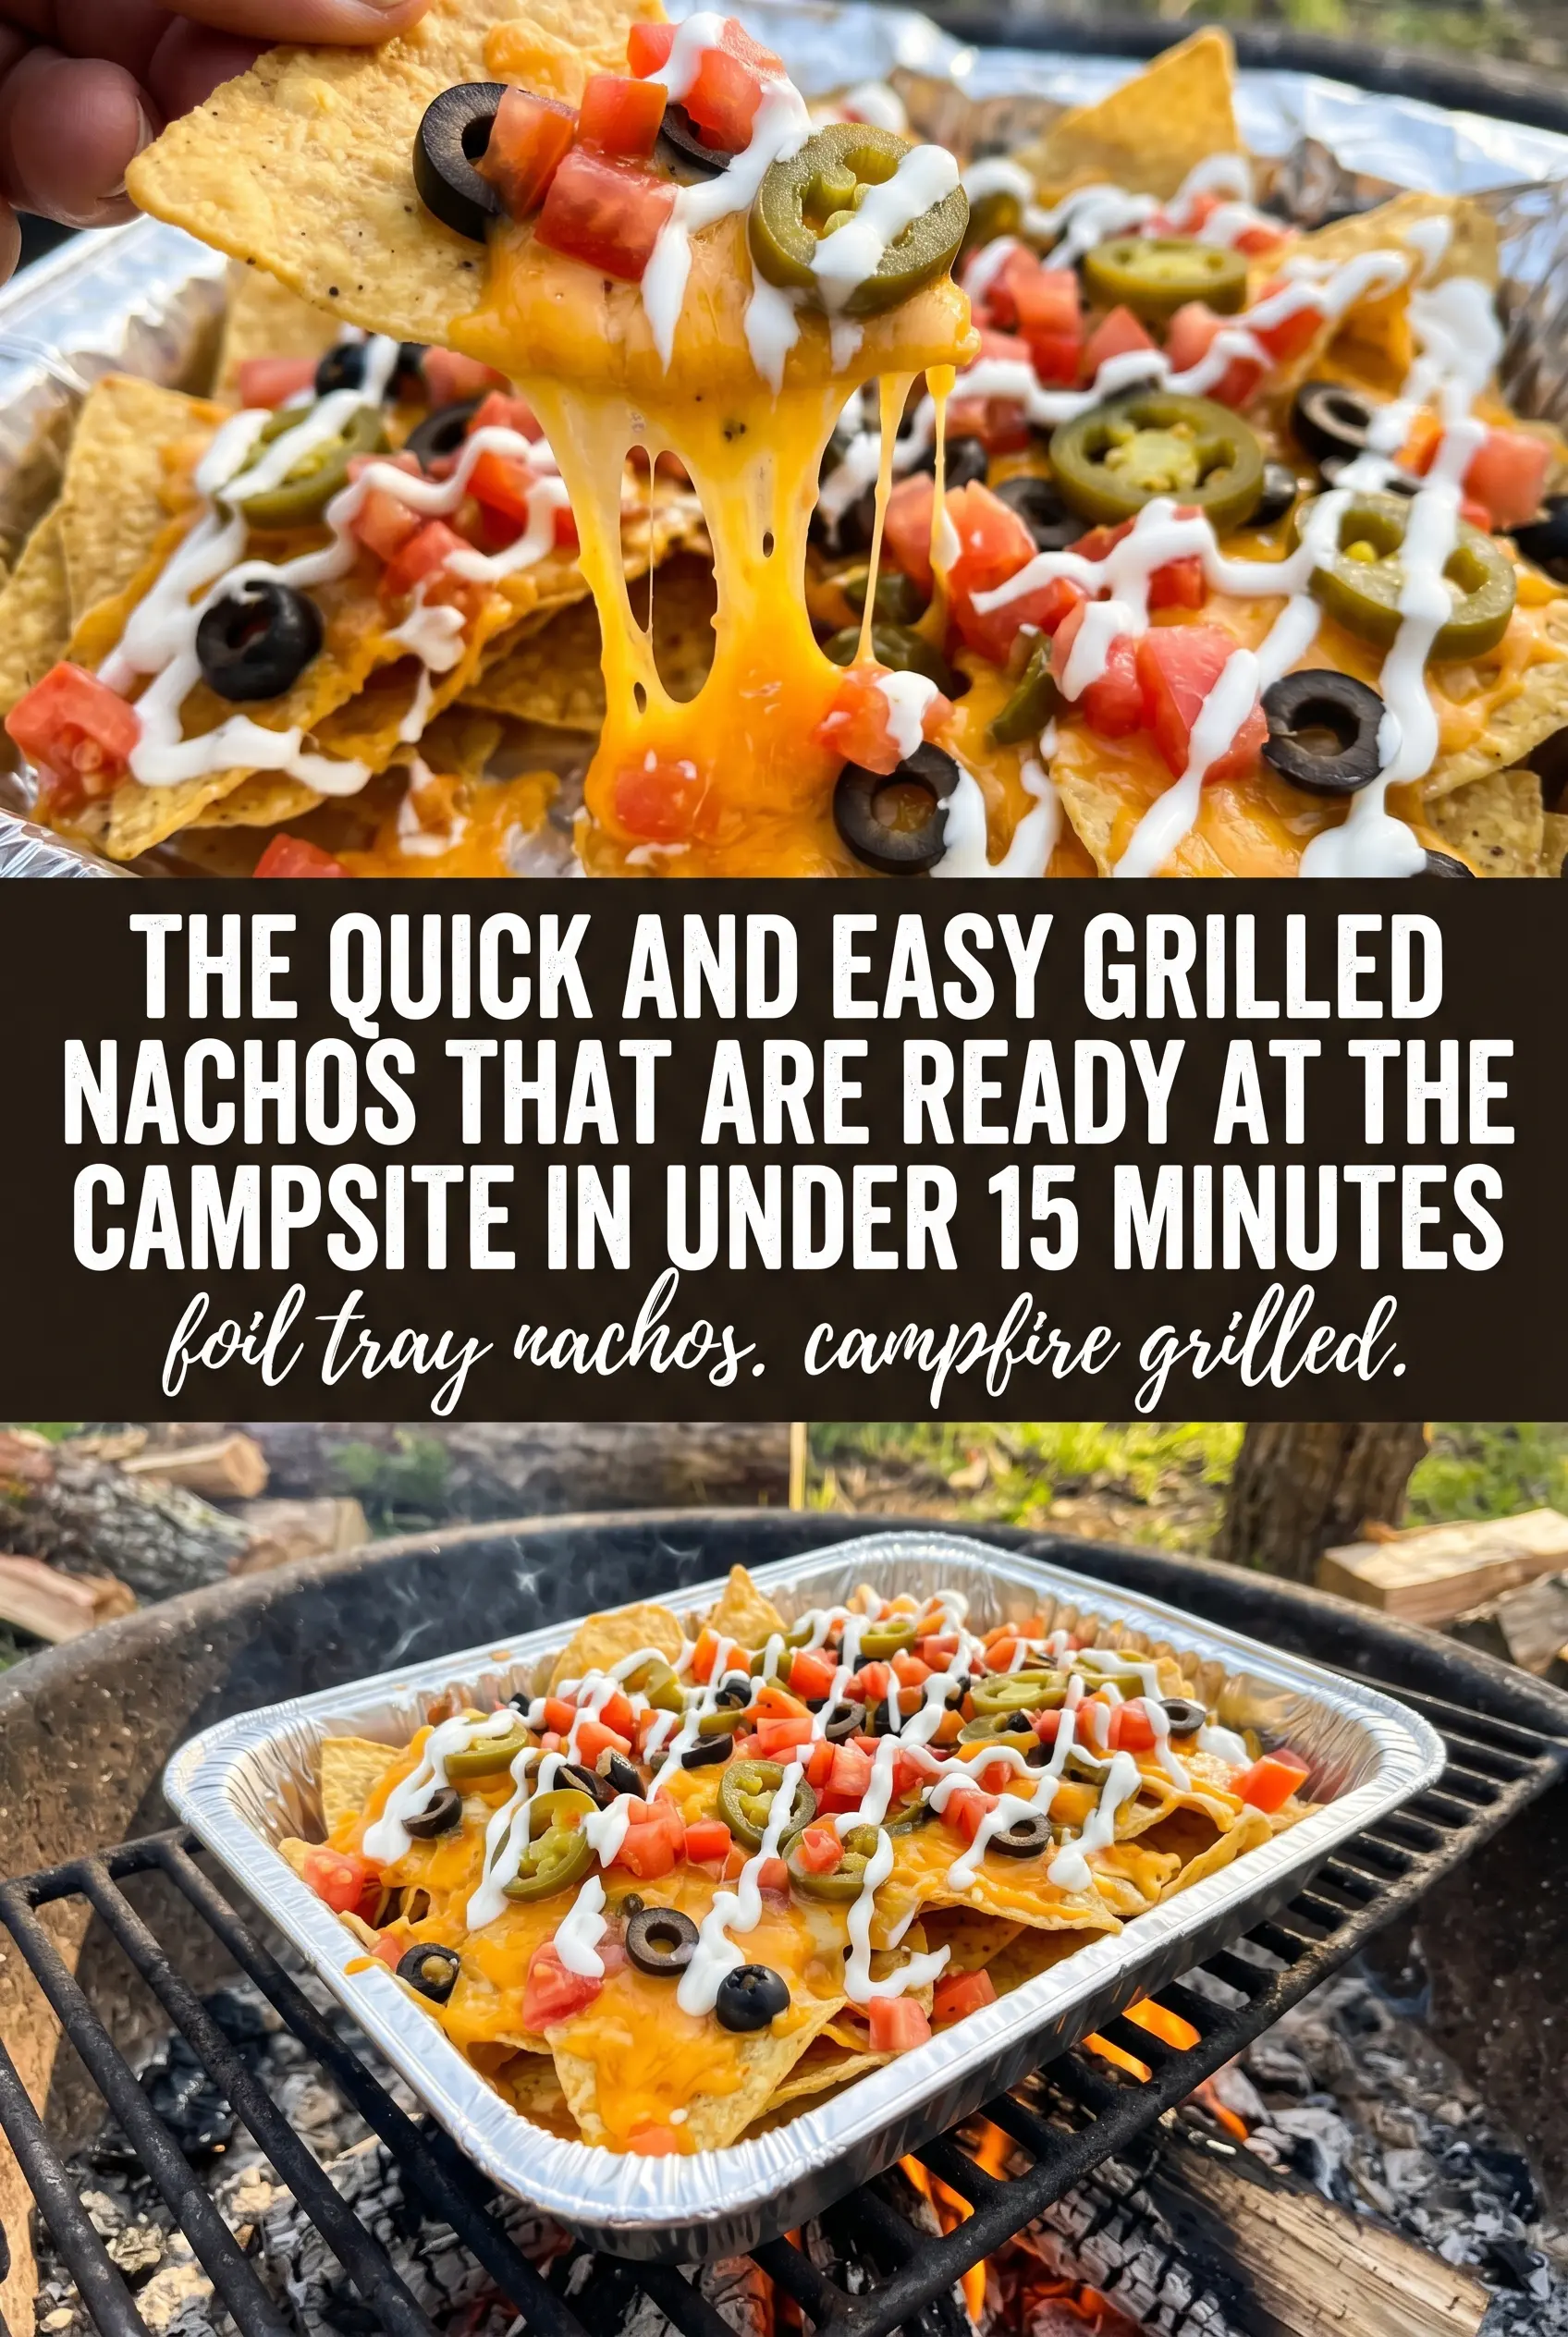
Camping grilled nachos hit the table hot, smoky, and piled high with melted cheese that stretches between every chip. The best part is how the bottom layer picks up just enough heat to turn lightly toasted while the top stays loaded and gooey. It’s the kind of campfire food that disappears fast because everyone can grab a handful and keep coming back for more.
What makes this version work is the layering. Putting chips, cheese, beans, and beef in two rounds helps the heat move through the pan more evenly, so you don’t end up with a cold center and burnt edges. A disposable aluminum pan also helps here because it conducts heat quickly and makes cleanup easy when you’re cooking outdoors. The key is medium campfire heat; if the fire is too aggressive, the chips on the bottom scorch before the cheese has a chance to melt.
Below, I’ll show you how to keep the nachos from turning soggy, how to build the layers so every bite has something on it, and a few smart swaps if you want to change up the toppings for your next trip.
The cheese melted into every layer and the bottom chips stayed crisp enough to scoop without falling apart. I used a cast iron grate over the fire and it bubbled up in about 9 minutes just like you said.
Like these campfire grilled nachos? Save them for the next night you want a smoky, cheesy crowd-pleaser with almost no cleanup.
Why the chips stay crisp instead of turning into a soggy mess
The mistake most people make with nachos is piling on wet toppings before the chips have had time to heat through. Here, the beans and beef are tucked between layers of chips and cheese, which gives the tortilla chips a little insulation while still letting the heat reach the center of the pan. The result is nachos that hold together long enough to eat, instead of collapsing into one soft layer.
Medium heat matters more than time. A campfire can swing from gentle to fierce fast, and if the pan sits over flames that are too hot, the bottom chips burn before the cheese fully melts. You want bubbling cheese, not blackened edges. If the pan looks like it’s heating unevenly, rotate it once during cooking so every side gets the same amount of direct heat.
What the cheese, beans, and beef are doing in every layer
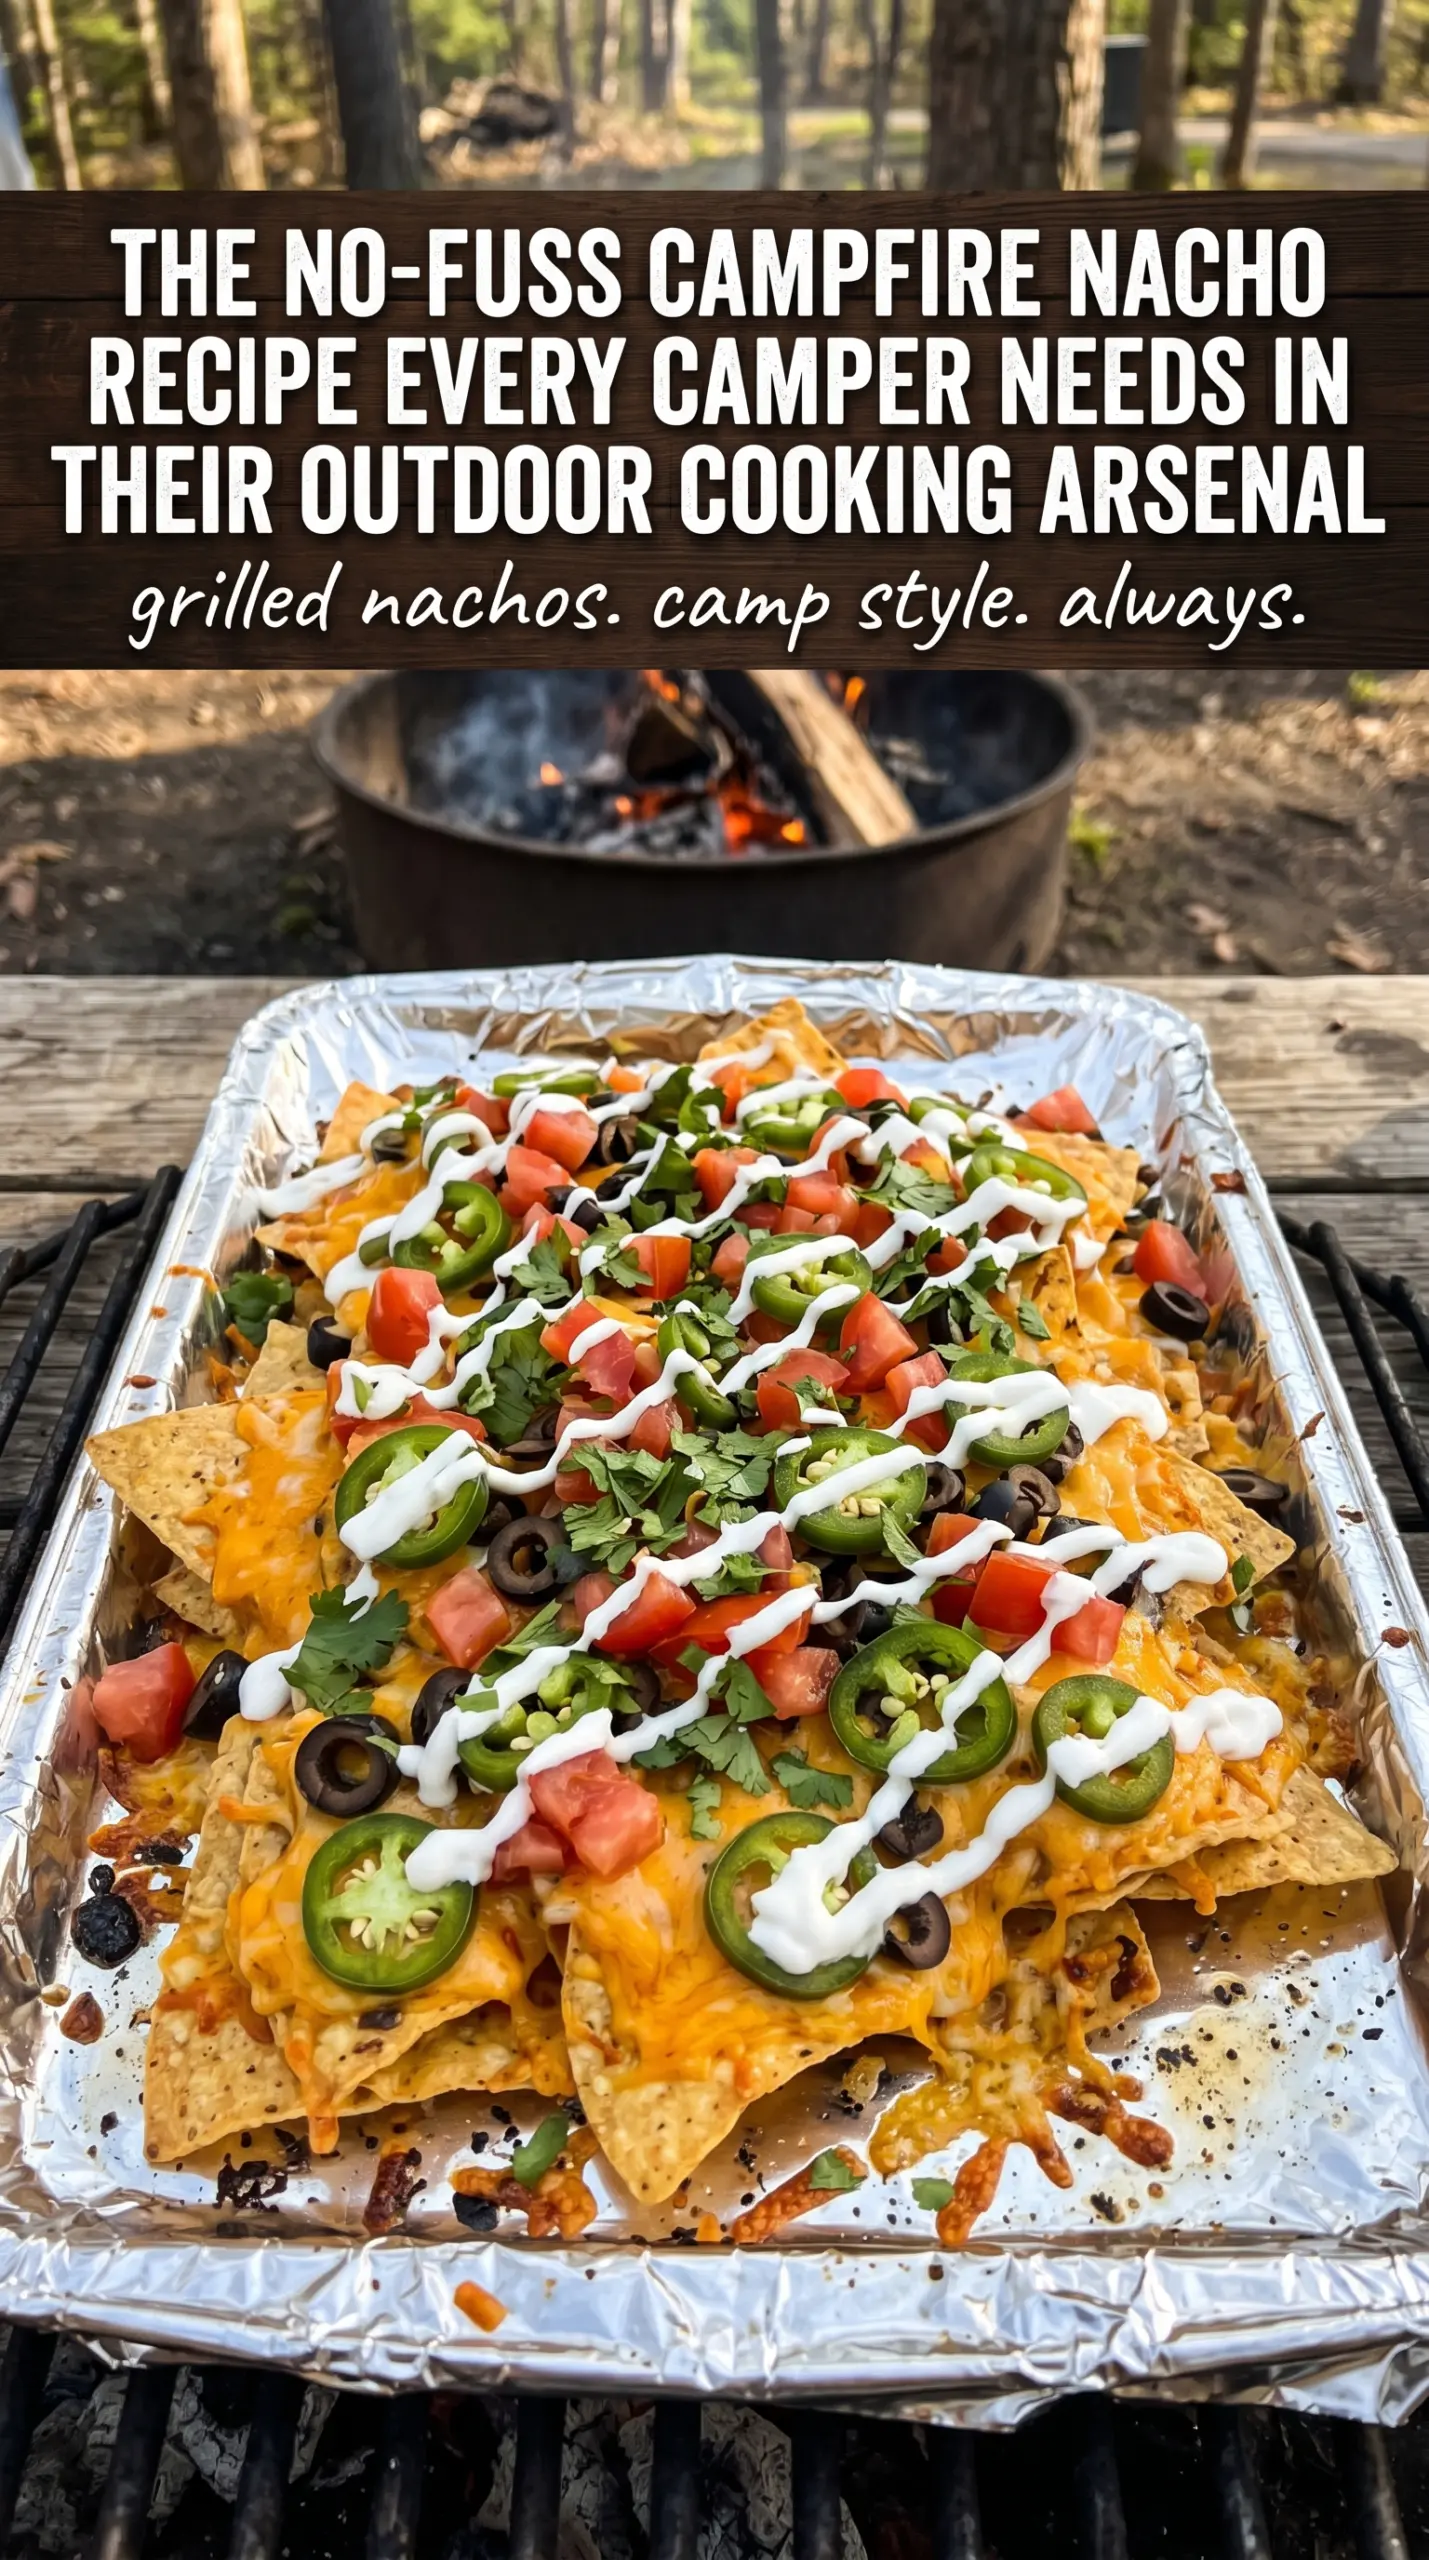
- Shredded Mexican cheese blend — This is the melt engine. A blend gives you good stretch and browning without separating as easily as a single hard cheese. Freshly shredded cheese melts better than pre-shredded, but pre-shredded works fine if that’s what you’ve got at camp.
- Black beans — These add substance and help the nachos feel like an actual meal. Drain them well so they don’t leak liquid into the pan. If you want a cleaner bite, rinse and pat them dry before layering.
- Cooked seasoned ground beef — The beef brings the smoky, savory backbone and gives the nachos heft. It should already be cooked before it goes into the pan, because the grill time is only for melting and warming through. Taco-seasoned beef works perfectly here.
- Disposable aluminum pan — This is one place where the pan matters. Aluminum heats quickly and evenly over a grate, and it saves you from scraping cheese off camp cookware later. A deeper pan also helps keep the layers from sliding around when you move it.
- Salsa, sour cream, jalapeño, and cilantro — These belong on after the heat comes off. The cold and fresh toppings keep the nachos from tasting heavy, and the lime at the end wakes everything up. If you add them too early, the sour cream can thin out and the herbs lose their brightness.
Building the pan so the middle heats before the edges burn
Start with a sturdy base
Line the pan with half the chips and spread them into an even layer, but don’t pack them down. You want enough room for the melted cheese to move between the chips. If the chips are crushed at the bottom of the bag, keep those for the top layer where they won’t have to hold as much weight.
Layer in two rounds
Add half the cheese, beans, and beef, then repeat with the remaining chips and toppings. The second layer helps create a more even melt because the heat doesn’t have to travel through one thick pile all at once. If you dump everything in one layer, the top usually looks done before the center has warmed through.
Watch for the melt, not the clock
Set the pan on the grill grate over medium campfire heat and cook for 8 to 10 minutes. You’re looking for fully melted cheese that’s bubbling at the edges and just starting to fuse the layers together. If the fire flares up or the bottom smells toasted too fast, slide the pan to a cooler spot for a minute before putting it back over the heat.
Finish after the heat comes off
As soon as the cheese is melted, pull the pan from the fire and add the salsa, sour cream, jalapeños, and cilantro. That keeps the fresh toppings bright and stops the chips from softening too much while the pan is still hot. Serve right away with lime wedges so everyone can hit their portion with acid just before eating.
How to adapt these nachos for your camp setup and your crowd
Dairy-free campfire nachos
Swap in your favorite dairy-free shredded cheese and expect a softer melt with less stretch. It still works, but the pan needs a little more time over gentle heat so the topping can warm through without burning the chips underneath. Add the salsa and herbs at the end just the same.
Vegetarian grilled nachos
Skip the beef and double the black beans, or add sautéed peppers and onions if you’ve pre-cooked them before the trip. You’ll lose some of the smoky, savory depth from the meat, so lean harder on the cheese and a punchy salsa to keep the nachos balanced.
Gluten-free by default, with one catch
These nachos are naturally gluten-free as long as your chips, salsa, and seasoning are certified gluten-free. The only real issue is cross-contact if you’re cooking over a shared camp grate, so start with a clean pan and avoid letting the chips touch any seasoned flour coatings from other foods.
Storage and Reheating
- Refrigerator: Store leftovers in an airtight container for up to 2 days. The chips soften as they sit, so they won’t have the same crunch the next day.
- Freezer: I don’t recommend freezing assembled nachos. The chips go stale and the toppings turn watery once thawed.
- Reheating: Warm leftovers in a skillet over low heat or in a foil-covered pan over gentle campfire heat until the cheese loosens again. Don’t blast them over high heat or the bottom will scorch before the center warms.
Answers to the Questions Worth Asking
Camping Grilled Nachos
Ingredients
Equipment
Method
- Line a large disposable aluminum pan with half the tortilla chips to form an even bottom layer.
- Layer half the shredded Mexican cheese blend over the chips, then add half the drained black beans and half the cooked ground beef.
- Repeat with the remaining tortilla chips, cheese, black beans, and ground beef to build a full, layered nachos pan.
- Place the pan on the grill grate over medium campfire heat and cook for 8-10 minutes until the cheese is melted and visibly bubbly.
- Remove the pan from the heat and immediately top with salsa, sour cream, sliced jalapeños, and chopped cilantro for fresh, bright flavor.
- Serve the nachos right away with lime wedges on the side so each bite can be finished with fresh squeeze.