Cheesy baked olive dip comes out bubbling at the edges, golden on top, and salty in all the right places. It’s the kind of appetizer that disappears fast because the top gets a little browned and the center stays soft, creamy, and scoopable. The olives keep every bite sharp and briny, which keeps the rich cheese base from feeling heavy.
What makes this version work is the balance. Cream cheese gives it body, mayonnaise and sour cream keep it spoonable after baking, and a mix of mozzarella and Parmesan creates both stretch and savoriness. The pimento-stuffed green olives bring the strongest brine, while black olives round things out so the flavor doesn’t lean too one-note. If you’ve had olive dip that tasted flat, it usually needed more acid, more salt, or a better melt on top. This one covers all three.
Below, I’ll show you how to keep the dip creamy instead of greasy, what to do if your olives are extra salty, and the small change that makes it easier to serve straight from the oven without breaking the texture.
The dip baked up thick and creamy with a crisp, browned top, and the olive flavor was perfect without being overpowering. I served it with baguette slices and it was gone before dinner started.
Love that browned, bubbly top and briny olive bite? Save this cheesy baked olive dip for your next game day spread or easy appetizer board.
The Part That Keeps Olive Dip Creamy Instead of Greasy
Olive dip can break in the oven when the dairy base starts out too thin or the heat is too high for too long. This version avoids that by building a thick mixture before it ever hits the oven. Cream cheese gives the dip structure, sour cream loosens it just enough, and mayonnaise adds richness without making it watery.
The other issue is the topping. If you mix all the mozzarella into the base, the dip can bake up soft but not especially appealing on top. Saving some cheese for the final layer gives you those browned spots and the stretchy pull people expect when they scoop into it. The olives also matter more than people think: slicing them helps distribute the brine through the whole dish instead of leaving pockets of salt in one bite.
- Cream cheese — This is the backbone. It needs to be fully softened, or the mixture stays lumpy and never bakes as smoothly as it should.
- Mayonnaise — Adds fat and silkiness. It helps the dip stay creamy after baking, and it’s part of what keeps the texture from feeling dense.
- Sour cream — Lightens the base and adds a little tang. Greek yogurt can work in a pinch, but it bakes a little tighter and less lush.
- Mozzarella — The stretch comes from here. Pre-shredded works, but freshly shredded melts more cleanly if you have the time.
- Parmesan — Brings the salty finish that makes the olives pop. Grated Parmesan is the right move here; the powdered shelf-stable kind won’t give the same nutty depth.
- Green and black olives — Use both. The green olives provide the sharp, punchy brine, while the black olives soften the flavor and keep the dip from tasting one-dimensional.
- Garlic — Fresh minced garlic matters. It bakes into the base and gives the dip a savory edge that dried garlic just doesn’t match.
What Each Ingredient Is Actually Doing in This Recipe

- Primary ingredient (the star) — Quality matters most. Choose the best you can find.
- Cooking medium (oil, butter, or broth) — This carries flavors and prevents dryness.
- Seasonings (salt, pepper, spices, herbs) — Layer flavors so nothing overpowers. Build depth gradually.
- Aromatics (garlic, onion, herbs) — Cook with fat to bloom flavors. Become the foundation.
- Supporting ingredients — Complement the main ingredient without overpowering it.
- Sauce or liquid (if applicable) — Brings flavors together. Balance richness with acid.
- Acid (lemon, vinegar, wine, or other) — Brightens and prevents flat-tasting results.
- Final finish (garnish, glaze, or sauce) — Prevents one-dimensional taste and adds visual appeal.
Building the Dip So It Bubbles, Browns, and Stays Scoopable
Mix the base until it’s fully smooth
Start with softened cream cheese so the mixture turns silky instead of grainy. Beat in the mayonnaise, sour cream, one cup of mozzarella, Parmesan, and garlic until there are no white streaks left. If the base looks a little stiff, keep mixing before you add the olives; once the olives go in, it’s harder to smooth things out without smashing them.
Fold in the olives without overworking them
Add the sliced green olives, black olives, and green onions, then fold just until everything is evenly scattered. You want the olives distributed through the dip, not crushed into a paste. If your olives taste especially salty, a quick drain and pat dry helps keep the whole dish balanced.
Bake until the top is browned in patches
Spread the mixture into a small greased baking dish and top it with the remaining mozzarella. Bake at 375F until the edges are actively bubbling and the top has golden spots, about 22 to 25 minutes. If the center looks loose, give it a few more minutes; the dip should be hot all the way through, but not dry.
Serve it while the cheese is still stretchy
Let the dish sit for a couple of minutes after it comes out of the oven so it settles just enough to scoop cleanly. Serve it hot with toasted baguette slices or crackers. If it sits too long, the top will still taste good, but the cheese pull disappears fast.
How to Adapt This Dip for a Bigger Crowd or a Different Table
Make it gluten-free for easy serving
The dip itself is naturally gluten-free, so the only change is the serving vehicle. Use gluten-free crackers, sliced cucumbers, or celery for scooping. The texture of the dip doesn’t change at all, which makes this one of the easier party appetizers to adapt.
Swap in all green olives for a sharper, brinier dip
If you want a more aggressive olive flavor, use only pimento-stuffed green olives and skip the black olives. The dip will taste saltier and brighter, with less mellow balance. That works especially well if you’re serving it with plain crackers or bread.
Use Greek yogurt in place of sour cream
Plain full-fat Greek yogurt works if that’s what you have, and it keeps the tangy edge. The dip will be a little less plush and a little more set once baked, but it still scoops well. Low-fat yogurt tends to make the texture thinner, so full-fat is the better swap.
Storage and Reheating
- Refrigerator: Store leftovers covered for up to 4 days. The cheese base firms up as it chills, but the flavor holds well.
- Freezer: It can be frozen, but the texture softens a bit after thawing because of the dairy. Freeze in a tightly sealed container for up to 1 month if you need to, then thaw overnight in the fridge.
- Reheating: Warm it in a 350F oven until hot and bubbling again. The mistake to avoid is blasting it in the microwave, which makes the cheese separate and the olives get tough around the edges.
Answers to the Questions Worth Asking
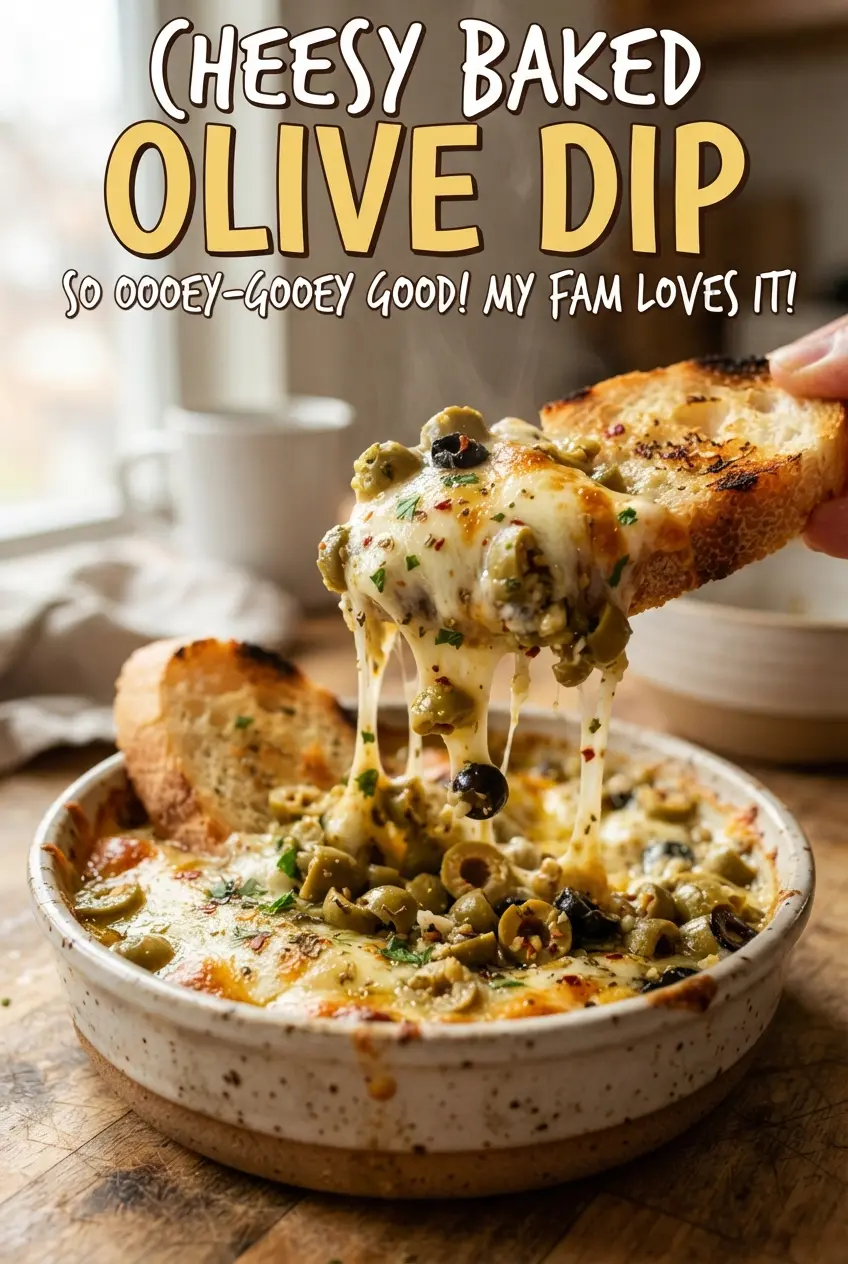
Cheesy Baked Olive Dip
Ingredients
Equipment
Method
- Preheat the oven to 375F and grease a small baking dish with a thin coating so the dip releases easily.
- Mix the cream cheese, mayonnaise, sour cream, 1 cup shredded mozzarella, Parmesan, and garlic until completely smooth with no visible cream cheese lumps.
- Fold in the pimento-stuffed green olives, black olives, and green onions so the dip is evenly studded throughout.
- Spread the mixture into the baking dish and top with the remaining mozzarella to form a melty browned layer.
- Bake for 22-25 minutes at 375F until bubbly at the edges and golden on top, with the cheese visibly melted and slightly browned.
- Serve hot with toasted baguette slices or crackers, making sure each scoop has both creamy dip and melted cheese.