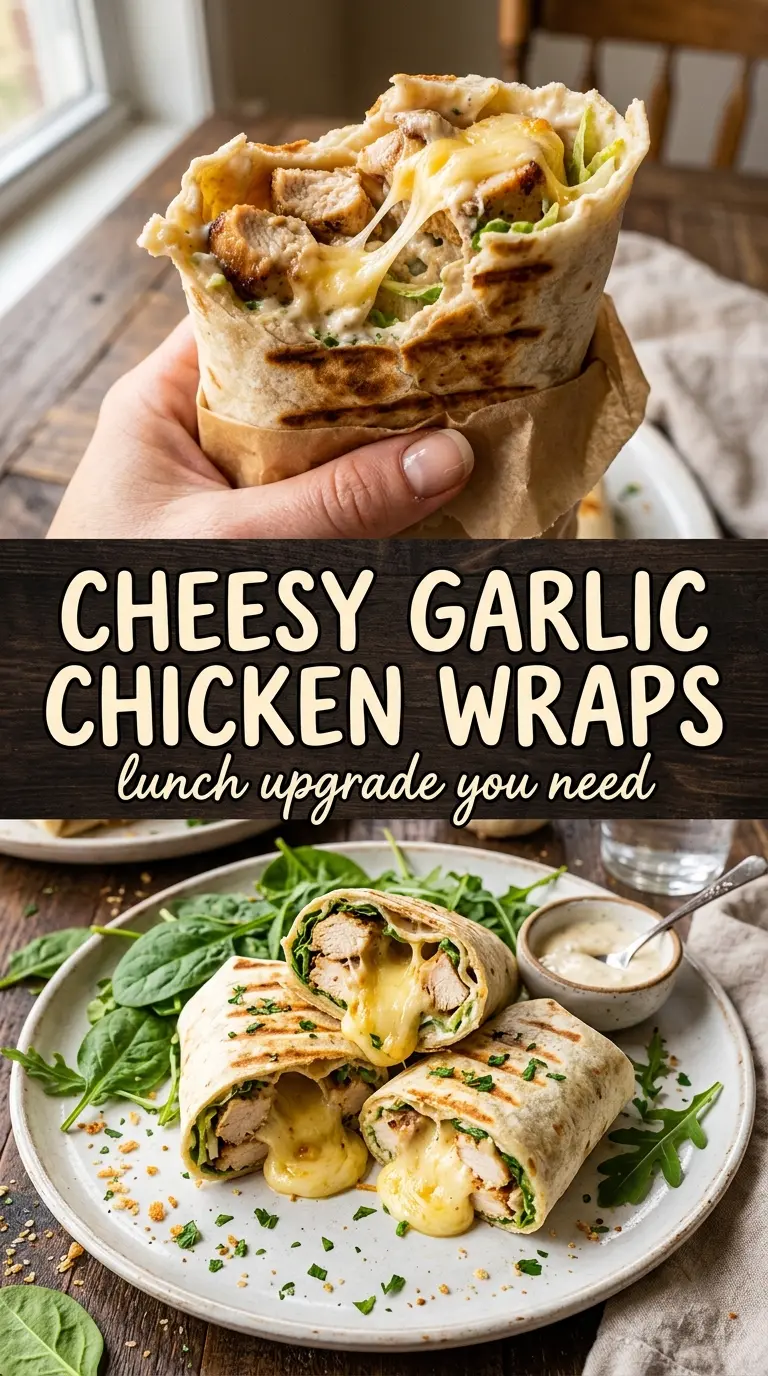
Cheesy garlic chicken wraps hit that sweet spot between fast lunch and real dinner. The tortillas toast up crisp and golden on the outside while the inside stays packed with buttery garlic chicken, melted mozzarella, cool romaine, and juicy tomato. Every bite has contrast, which is why these don’t taste like an afterthought wrap thrown together from leftovers.
The trick is cooking the chicken first, then using the same pan for the garlic butter. That keeps the garlic from burning and gives the chicken a richer finish without adding extra steps. Mozzarella works best here because it melts into long, stretchy strands instead of turning oily, and a light hand with dressing keeps the wrap from going soggy before it even hits the skillet.
Below, I’ve included the part that matters most: how to keep the tortilla crisp, how to avoid overfilling, and the swaps I actually trust when I want to change the wrap without losing what makes it good.
The garlic butter coated the chicken beautifully, and the wrap stayed crisp after toasting instead of getting greasy. My kids ate the whole thing without picking out the tomatoes, which never happens.
Love the melty mozzarella and garlic butter chicken? Save these cheesy garlic chicken wraps for a quick skillet dinner with a crisp toasted finish.
The Step That Keeps the Wrap Crisp Instead of Soggy
The wrap falls apart when the filling is too wet or too hot. Garlic chicken straight from the pan can steam the tortilla from the inside, and dressing spread too thickly turns the lettuce limp before the wrap ever reaches the skillet. Let the chicken sit for a minute after tossing it in the garlic butter, then build the wrap quickly so the tortilla warms and seals without softening.
Toasting seam-side down first matters more than people think. It locks the wrap shut before you flip it, which keeps the melted cheese from leaking out the sides. If the skillet is too hot, the tortilla browns before the cheese melts; medium heat gives you the balance you want: a golden shell, melted center, and no greasy scorch marks.
What Each Ingredient Is Actually Doing in This Wrap
- Flour tortillas — Large, soft tortillas are the structure here. You want something flexible enough to roll without tearing and sturdy enough to hold up to the skillet. Whole wheat works, but it tends to taste drier and can crack if it’s not warmed first.
- Chicken breasts — Cutting the chicken into strips gives you fast, even browning and keeps the filling easy to bite through. Thighs work too if you want richer flavor, but they’ll add a little more moisture, so let them cook off fully before wrapping.
- Butter and garlic — This is the backbone of the flavor. Butter carries the garlic into every bite, and tossing the cooked chicken in the pan right after it finishes picks up all that flavor without burning the garlic. Fresh garlic matters here; jarred garlic can taste flat once it hits the hot pan.
- Mozzarella — This cheese melts cleanly and stretches well, which is exactly what you want when you cut the wrap open. Pre-shredded works fine, but if you shred your own, it melts a little smoother because it doesn’t have the anti-caking coating.
- Romaine and tomatoes — These aren’t just filler. They bring crunch and freshness that keep the wrap from eating heavy. Slice the tomatoes and pat them dry if they’re extra juicy, or they’ll loosen the tortilla as the wrap sits.
- Ranch or Caesar dressing — Use enough to add flavor, not enough to soak the tortilla. Ranch keeps it creamy and familiar; Caesar gives the wrap a sharper, saltier edge that plays nicely with the garlic butter.
Building the Garlic Butter Filling Without Overcooking It
Cooking the Chicken Strips
Season the chicken before it hits the pan so the surface browns instead of steaming. Medium-high heat gives you color fast, but don’t crowd the skillet or the chicken will release moisture and turn pale. You’re looking for browned edges and opaque centers, with the thickest pieces reaching 165°F. Pull the chicken as soon as it’s done; it keeps cooking in the garlic butter.
Turning the Pan Drippings Into Garlic Butter
Drop the heat back a little before the garlic goes in. Garlic only needs about a minute, just until fragrant, and it goes bitter fast once the butter starts foaming hard. Toss the cooked chicken through the garlic butter while the pan is still warm so every strip gets coated. If the garlic starts browning, take the pan off the burner immediately and stir; burnt garlic will dominate the whole wrap.
Assembling and Toasting the Wrap
Warm the tortillas first so they fold without splitting. Spread the dressing in a thin layer, then add the cheese before the chicken so it has a chance to melt into the filling as the wrap toasts. Roll it tightly, tucking in the sides if you want a neater cut, and cook seam-side down first. If the tortilla browns before the cheese melts, lower the heat and give it another minute; the wrap should be crisp outside and soft, molten inside.
Three Ways to Change These Wraps Without Losing the Good Part
Dairy-Free Garlic Chicken Wraps
Swap the butter for olive oil or a dairy-free butter alternative, and use a plant-based shredded mozzarella that melts well. You’ll lose a little of the rich, round flavor that real butter gives the garlic, but the wrap still works if you keep the filling hot and the skillet medium so the tortilla toasts instead of drying out.
Low-Carb Lettuce Wrap Version
Use large romaine leaves or butter lettuce instead of tortillas and skip the skillet toast. The filling stays the same, but you’ll get a lighter, crunchier bite with less structure, so let the chicken cool slightly before assembling or it will wilt the leaves too fast.
Swap the Chicken for Rotisserie Chicken
Use shredded rotisserie chicken and warm it in the garlic butter just long enough to coat it. This cuts the cook time down even more, but you won’t get the same browned edges you get from searing raw chicken, so the flavor is a little softer and less caramelized.
Storage and Reheating
- Refrigerator: Store the assembled wraps for up to 2 days, but expect the lettuce to soften and the tortilla to lose some crispness.
- Freezer: These don’t freeze well once assembled. The lettuce and tomato go watery after thawing, so freeze only the cooked garlic chicken if you want to get ahead.
- Reheating: Reheat the chicken filling in a skillet over low heat or in the microwave until just warmed through, then build a fresh wrap and toast it. If you reheat the full wrap in the microwave, the tortilla turns chewy and the cheese won’t melt evenly.
Questions I Get Asked About This Recipe

Cheesy Garlic Chicken Wraps
Ingredients
Equipment
Method
- Season the chicken strips with salt and pepper, then cook them in 2 tablespoons butter in a skillet over medium-high heat for 5-6 minutes, until golden and cooked through to 165°F. Visual cue: golden edges on the strips as they finish cooking.
- In the remaining 2 tablespoons butter, cook the garlic for 1 minute until fragrant. Visual cue: you should smell garlic immediately as it turns lightly golden.
- Toss the cooked chicken strips in the garlic butter, then stir in the fresh parsley. Visual cue: the chicken looks glossy and evenly coated.
- Warm the tortillas until pliable, then spread ranch dressing over each. Visual cue: tortillas soften and flex without cracking.
- Layer shredded mozzarella, garlic chicken strips, romaine, and cherry tomatoes on each tortilla. Visual cue: a thick layer of cheese and chicken is visible across the center.
- Roll tightly and toast seam-side down in a skillet over medium heat for 2 minutes per side until golden and cheese is melted. Visual cue: the seam is sealed and the cut edge would show melted cheese stretching.
- Slice diagonally and serve immediately. Visual cue: you reveal melted mozzarella and the layered filling at the cut face.