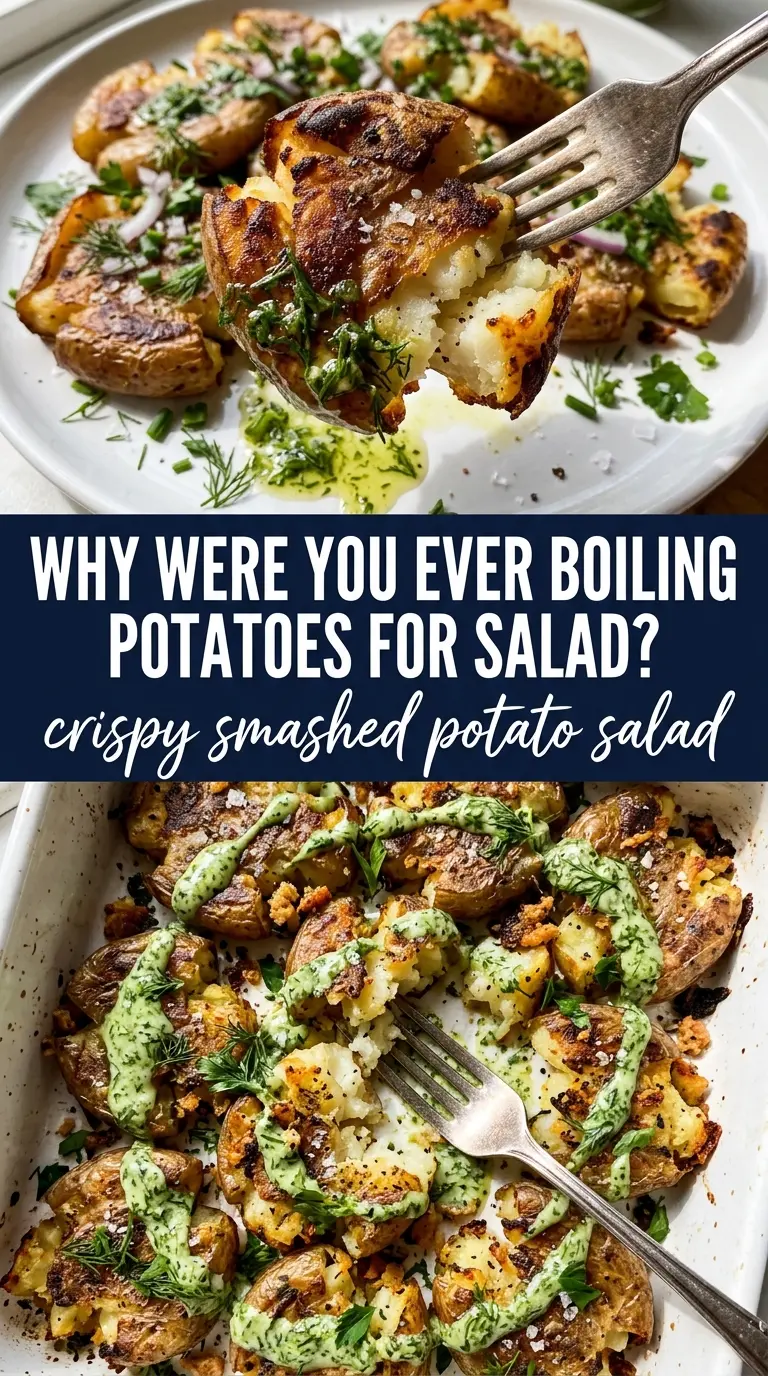
Crispy smashed potato salad lands in that sweet spot between warm roasted potatoes and the creamy, herby potato salad people keep going back for. The edges get deeply browned and shattery in the oven, while the centers stay tender enough to soak up the dressing without turning heavy or gluey. It eats like a side dish with a little attitude, which is exactly why it tends to disappear first.
The trick is giving the potatoes time to cool before they meet the dressing. If they go in too hot, the mayo and sour cream loosen up and slide right off instead of clinging in a thick coating. A hot oven, a generous smash, and enough space on the pan matter here too, because the crisp edges only happen when the potatoes roast instead of steam.
Below you’ll find the small details that make the texture work, plus a few smart swaps if you want to change the herbs, skip the bacon, or stretch the salad for a bigger crowd.
The potatoes got those crunchy edges I was hoping for, and waiting to toss them with the dressing kept everything creamy instead of greasy. My husband asked me to make it again for the next cookout.
Like this crispy smashed potato salad? Save it to Pinterest for the next time you want golden edges, creamy dressing, and bacon in every bite.
The Step Most Potato Salads Skip: Letting the Potatoes Brown, Not Steam
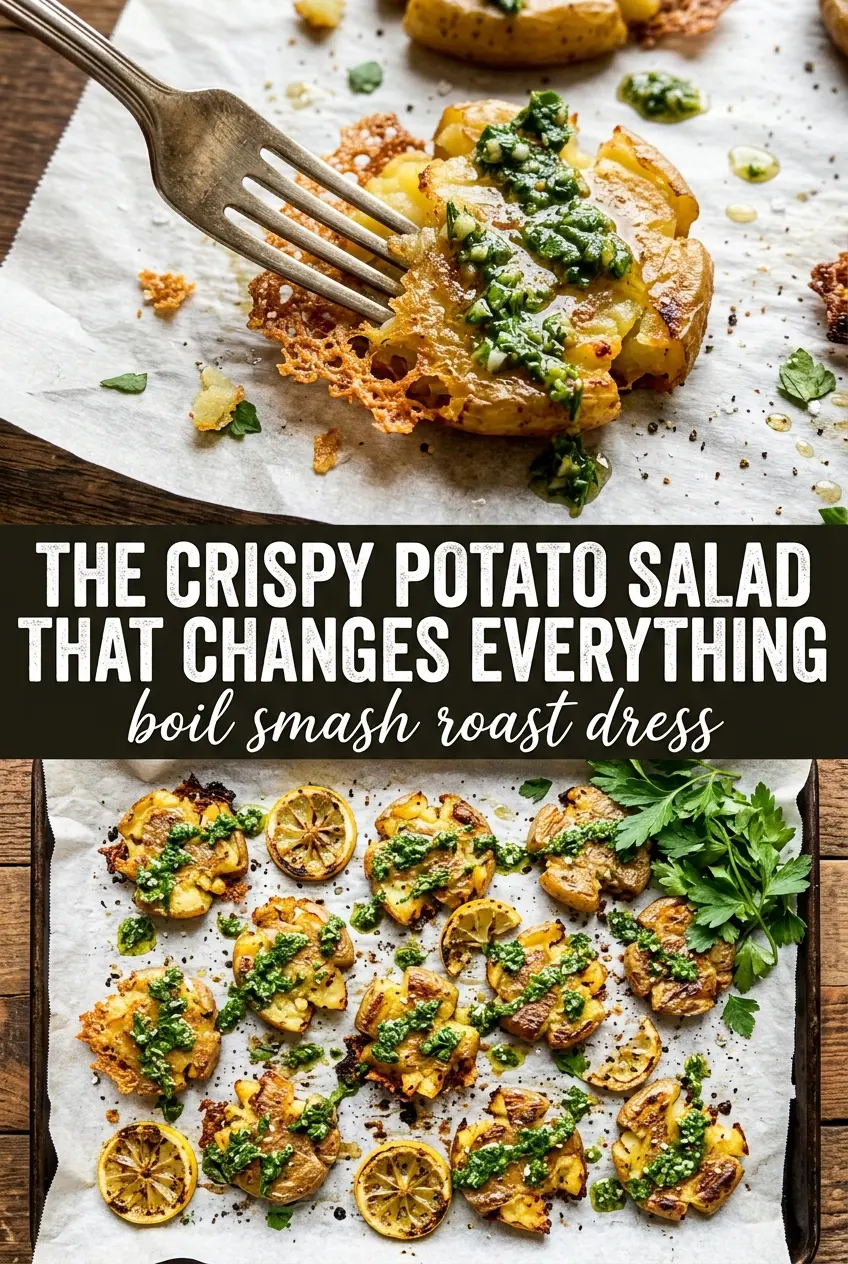
The crisp texture comes from two separate things working together: boiling the potatoes until they’re tender enough to smash, then roasting them hard enough to dry the surfaces and deepen the edges. If the potatoes are crowded on the pan, they trap steam and soften before they ever have a chance to crisp. Give them space, and use a hot oven so the cut surfaces can blister and brown before the centers collapse.
The cooling rest matters just as much as the roasting. Once the potatoes come out of the oven, the surface moisture settles and the texture firms up, which keeps the dressing from turning thin. That 30-minute rest also lets the salad stay defined instead of melting into a warm mash.
- Baby potatoes — Small potatoes hold their shape better after boiling and give you more crisp surface for the amount of flesh. Yukon golds work best if that’s what you have, but avoid big russets here; they break down too easily and don’t give the same smashed edges.
- Olive oil — This is what helps the potatoes blister in the oven. A neutral oil will work in a pinch, but olive oil gives better browning and a fuller taste on the finished potatoes.
- Mayonnaise and sour cream — Mayo gives body and cling, while sour cream adds tang and loosens the dressing just enough to coat without feeling heavy. Greek yogurt can stand in for sour cream if needed, but the dressing will be a little sharper and less silky.
- Dijon mustard — Dijon sharpens the dressing and keeps it from tasting flat. Whole-grain mustard works too, though it changes the texture slightly and makes the dressing look speckled.
- Fresh chives and dill — Fresh herbs matter here because they cut through the richness and keep the salad tasting bright. Dried herbs won’t give the same lift or clean finish.
- Bacon — Bacon adds salt, crunch, and a smoky finish that works especially well against the creamy dressing. If you skip it, add an extra pinch of salt and a little smoked paprika to bring back some of that depth.
What Each Ingredient Is Actually Doing When Potatoes Brown
- Potatoes (cut into pieces, uniform size) — Even-sized pieces cook at the same rate. Uneven pieces have some mushy and some undercooked.
- Oil (generous amount for browning) — The potatoes need oil to brown, not steam. Steaming makes them soft; browning creates flavor.
- High heat (hot enough to brown, not just cook) — Medium heat just boils the potatoes in their own steam. High heat creates the crust that makes roasted potatoes delicious.
- No covering (let the heat hit the potatoes directly) — A lid traps steam and creates boiling. Uncover so the heat can brown the potatoes.
- Minimal stirring (let them sit to develop crust) — The potatoes need to sit on the hot surface to brown. Constant stirring prevents this.
- Browning time (wait until deeply golden) — Don’t flip too early. The bottom should be dark golden and crispy before turning.
- Salt and seasoning (applied during cooking) — Season the potatoes while they cook so the salt absorbs. Season right before serving if needed.
- Optional: finishing with fresh herbs — Add fresh herbs right after cooking so they stay bright and don’t wilt from the heat.
Building the Crunch Before the Dressing Goes On
Boil Until the Centers Give Without Falling Apart
Start the potatoes in salted water and cook them until a fork slides in with little resistance, but the skins still look intact. If they go too far, they’ll collapse when you smash them and turn the pan into loose chunks instead of crisp-edged rounds. Drain them well and let the steam escape for a minute so the roasting step starts with dry potatoes, not wet ones.
Smash for Fractured Edges, Not Flat Disks
Move the potatoes to a baking sheet and press each one just once with the bottom of a glass or measuring cup. You want cracks and uneven ridges, not a smooth pancake, because those rough edges are what brown and crisp. If the potatoes stick to the glass, dip the bottom in a little oil first and press straight down rather than twisting.
Roast Hot and Leave Space
Brush or drizzle the potatoes with oil, season them well, and roast at 450°F until the edges are deep gold and the bottoms release cleanly from the pan. If they’re pale, they need more time; if they’re browning too fast before the centers dry out, move the tray to a lower rack. The goal is a crunchy shell with a creamy middle, not a burnt edge and a raw center.
Dress Only After the Potatoes Cool
Mix the mayonnaise, sour cream, Dijon, chives, and dill while the potatoes cool. Toss the potatoes only when they’ve had that full rest, or the dressing will loosen and slide off the hot surfaces. Fold in the bacon at the end so it keeps some crunch instead of softening in the warm bowl.
How to Adapt the Salad Without Losing the Texture
Dairy-Free Version That Still Coats the Potatoes
Swap the sour cream for a thick dairy-free plain yogurt and use a vegan mayo you trust. The result is still creamy and tangy, but a little lighter and less rich. Keep the potatoes fully cooled before tossing so the dairy-free dressing doesn’t loosen up.
Vegetarian Version With More Savory Depth
Leave out the bacon and add a small pinch of smoked paprika plus a little extra salt. You lose the smoky crunch, but the potatoes still taste full and balanced instead of like they’re missing something. A handful of finely chopped celery can also add back some fresh bite.
Extra-Crunchy Version for People Who Like More Texture
Roast the smashed potatoes a few minutes longer until the edges are deeply browned and the bottoms lift easily from the pan. You’ll get a more pronounced crackly bite, but watch the tray closely near the end because the difference between crisp and dry happens fast. This version holds up best if you serve it soon after tossing.
Storage and Reheating
- Refrigerator: Store leftovers for up to 3 days. The potatoes will soften as they sit, but the flavor stays good.
- Freezer: This one doesn’t freeze well once dressed. The dairy-based dressing separates and the potatoes turn grainy after thawing.
- Reheating: For the best texture, reheat the potatoes plain on a sheet pan in a 400°F oven, then add the dressing after they’ve cooled slightly. Microwaving softens the crisp edges and turns the salad heavy.
Answers to the Questions Worth Asking
Crispy Smashed Potato Salad
Ingredients
Equipment
Method
- Boil baby potatoes in salted water until tender when pierced with a fork, about 20-25 minutes, then drain thoroughly.
- Preheat oven to 450°F and place a sheet pan in the oven while it heats.
- Transfer drained potatoes to the hot baking sheet and smash each potato with the bottom of a glass until mostly flattened.
- Drizzle smashed potatoes with olive oil and season with salt and pepper to coat the rough surfaces.
- Roast for 25-30 minutes at 450°F until crispy and golden at the edges, then transfer to a plate.
- Let the roasted potatoes cool for 30 minutes until warm or cool to the touch, then keep them from steaming.
- Stir mayonnaise, sour cream, Dijon mustard, fresh chives, and fresh dill until smooth and evenly combined.
- Toss the crispy potatoes with the dressing until the smashed edges are lightly coated and still textured.
- Top with bacon and serve immediately or chill briefly to set the dressing.