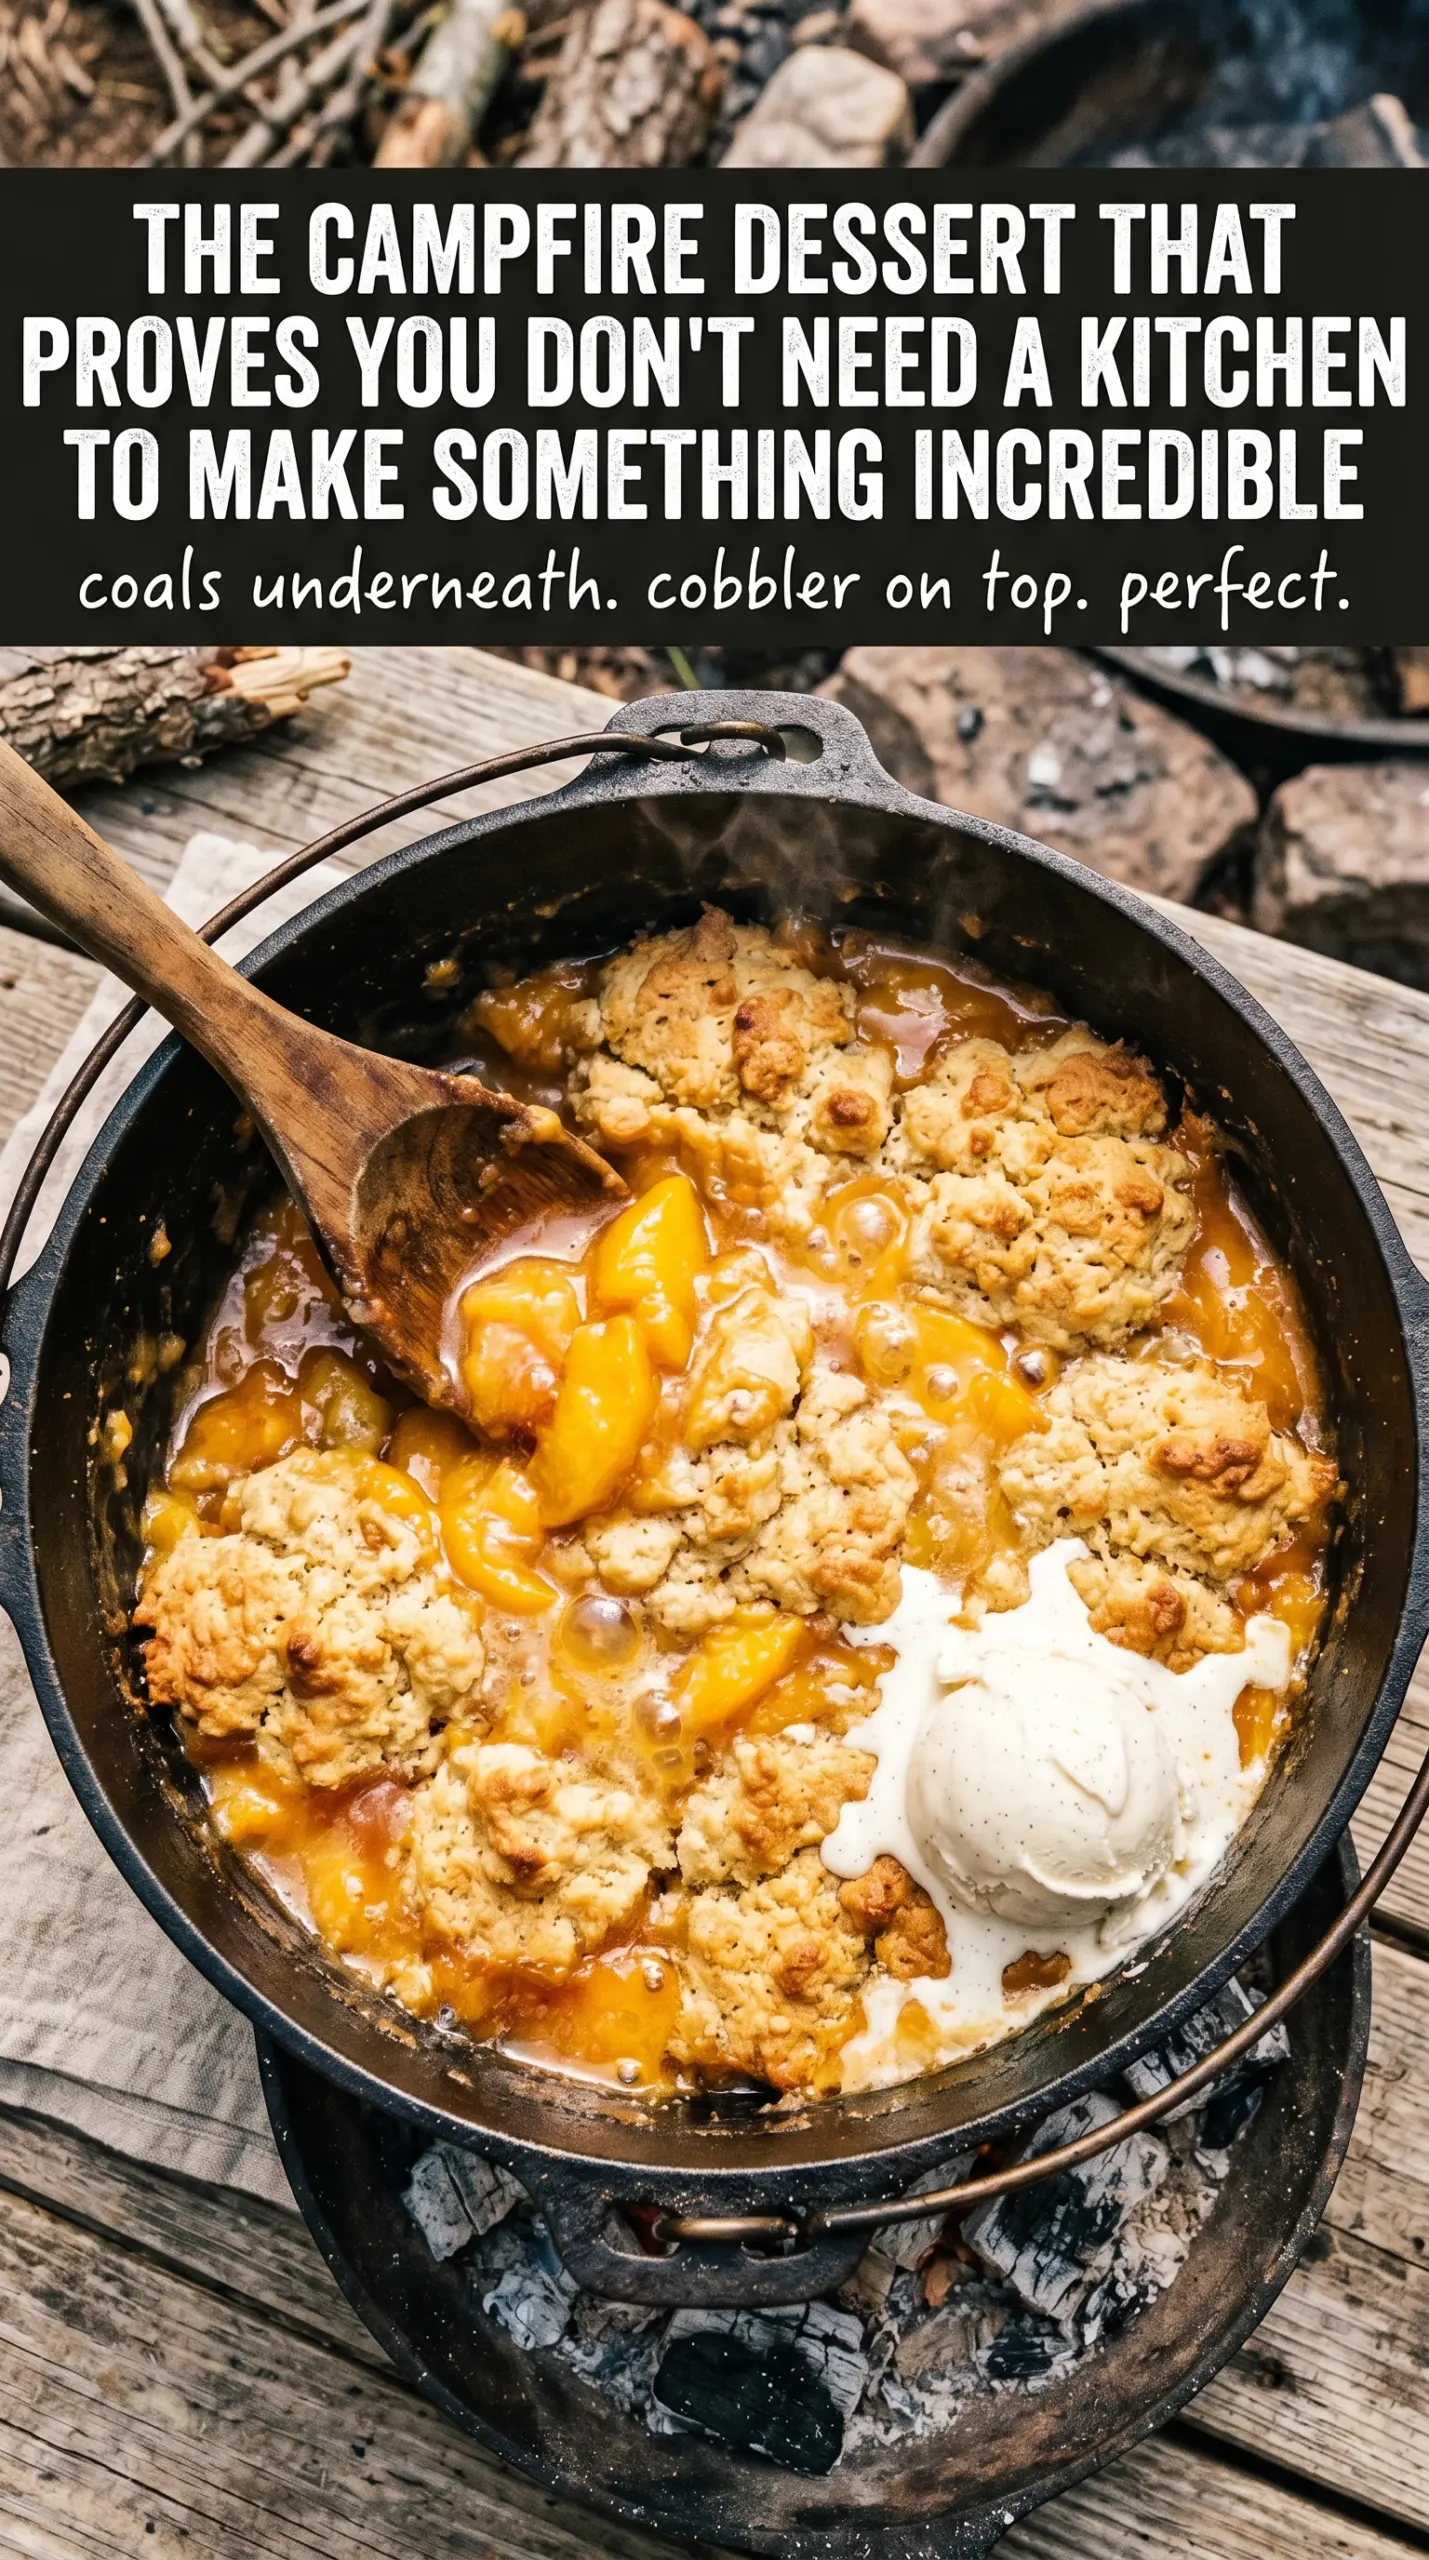
Golden cobbler with bubbling peach filling and a crisp, buttery top is the kind of dessert that disappears fast, whether you serve it at a campsite or bring the Dutch oven straight to the table. The peaches turn syrupy underneath the cake mix topping, and the edges bake up with those caramelized bits everyone reaches for first. It’s simple food, but it lands like something that took much more effort than it did.
The trick here is leaving the cake mix dry and letting the melted butter do the work. That gives you those soft, tender patches on top along with deeper browned spots where the butter hits the flour and sugar just right. Draining the peaches helps keep the filling from turning watery, though a little juice is a good thing because it helps the sugar and spices melt into a proper cobbler sauce.
Below, I’ve included the one detail that keeps the topping from baking up powdery, plus a few useful variations if you’re making this at home instead of over coals.
The topping baked up crisp in spots and soft in the middle, and the peaches turned into that thick, bubbly filling I was hoping for. I used the full 10-minute rest and it served cleanly with ice cream.
Save this Dutch Oven Peach Cobbler for the nights when you want bubbling peaches and a buttery cake topping with almost no cleanup.
The Small Mistake That Turns Cobbler Filling Watery
The biggest failure in Dutch oven cobbler is too much liquid in the bottom before the topping even starts to set. Canned peaches carry their own syrup, and if you leave all of it in the pan, the cake mix sits on top of a soup instead of baking into a real crust. Draining the peaches gives you a thickened filling with just enough moisture left to help the sugar dissolve and the spices bloom.
The second thing people miss is the topping order. The dry cake mix has to stay on top, and the butter needs to be drizzled evenly enough to moisten most of it. If you dump the butter in one spot, you’ll end up with dry pockets of floury mix next to greasy patches, which is exactly how you get a cobbler that tastes unfinished.
What Each Ingredient Is Doing In This Dutch Oven Cobbler
- Peaches — Canned sliced peaches keep this reliable and fast, and they’re soft enough to turn jammy without needing pre-cooking. Fresh peaches work in peak season, but they need peeling and slicing, and you’ll want a little extra sugar if they aren’t very ripe.
- Yellow cake mix — This is what gives you the cobbler topping without mixing a separate dough. A homemade biscuit topping can be lovely, but the cake mix creates a more tender, slightly craggy crust that works especially well with the melted butter method.
- Butter — Melted butter is what turns the dry mix into a browned topping instead of a sandy layer. Use real butter here; a substitute won’t give you the same richness or those browned pockets across the top.
- Cinnamon and nutmeg — These don’t overpower the peaches, but they give the filling warmth and make the fruit taste fuller. Freshly grated nutmeg is a nice upgrade if you have it, though the pre-ground version still does the job.
- Sugar — The peaches need a little extra sweetness, especially if your canned fruit is packed in juice instead of heavy syrup. It also helps build that glossy, spoonable filling once the cobbler bubbles up.
How To Build The Cobbler So The Top Bakes And The Fruit Thickens
Layering The Peaches First
Spread the drained peaches in an even layer across the bottom of the Dutch oven. You want a level base so the filling cooks consistently and the topping doesn’t slide into one side. Sprinkle the sugar and spices over the peaches instead of stirring; that keeps the fruit intact and lets the seasoning melt into the juices as the cobbler heats.
Leaving The Cake Mix Alone
Pour the dry cake mix over the fruit in an even layer, then stop. Don’t stir it in. The dry mix needs to stay on top so the butter can seep down through it and create a baked crust rather than a batter. If the mix clumps in one area, gently spread it with the back of a spoon so every section gets a chance to absorb fat.
Drizzling The Butter Evenly
Slowly pour the melted butter over as much of the cake mix surface as you can. The goal is to moisten the top in patches without flooding one corner. Any dry white spots left behind usually stay powdery after baking, so take a minute to cover them as evenly as possible. If you’ve got a few small dry areas at the end, that’s fine; they’ll still brown around the edges once the cobbler starts bubbling.
Baking Until The Filling Is Active
Cover the Dutch oven and bake with coals on top and underneath until the topping is golden and the filling is bubbling at the edges and through the center. That bubbling matters more than the clock alone, because it tells you the peaches have thickened and the topping has set. Pull it too early and the middle will look pale and wet; let it go until the top has real color and the fruit is visibly simmering.
How To Adapt This For The Oven, Fresh Peaches, Or A Lighter Finish
Bake It In The Oven Instead Of Over Coals
Set the assembled cobbler in a 350°F oven and bake until the top is golden and the filling bubbles around the edges, usually about 35 to 45 minutes. You lose the smoky campfire note, but the texture stays the same if the heat is steady and the dish is uncovered only when serving.
Use Fresh Peaches When They’re In Season
Peel and slice about 8 to 10 cups of ripe peaches, then add a splash of water or peach juice if they seem dry. Fresh fruit tastes brighter and a little less syrupy than canned peaches, so the filling will be more delicate and less jam-like.
Make It Gluten-Free
Use a gluten-free yellow cake mix in the same amount and keep the rest of the method unchanged. The topping will still brown and crisp, though it can bake a touch more crumbly, so give it the full bake time until the center is set.
Use Less Sugar For A Brighter Peach Flavor
Cut the sugar back to 2/3 cup if your peaches are packed in heavy syrup or you like a less sweet dessert. You’ll get a sharper fruit flavor and a topping that tastes a little more balanced, but the cobbler will need those extra spices to keep the filling from tasting flat.
Storage and Reheating
- Refrigerator: Store leftovers covered for up to 4 days. The topping softens as it sits, but the flavor stays good.
- Freezer: You can freeze baked cobbler for up to 2 months, though the topping will lose some crispness. Cool it completely, wrap it tightly, and thaw in the refrigerator before reheating.
- Reheating: Rewarm in a 325°F oven until hot in the center. The microwave works in a pinch, but it turns the topping soft and steamy instead of bringing back any texture.
Answers To The Questions Worth Asking

Dutch Oven Peach Cobbler
Ingredients
Equipment
Method
- Spread the drained sliced peaches in the bottom of the Dutch oven so they form an even layer. Keep the surface fairly level for consistent bubbling.
- Sprinkle the sugar, cinnamon, and nutmeg evenly over the peaches. Aim for full coverage so the filling tastes balanced in every bite.
- Pour the yellow cake mix evenly over the peaches without stirring. Leave the mix as a dry blanket so it turns golden as it bakes.
- Drizzle the melted butter over the cake mix, covering as much as possible. Use a slow drizzle to help the butter soak through the dry layer.
- Cover the Dutch oven with its lid and place it on campfire coals with additional coals on top of the lid. This creates heat from both the bottom and the top.
- Cook for 40-45 minutes, until the topping is golden and the peaches are bubbling. If needed, rotate the Dutch oven once during cooking for even browning.
- Let the cobbler cool for 10 minutes before serving. This helps the filling thicken slightly and makes scooping easier.
- Serve warm with vanilla ice cream. Scoop into bowls so you get both bubbling peach filling and golden topping.