These Easter Bunny M&M’s Cookies are a fun twist on the classic cookie! They’re soft, chewy, and packed with colorful M&M’s that make them extra cheerful.
Baking these cookies always brings a smile to my face, especially when I catch a few cute M&M bunnies hopping around the kitchen! 🐰 I love sharing them with family during the holiday!
Key Ingredients & Substitutions
All-purpose flour: This is your base ingredient. If you’re gluten-sensitive, try using a gluten-free all-purpose blend. I’ve had success with blends that include rice flour and tapioca starch.
Unsalted butter: Softened butter gives good creaminess to these cookies. If you’re looking for a dairy-free option, coconut oil or vegan butter can work well too!
Easter pastel-colored M&M’s: The colorful candy adds great fun! If you can’t find pastel M&M’s, regular ones or another colored chocolate candy will do. You could even use chocolate chips for a simpler cookie.
White chocolate chips: These help the dough hold its shape. If you’d rather skip them, just use more flour for stability or try yogurt chips to maintain sweetness without added sugar.
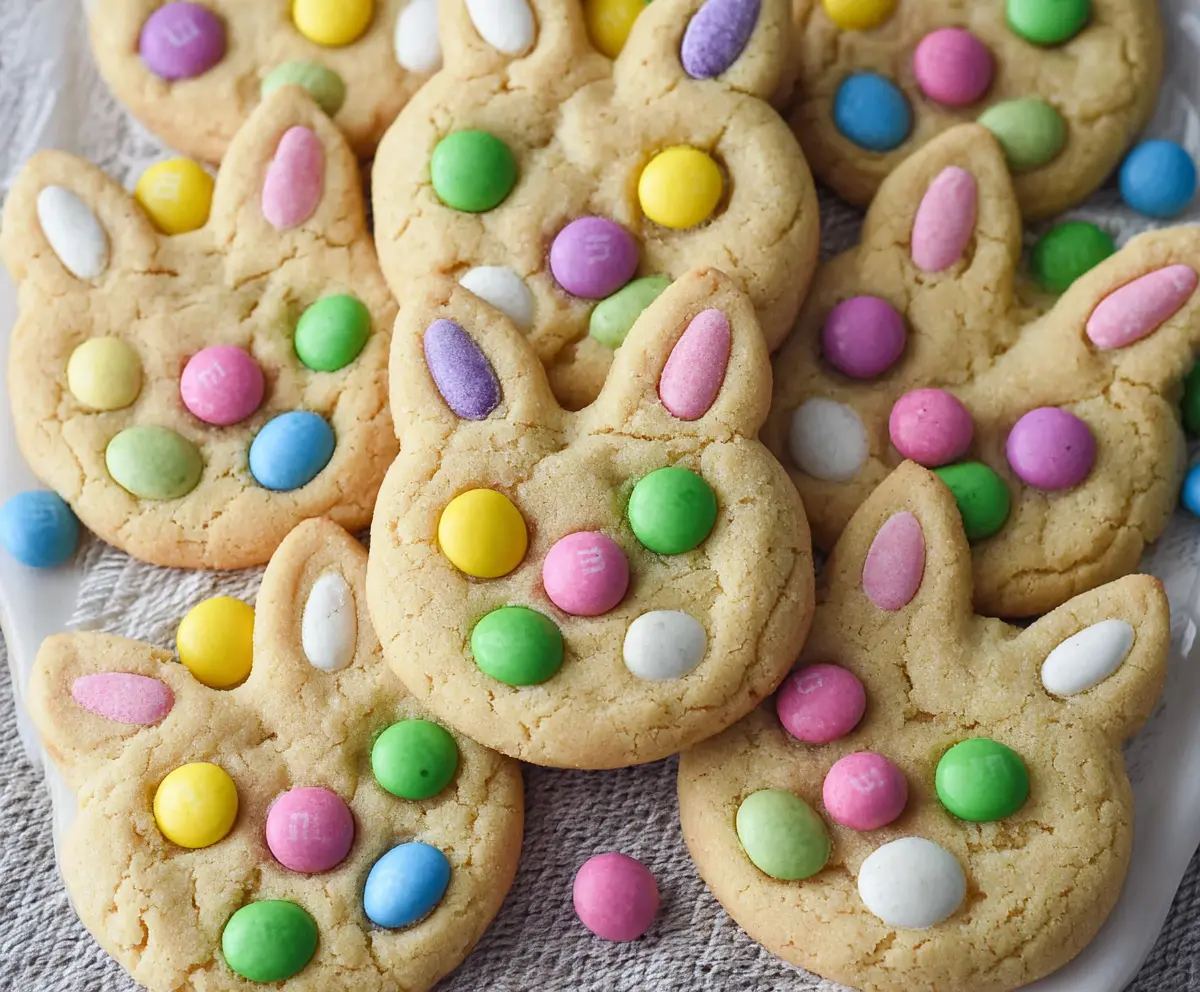
How Do You Create the Perfect Bunny Shape?
Shaping the cookies can be tricky. But shaping them into a bunny face is part of the fun! Here’s how to get the best bunny shape:
- Start with a dollop of dough about 2 tablespoons in size.
- Roll it into a ball, then gently flatten it to form a round disk.
- Pinch the top to create two “ears.” Make sure not to overwork the dough to keep them soft!
Using your fingers to pinch gently will help form the ears nicely. And don’t forget to press in those M&M’s for decorating before baking!

How to Make Easter Bunny M&M’s Cookies
Ingredients You’ll Need:
For The Cookie Dough:
- 2 ½ cups all-purpose flour
- 1 tsp baking soda
- ½ tsp salt
- 1 cup unsalted butter, softened
- 1 cup granulated sugar
- ½ cup packed light brown sugar
- 2 large eggs
- 2 tsp vanilla extract
- 1 ½ cups white chocolate chips or white candy coating chips (optional for bunny shape firmness)
- 1 ½ cups Easter pastel-colored M&M’s candies (regular size and some mini for ears)
- Cooking spray or parchment paper for the baking sheet
How Much Time Will You Need?
This Easter-themed cookie recipe takes about 15-20 minutes of preparation time and around 10-12 minutes for baking. After baking, allow 5 minutes for cooling on the baking sheet before transferring them to a wire rack. In total, you’re looking at roughly 30-35 minutes of delicious fun!
Step-by-Step Instructions:
1. Preheat The Oven:
First things first! Preheat your oven to 350°F (175°C). While that’s getting warm, line your baking sheets with parchment paper or lightly grease them with cooking spray to prevent sticking.
2. Mix The Dry Ingredients:
In a medium-sized bowl, sift together the flour, baking soda, and salt. This helps to combine everything evenly and makes sure there are no lumps. Set this bowl aside for now.
3. Cream The Butters and Sugars:
In a large mixing bowl, cream together the softened butter, granulated sugar, and brown sugar. Use an electric mixer or a sturdy spoon to blend until the mixture is light and fluffy—about 2-3 minutes. This is what makes your cookies soft!
4. Add Eggs and Vanilla:
Next, beat in the eggs one at a time, making sure each one is well mixed in before adding the next. Then stir in the vanilla extract. This will give your cookies that delicious flavor we all love!
5. Combine Wet and Dry Ingredients:
Now it’s time to bring it all together! Gradually add the dry ingredients into the wet mixture, mixing just until combined. Be careful not to over-mix—this will keep the cookies tender.
6. (Optional) Fold In White Chocolate:
If you’re using white chocolate chips or candy coating chips, fold them in gently at this point. They help the cookies hold their bunny shape nicely!
7. Shape The Cookies:
Take small portions of dough and roll them into balls, then flatten them gently. To make a bunny face, shape them so there are two points at the top for ears by pinching the dough slightly.
8. Prepare for Baking:
Place the shaped cookies on your prepared baking sheets, leaving about 2 inches of space between each one to allow for spreading.
9. Decorate With M&M’s:
Press the Easter pastel-colored M&M’s into the dough. Place smaller M&M’s for the ears and use the regular-sized ones to create eyes and a nose. Get creative!
10. Bake The Cookies:
Pop the baking sheets into your preheated oven and bake for 10-12 minutes, or until the edges turn a lovely golden color. Your kitchen will start smelling amazing!
11. Cooling Time:
Once baked, remove the cookies from the oven and let them sit on the baking sheet for about 5 minutes. This allows them to settle and become easier to move.
12. Enjoy Your Cookies!
Transfer the cookies to a wire rack to cool completely. Then serve them up and enjoy your festive Easter Bunny M&M’s Cookies! Perfect for sharing with family and friends this holiday season!
Can I Use Whole Wheat Flour Instead of All-Purpose Flour?
Yes, you can substitute whole wheat flour for all-purpose flour, but the cookies may turn out denser. If you do, consider adding a tablespoon or two of extra liquid (like milk) to the dough to compensate.
What If I Don’t Have White Chocolate Chips?
No problem! If you don’t have white chocolate chips, you can skip them altogether or replace them with more M&M’s, chocolate chips, or even chopped nuts for a different texture.
How Do I Make These Cookies Chewy?
To achieve chewier cookies, avoid over-mixing the dough, and consider chilling it in the refrigerator for at least 30 minutes before baking. This helps maintain moisture during baking and results in a deliciously chewy texture.
How to Store Leftover Cookies?
Store any leftover cookies in an airtight container at room temperature for up to 5 days. For longer storage, you can freeze them in a single layer, then transfer them to a freezer bag for up to 3 months. Just thaw at room temperature before enjoying!