These fun Easter Bunny M&M’s Cookies are soft, chewy, and filled with colorful chocolate candies that cheer you up! Perfect for your spring celebrations.
Baking these cookies is a breeze, and the kids love helping out! They tiptoe around the kitchen to sneak a taste before I say they’re ready. 🍪🐰
Key Ingredients & Substitutions
All-purpose flour: This is your main ingredient for structure. If you’re looking for gluten-free options, try a gluten-free all-purpose flour blend. My go-to brand works great for cookies without changing the texture much!
Unsalted butter: I love using melted butter here; it adds a rich flavor. If you’re lactose intolerant, you can replace it with coconut oil or a plant-based butter alternative, though the flavor will change slightly.
Easter-themed M&M’s: These add color and fun! If they’re unavailable, regular M&M’s work perfectly. For a healthier spin, try mini chocolate chips or dried fruit for a different texture and flavor.
Brown sugar: This sugar adds to the chewiness. You can use coconut sugar or a mix of white sugar if desired, but I highly recommend sticking with brown sugar for that irresistible flavor.
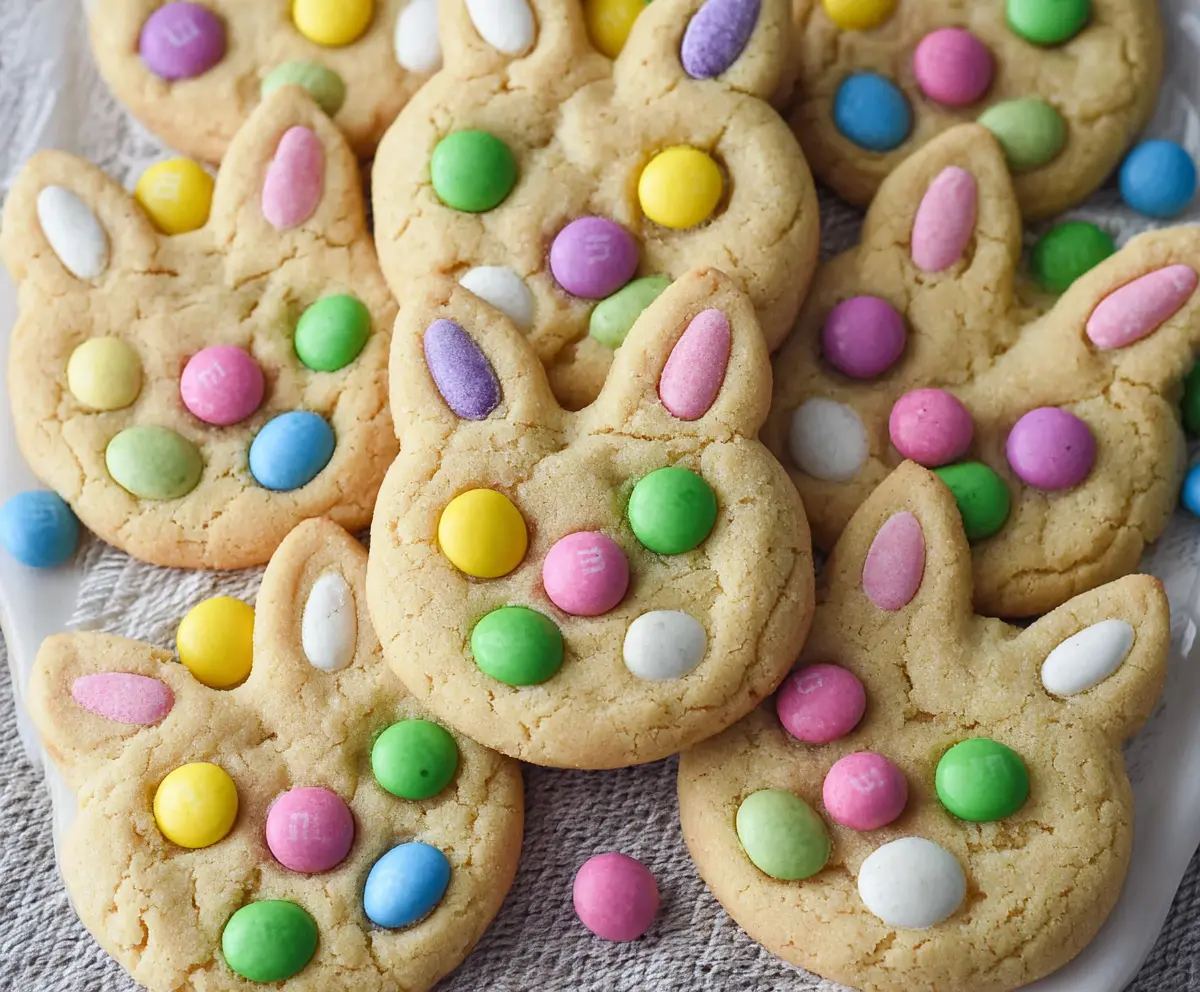
How Do I Shape the Cookies into Bunny Faces?
Shaping the cookies into adorable bunny faces is key to their charm! After forming the dough into rounds, flatten them slightly for baking. For the ears, you can pinch the top of the cookie or use a knife to shape them out. Here’s how:
- Split the cookie dough ball into a rounded top and two smaller sections for ears.
- Pinch the top center to form the bunny’s head, and shape each side into tall ear points.
- Gently press the dough at the bottom of each ear to secure it.
To finish, press your additional M&M’s to create features such as eyes and a nose. It doesn’t have to be perfect; each bunny can have its unique look!

How to Make Easter Bunny M&M’s Cookies
Ingredients You’ll Need:
For the Cookie Dough:
- 2 1/4 cups all-purpose flour
- 1/2 teaspoon baking soda
- 1/2 teaspoon salt
- 3/4 cup unsalted butter, melted and slightly cooled
- 1 cup packed brown sugar
- 1/2 cup granulated sugar
- 1 tablespoon vanilla extract
- 1 large egg plus 1 egg yolk, at room temperature
- About 1 1/2 cups Easter-themed M&M’s candy-coated chocolates (or regular mixed colors)
- Additional M&M’s for decorating (multicolored and some elongated for bunny ears)
How Much Time Will You Need?
This cookie recipe takes about 15 minutes to prepare and 10-12 minutes to bake. After baking, let the cookies cool for a few minutes before transferring them to a wire rack. In total, you’ll spend about 30 minutes to have a lovely batch of festive cookies ready to enjoy!
Step-by-Step Instructions:
1. Preheat the Oven:
Start by preheating your oven to 350°F (175°C). While it warms up, line your baking sheets with parchment paper or silicone baking mats to prevent sticking.
2. Mix the Dry Ingredients:
In a medium bowl, whisk together the flour, baking soda, and salt. This step will ensure that your cookies expand evenly while baking. Once mixed, set this bowl aside.
3. Combine Wet Ingredients:
In a large bowl, mix the melted butter, brown sugar, and granulated sugar together until the mixture is smooth and creamy. This should take about 2-3 minutes of stirring.
4. Add Eggs and Vanilla:
Add the vanilla extract, egg, and egg yolk to the butter-sugar mixture. Beat everything together until well combined. It should be thick and creamy!
5. Combine Wet and Dry Mixtures:
Gradually add the dry ingredients to the wet ingredients, mixing just until combined. It’s important not to overmix, as that can make the cookies tough. You want a nice, soft dough.
6. Fold in M&M’s:
Gently fold in about 1 cup of the M&M’s into the cookie dough, being careful not to break them. These will add sweetness and color to your cookies!
7. Shape the Cookies:
Using a cookie scoop or a spoon, portion the dough onto your prepared baking sheets, spacing them about 2 inches apart. Flatten each cookie dough ball slightly into a round disc.
8. Shape the Bunny Faces:
If you’re feeling creative, shape the discs into bunny heads by pinching parts of the dough to form ears. Alternatively, you can use a bunny-shaped cookie cutter if you have one!
9. Decorate Your Cookies:
Now comes the fun part! Press the additional M&M’s into the tops of each cookie to create faces—think eyes, nose, mouth, and ears. Make sure they stick but be gentle so they don’t break.
10. Bake the Cookies:
Put your baking sheets in the oven and bake for about 10-12 minutes, or until the edges are set and just starting to brown. The centers will look soft; that’s perfect!
11. Cool Before Serving:
Once baked, remove the cookies from the oven and let them cool on the baking sheet for about 5 minutes. Then, transfer them to a wire rack to cool completely.
12. Enjoy!
Finally, serve your festive Easter bunny cookies to friends and family! They’re soft, subtly sweet, and sure to bring smiles with their playful bunny designs.
Can I Use Different Types of Candy for Decoration?
Absolutely! While Easter-themed M&M’s are fun and festive, feel free to use any candy you like. Mini chocolate eggs, jellybeans, or even chocolate chips can create a delightful touch to your bunny cookies.
Can I Make the Dough Ahead of Time?
Definitely! You can prepare the cookie dough ahead of time and refrigerate it for up to 3 days. Just make sure to cover it tightly in plastic wrap or place it in an airtight container. Let it sit at room temperature for about 15-20 minutes before scooping and shaping.
How Should I Store Leftover Cookies?
Store your leftover cookies in an airtight container at room temperature for up to a week. If you want to keep them longer, you can freeze the cookies in a freezer-safe bag for up to 3 months. Just thaw them at room temperature before enjoying!
Why Are My Cookies Spreading Too Much?
If your cookies are spreading excessively during baking, it could be due to warm dough or not enough flour. Make sure your butter is only slightly cooled and not hot. Also, check that you’re accurately measuring your flour and not packing it into the measuring cup too tightly. You can also refrigerate the dough for 30 minutes before baking to help with spreading.