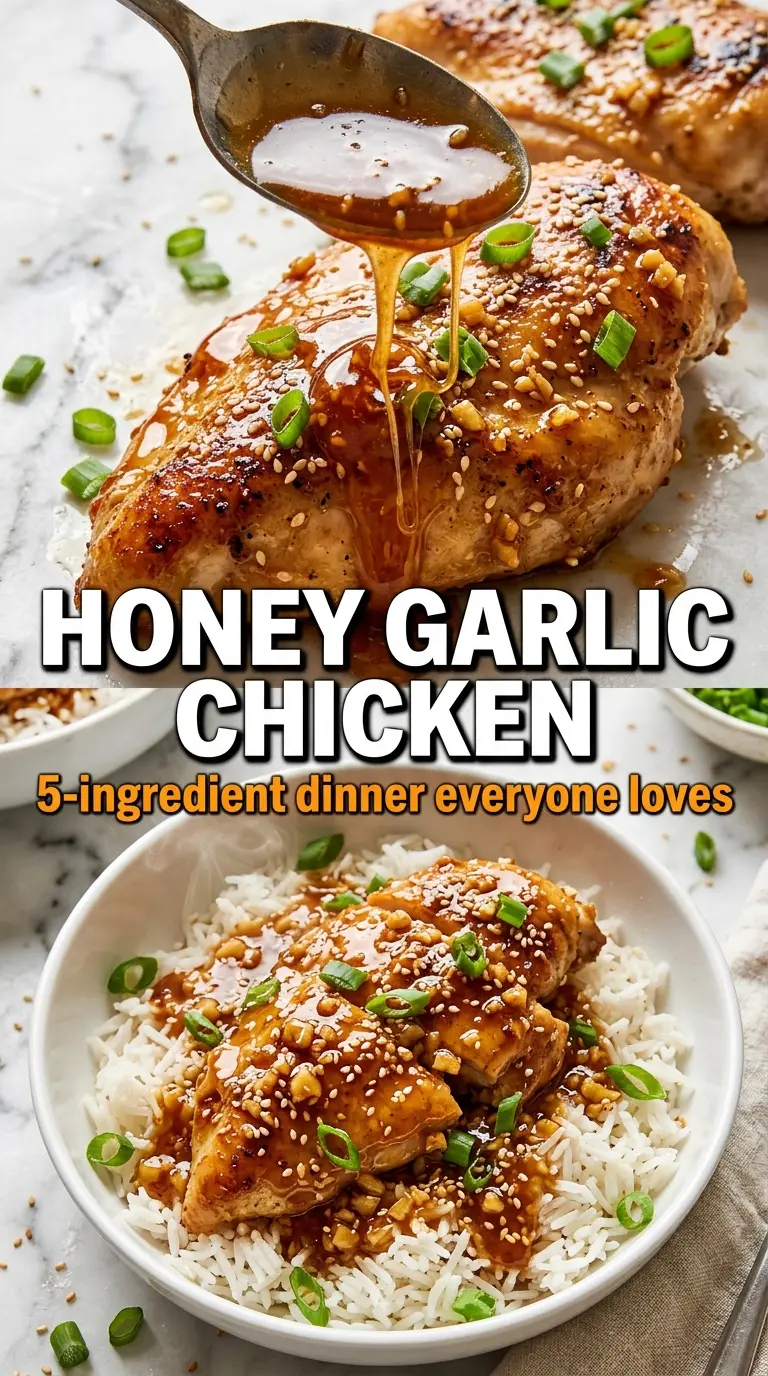
Sticky honey garlic chicken earns its place in the dinner rotation because the glaze turns glossy and clingy instead of thin and sugary, and the chicken stays juicy under that burnished coating. The sauce grabs onto every seared edge, then settles into the pan with just enough shine to spoon over rice.
The trick is building the glaze in the same skillet you used for the chicken. Those browned bits left behind give the sauce depth, and the cornstarch slurry tightens it into a lacquer instead of a loose sauce. A quick simmer after the honey and soy sauce go in keeps the garlic from tasting raw and keeps the butter from separating.
Below you’ll find the timing that keeps the chicken from drying out, plus a few swaps that still give you that sticky, amber finish.
The sauce thickened into that perfect sticky glaze, and the garlic never burned. I served it over rice, and my husband went back for seconds before I even sat down.
Save this honey garlic chicken for the nights when you want a glossy skillet glaze that clings to every bite.
The Reason the Glaze Stays Sticky Instead of Turning Watery
Most honey garlic chicken goes wrong when the sauce is rushed. Honey needs a little reduction time, and the cornstarch needs a brief simmer to thicken properly. If you add the chicken back before the sauce has some body, it never really coats; it just slides off and pools like thin syrup.
The other trap is heat. Garlic burns fast once butter is in the pan, and burnt garlic tastes sharp instead of sweet. Pulling the pan off the highest heat before the honey goes in gives you a clean, glossy sauce with dark amber color instead of bitter spots.
What Each Ingredient Is Doing in the Pan
- Chicken breasts — Boneless, skinless breasts sear quickly and stay neat under the glaze. If yours are thick, slice them in half horizontally or pound them to even thickness so they cook through before the outside dries out.
- Honey — This is what gives the sauce that lacquered finish. There isn’t a real substitute that behaves the same way, but maple syrup will work in a pinch with a slightly deeper, less floral sweetness and a looser shine.
- Soy sauce — It brings salt and the savory backbone that keeps the glaze from tasting flat. Use low-sodium if that’s what you keep on hand, but don’t swap in straight salt or the sauce loses depth.
- Rice vinegar — A small amount keeps the honey from turning cloying and helps the sauce taste brighter. Lemon juice can stand in if needed, but it reads sharper and a little less round.
- Cornstarch slurry — This is what turns the pan juices into a coating sauce. Mix it with cold water first, then simmer long enough for the cloudiness to disappear and the glaze to tighten.
- Butter and garlic — Butter carries the garlic flavor and gives the sauce a silky finish. Mince the garlic finely so it softens fast; big pieces are the first thing to burn.
Getting the Sear Before the Glaze Goes In
Seasoning and Searing the Chicken
Pat the chicken dry, then season it well with salt, pepper, and garlic powder. A dry surface gives you better browning, and that browning is what keeps the final dish tasting like more than just sweet sauce. Add the chicken to hot oil and leave it alone until it releases from the pan with a deep golden crust. If it sticks, it isn’t ready to turn yet.
Cooking the Sauce in the Same Skillet
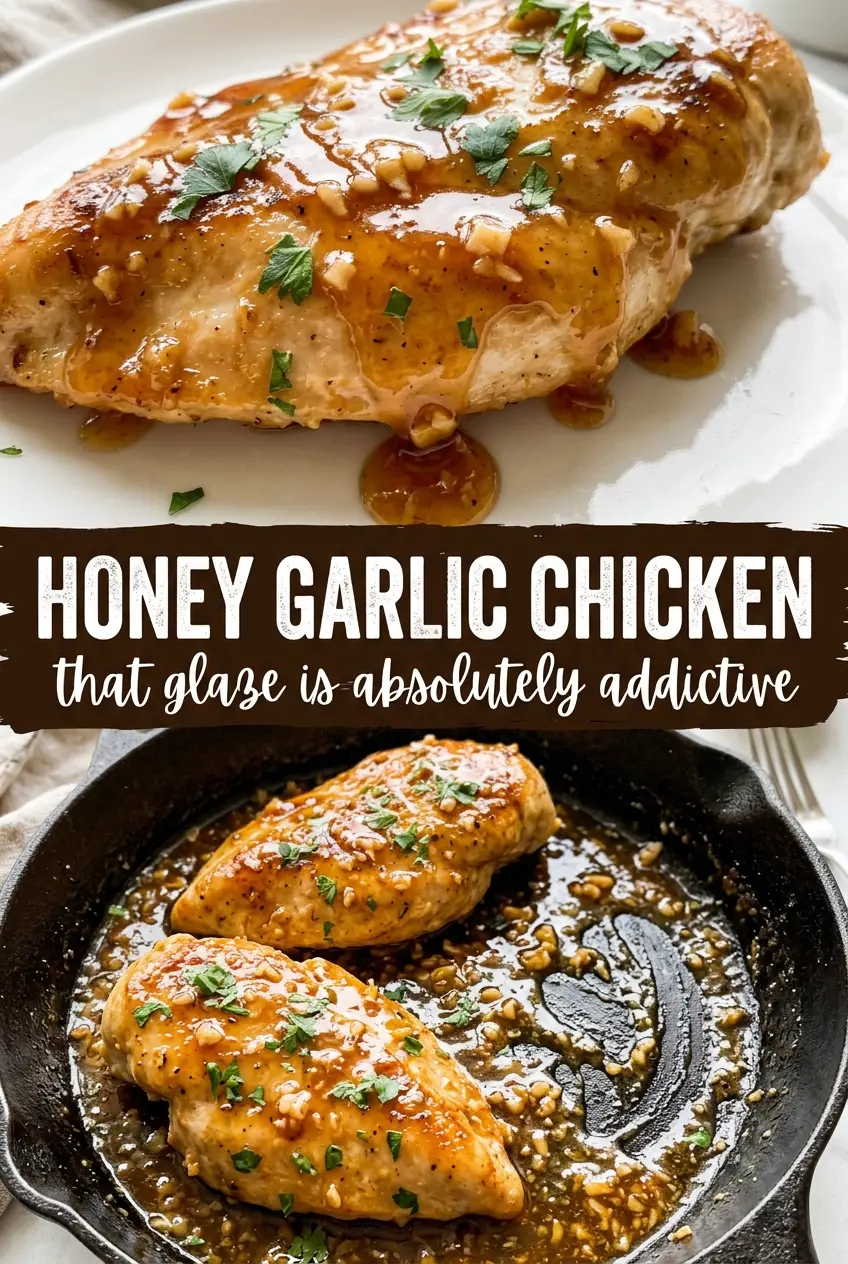
Take the chicken out once it reaches 165°F and set it aside while you build the sauce. Keep the skillet; those browned bits are part of the flavor. Cook the garlic in butter just until fragrant, then stir in the honey, soy sauce, and vinegar. The sauce should look loose at first and start to bubble around the edges.
Turning It Into a Sticky Finish
Stir in the cornstarch slurry and simmer until the sauce looks glossy and lightly thickened. It should coat the back of a spoon, not sit like jelly. Return the chicken to the skillet and turn it through the glaze for a minute or two so every surface gets coated. If the sauce tightens too much, a splash of water brings it back without breaking the shine.
Make It with Thighs Instead of Breasts
Boneless skinless thighs stay juicier and forgive a longer sear, which makes them a good swap if you tend to overcook chicken breasts. Cook them a minute or two longer per side, then finish by temperature, not by the clock.
Gluten-Free Version
Use tamari or a certified gluten-free soy sauce in place of standard soy sauce. The glaze will still brown and thicken the same way, and the flavor stays close to the original.
Dairy-Free Adjustment
Swap the butter for a neutral oil or a plant-based butter if you need to skip dairy. You’ll lose a little of the sauce’s roundness, but the sticky texture and amber color still come through.
Make It Spicy
Add a pinch of red pepper flakes with the garlic or stir in a little chili paste with the honey. The heat wakes up the sweetness and makes the glaze taste less dessert-like without changing the texture.
Storage and Reheating
- Refrigerator: Store leftovers in an airtight container for up to 4 days. The glaze thickens as it chills, which is normal.
- Freezer: It freezes well for up to 2 months, though the sauce may look a little softer after thawing. Freeze in portions with extra sauce so the chicken doesn’t dry out.
- Reheating: Reheat gently in a skillet over low heat with a splash of water to loosen the glaze. Microwaving on high can make the chicken rubbery and the sauce split.
Answers to the Questions Worth Asking
Honey Garlic Chicken
Ingredients
Equipment
Method
- Season the chicken breasts with salt, pepper, and garlic powder, coating both sides. Heat olive oil in a large skillet over medium-high heat and place chicken in the pan.
- Sear the chicken for 5-6 minutes per side until deeply golden, developing a caramelized crust. Check the thickest part reaches 165°F internal temperature, then remove the chicken to a plate.
- In the same pan, melt the butter and cook the minced garlic for 1 minute until fragrant, stirring so it doesn’t brown. Keep the heat at medium so the garlic stays golden.
- Add honey, soy sauce, and rice vinegar to the pan and stir to combine into a glossy amber liquid. Continue cooking until the mixture is simmering and cohesive.
- Stir in the cornstarch slurry and simmer for 2-3 minutes until the sauce thickens into a sticky glaze. Look for a coating texture that leaves trails on the spoon.
- Return the chicken to the pan and turn to coat in the honey garlic glaze so the surface clings. Cook for 1-2 more minutes until the glaze is blistered and glistening.
- Top with sesame seeds and sliced green onions for a fresh, bright finish. Serve immediately over steamed rice while the sauce pools and stays shiny.