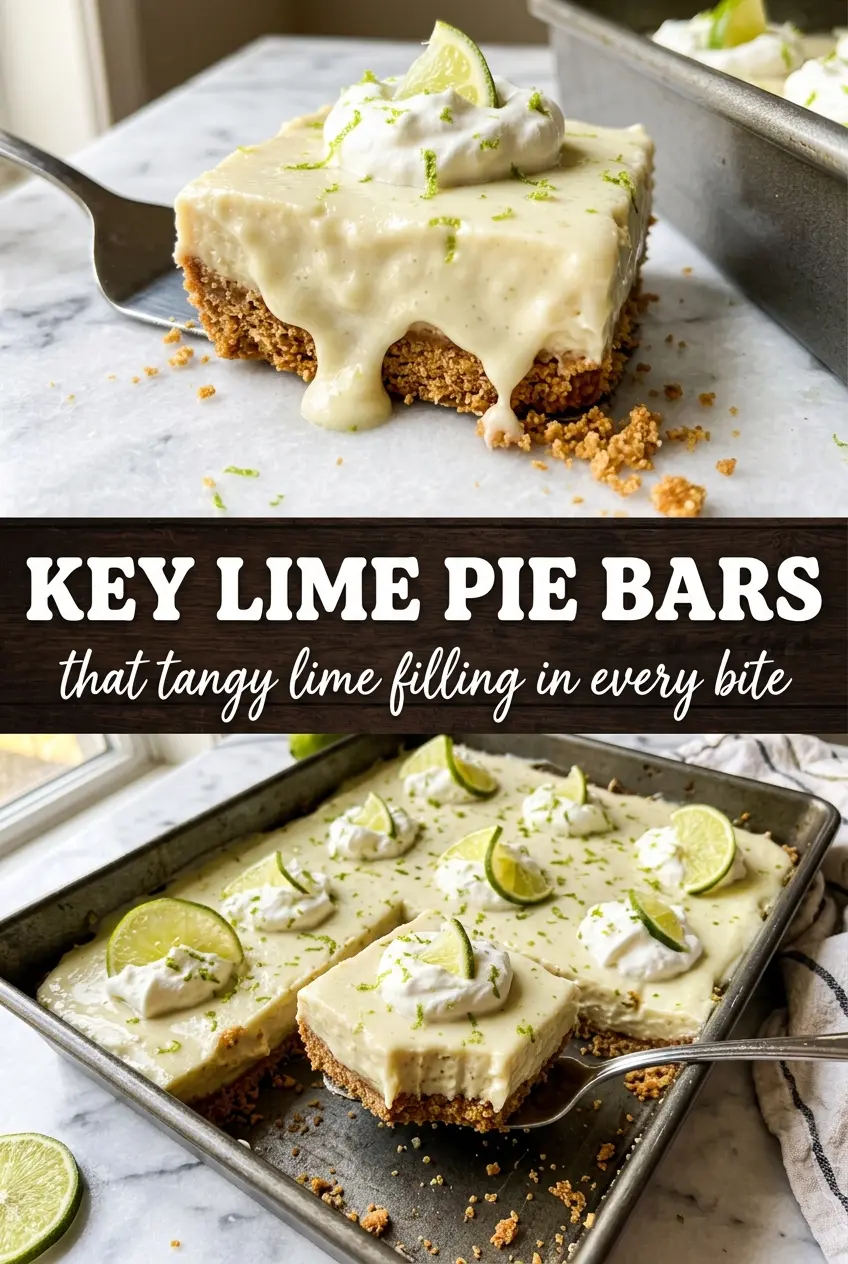
Key lime pie bars bring all the bright, tart punch of the classic pie, but in a form that cuts cleanly, travels well, and disappears fast from a dessert table. The filling sets up smooth and creamy on top of a thick graham cracker crust, and every square gets that sharp lime finish that keeps you going back for another bite.
What makes this version work is the balance: enough lime juice to taste fresh and vibrant, but enough sweetened condensed milk to keep the filling silky instead of harsh. The crust gets a quick bake before the filling goes in, which keeps it from turning soggy under the custard-like layer. I also like a generous amount of zest here, because the zest gives you the lime aroma that juice alone can’t carry.
Below you’ll find the one timing detail that matters most for a clean set, plus a couple of variations if you want to adjust the citrus, make them ahead, or skip the green food coloring without losing that classic key lime look.
The filling set up beautifully and sliced into neat bars after chilling overnight. The crust stayed crisp underneath, and the lime zest on top made them taste fresh instead of just sweet.
Save these key lime pie bars for the kind of dessert that cuts clean, chills firm, and brings a bright lime finish to every square.
The crust has to be baked before the filling goes in
The biggest mistake with bar-style key lime desserts is treating the crust like an afterthought. A graham crust that never gets a turn in the oven tends to stay sandy and soft under the filling, and once the bars chill, that softness reads as soggy instead of tender. Baking the crust first gives the butter time to bind the crumbs and lets the sugar melt into the base, which helps it hold together when you lift out the squares.
The filling also behaves better when it goes onto a warm crust rather than a cold one. Warm crust plus short bake time means the bars set evenly without overbaking the edges while the center finishes. If the center looks fully firm in the oven, you’ve gone too far — it should still have the slightest wobble when you pull the pan.
What the lime juice, zest, and condensed milk each do here

- Graham cracker crumbs — These give the bars their classic pie-like base. Fresh crumbs from full sheets taste better than pre-crushed crumbs that have been sitting around, but either works. The main thing is pressing them firmly into the pan so the crust bakes into a compact layer instead of crumbling apart when sliced.
- Butter — Melted butter is what turns the crumbs into a crust you can cut cleanly. If you skimp here, the crust turns dry and loose. If you use a salted butter, the bars still work fine; the little bit of salt sharpens the sweetness.
- Sweetened condensed milk — This is the structure and sweetness of the filling all in one ingredient. There isn’t a true substitute if you want the same silky, set custard texture. Evaporated milk won’t give the same body, and regular milk won’t work at all.
- Fresh key lime juice — Bottled juice will get the job done in a pinch, but fresh juice gives a cleaner, brighter flavor. Regular lime juice is the best practical substitute if key limes aren’t available, and the bars still taste right as long as you keep the zest in the mix.
- Lime zest — This is what makes the lime flavor smell and taste vivid instead of flat. Zest is especially important if you use regular lime juice instead of key lime juice, because it adds back the aromatic part the juice can’t fully supply.
- Egg yolks — The yolks help the filling bake into a sliceable custard. Whole eggs make the texture firmer and a little less rich, so yolks are the better choice for that smooth pie-bar texture.
Getting the filling to set without turning grainy
Mix the custard base until it’s smooth
Whisk the egg yolks, condensed milk, lime juice, and zest just until the mixture looks even and glossy. You don’t need to beat air into it. Too much whisking can trap bubbles that make the surface puffy, and puffy bars tend to collapse unevenly as they cool.
Pour onto the warm crust and spread gently
Once the crust comes out of its short bake, pour the filling over it right away and nudge it into the corners with a spatula. A warm crust helps the filling start setting from the bottom up. If the crust has cooled completely, the filling can seep into it a little more and blur that neat crust line.
Bake only until the center barely moves
The edges should look set and the center should still have a small jiggle, like soft gelatin. That’s the cue to pull the pan. If you wait until the middle looks fully firm, the eggs will overcook and the bars can turn a little rubbery once chilled.
Chill long enough to slice cleanly
Let the bars cool completely at room temperature first, then refrigerate until cold all the way through. Three hours is the minimum, but longer is better if you want sharp edges. If you cut them while they’re still warm or only partially chilled, the filling smears and the crust breaks apart.
Swap the key limes for regular limes
Regular lime juice works well if key limes aren’t available. The bars will taste a little less floral and a little more straightforwardly tart, so keep the zest in the filling to bring back some of that bright citrus edge.
Skip the green food coloring
The coloring is optional and only affects appearance. Without it, the filling bakes up a pale creamy yellow-green from the yolks and lime juice, which still looks natural and tastes exactly the same.
Make them gluten-free
Use certified gluten-free graham-style crumbs in the crust. The filling is already gluten-free, so this swap keeps the texture and flavor close to the original while making the bars work for more people.
Turn them into a lemon-lime version
Replace half of the lime juice with lemon juice for a sharper, slightly less tropical finish. The bars will taste brighter and less classic, but the texture stays the same and the citrus flavor gets a little more layered.
Storage and Reheating
- Refrigerator: Store covered for up to 5 days. The crust softens slightly over time, but the bars still slice well when cold.
- Freezer: These freeze well. Cut into bars, wrap tightly, and freeze for up to 2 months. Thaw in the refrigerator so the filling doesn’t weep.
- Reheating: No reheating needed. Serve them chilled for the best texture. If they sit at room temperature too long, the filling softens and the slices lose their clean edges.
Questions I Get Asked About This Recipe
Key Lime Pie Bars
Ingredients
Equipment
Method
- Preheat the oven to 350°F, then mix graham cracker crumbs, granulated sugar, and melted butter until evenly moistened.
- Press the crust mixture firmly into a parchment-lined 9x13 pan, smoothing the top with your palm.
- Bake for 8 minutes, then cool slightly before adding the filling.
- Whisk egg yolks, sweetened condensed milk, key lime juice, lime zest, and a drop of green food coloring until smooth and combined.
- Pour the filling over the warm crust and spread it evenly to the edges.
- Bake for 18-20 minutes at 350°F until the filling is just set with a slight jiggle in the center.
- Cool the bars completely at room temperature before chilling.
- Refrigerate for at least 3 hours until firm.
- Dust the top with powdered sugar, scatter lime zest, then cut into 16 bars to serve.