Juicy chicken breasts get a sharp taco-seasoned crust, then the whole skillet gets buried under a thick queso sauce that clings instead of sliding off. That glossy orange blanket changes the whole dish from plain skillet chicken into something people actually hover over at the table. The jalapeño and diced tomatoes keep the sauce from tasting flat, and the final squeeze of lime wakes up all that richness.
The trick here is treating the chicken and the cheese sauce as two separate jobs. Searing the chicken first gives you color and keeps the meat from steaming in the pan. The sauce works because it starts with a simple roux, then gets milk added slowly before the cheese goes in. That order keeps it smooth. If you dump cheese into hot milk without the flour base, it can turn grainy or break.
Below, I’ll walk you through the part that matters most: getting the sauce thick enough to coat the chicken without turning gluey. I’ve also included a few smart swaps for what you can change without wrecking the texture.
The queso sauce turned out silky and thick, and the jalapeño gave it a little kick without taking over. I sliced the chicken like you suggested and it held onto the sauce perfectly.
Save this Mexican chicken with cheese sauce for the nights when you want a glossy queso skillet dinner that plates up fast.
The Reason the Sauce Stays Smooth Instead of Turning Grainy
The sauce looks rich and heavy, but it only behaves that way if you build it in the right order. The flour needs a full minute in the butter so it stops tasting raw and can actually thicken the milk. Once the milk goes in, whisk until the mixture looks glossy and lightly nappé before adding cheese. If the base is too thin, the cheese just melts into soup.
Velveeta earns its place here because it melts cleanly and stabilizes the sauce. The Mexican cheese blend adds the sharper, more familiar queso flavor, but by itself it can get stringy or clumpy. The combination gives you stretch, body, and that smooth restaurant-style finish without needing a packet of processed sauce mix.
- Butter and flour — This roux is what keeps the sauce from breaking. Cook it long enough to lose the raw flour taste, but don’t let it darken much or the cheese sauce will look muddy.
- Whole milk — Lower-fat milk works in a pinch, but the sauce won’t feel as lush. Whole milk gives you a little more cushion against curdling when the cheese goes in.
- Velveeta — This is the insurance policy. If you skip it, the sauce can still work, but it’s more likely to turn grainy if the heat climbs too high.
- Rotel and jalapeño — Drain the tomatoes well so the sauce stays thick. Too much liquid here is the fastest way to thin out all your careful work.
What Each Ingredient Is Actually Doing in This Recipe

- Primary ingredient (the star) — Quality matters most. Choose the best you can find.
- Cooking medium (oil, butter, or broth) — This carries flavors and prevents dryness.
- Seasonings (salt, pepper, spices, herbs) — Layer flavors so nothing overpowers. Build depth gradually.
- Aromatics (garlic, onion, herbs) — Cook with fat to bloom flavors. Become the foundation.
- Supporting ingredients — Complement the main ingredient without overpowering it.
- Sauce or liquid (if applicable) — Brings flavors together. Balance richness with acid.
- Acid (lemon, vinegar, wine, or other) — Brightens and prevents flat-tasting results.
- Final finish (garnish, glaze, or sauce) — Prevents one-dimensional taste and adds visual appeal.
Building the Chicken and Queso in the Right Order
Seasoning and Searing the Chicken
Rub the chicken with taco seasoning until every side is coated, then sear it in hot oil until it picks up a deep brown crust. That color matters because it gives the finished dish more than just cheese flavor. If the pan isn’t hot enough, the chicken will pale and release liquid instead of browning. Cook it until the center hits 165°F, then rest it before slicing so the juices stay in the meat, not on the cutting board.
Making the Roux
Melt the butter and whisk in the flour until it looks like a smooth paste. Let it bubble gently for about a minute, just long enough to lose the raw taste. If you rush this part, the sauce can taste chalky even after the cheese melts in. Keep the heat at medium, not high, because a roux that browns too much will make the sauce taste heavier than you want.
Melting the Cheese Without Breaking It
Pour in the milk slowly, whisking constantly so the base stays smooth. When it starts to thicken and steam, add the cheeses off the hottest part of the burner if your pan runs hot. Stir until the sauce turns glossy and pulls together, then add the Rotel, jalapeño, and cumin. If it looks a little too thick, loosen it with a splash of milk; if it looks thin, let it simmer for a minute or two longer, but don’t crank the heat or the cheese can seize.
Finishing and Serving
Slice the rested chicken and arrange it on the plate before spooning the queso over the top. That order helps the sauce coat the chicken instead of pooling away from it. Finish with cilantro and a wedge of lime. The lime cuts through the richness and keeps each bite tasting sharp instead of heavy.
How to Adapt This Tex-Mex Chicken Without Losing the Sauce
Make it spicier
Leave the jalapeño seeds in, or add a pinch of cayenne to the sauce. That gives the queso more bite without changing the texture. If you want heat that reads on the first bite, stir in a little of the Rotel juice too.
Make it dairy-free
Use a plain unsweetened oat milk or soy milk, plus your favorite dairy-free shredded cheese and a melting-style vegan cheese. The sauce won’t have the same body as the original, so keep the heat low and expect a looser finish. A cornstarch slurry can help if the sauce needs more thickness.
Make it gluten-free
Swap the all-purpose flour for a gluten-free 1:1 blend or use cornstarch instead of a roux. Cornstarch thickens faster, so mix it with a little cold milk first and add it gradually. The texture will be a touch silkier and less buttery, but it still coats well.
Turn it into a skillet dinner for a crowd
Slice the chicken and return it to the pan before adding the sauce, then serve it straight from the skillet with tortillas on the side. The chicken holds warmer that way, and the sauce stays loose enough for scooping. This version is especially good when you want the dish to feel casual and shareable.
Storage and Reheating
- Refrigerator: Store chicken and sauce separately if you can, up to 3 days. The sauce thickens as it chills.
- Freezer: The chicken freezes well, but the cheese sauce doesn’t thaw with the same silky texture. If you must freeze it, expect some separation and plan to whisk in a splash of milk while reheating.
- Reheating: Warm the sauce slowly over low heat and add milk a tablespoon at a time until it loosens. Don’t microwave it hard and fast or the cheese can turn oily and gritty.
Questions I Get Asked About This Recipe
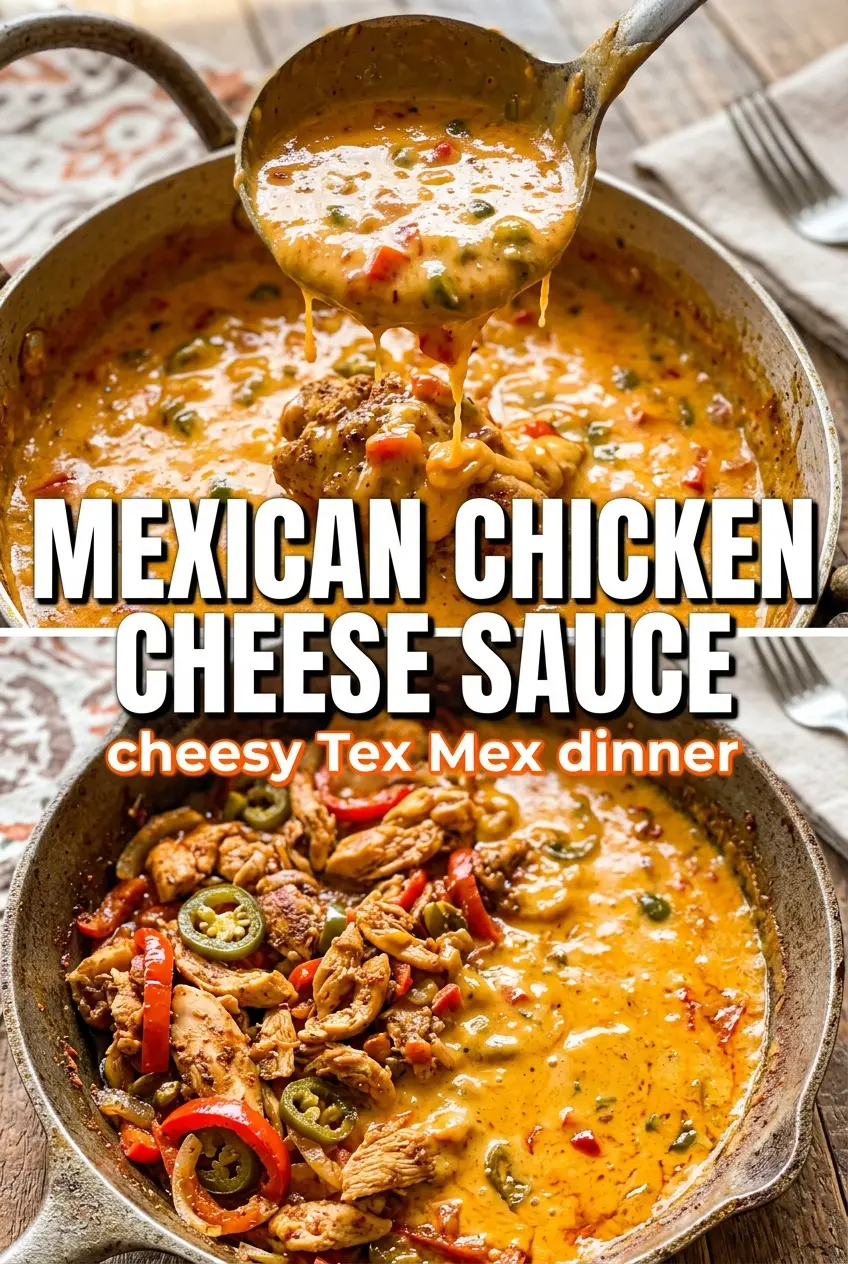
Mexican Chicken with Cheese Sauce
Ingredients
Equipment
Method
- Rub the boneless skinless chicken breasts with taco seasoning. Heat olive oil in a skillet over medium-high heat and sear the chicken for 5–6 minutes per side until cooked through to 165°F, then rest and slice.
- Melt butter in a saucepan over medium heat, then whisk in all-purpose flour for 1 minute. Gradually add whole milk while whisking until smooth.
- Stir in shredded Mexican cheese blend and cubed Velveeta until melted. Add drained diced tomatoes with green chiles (Rotel), jalapeño, and cumin, then simmer for 3–4 minutes until the sauce is smooth and thick.
- Plate the sliced chicken and pour the queso sauce generously over the top. Garnish with fresh cilantro and lime wedges.
- Serve with rice, tortillas, or over nachos. The jalapeño and tomato bits should be visible in the vibrant orange sauce coating the chicken.