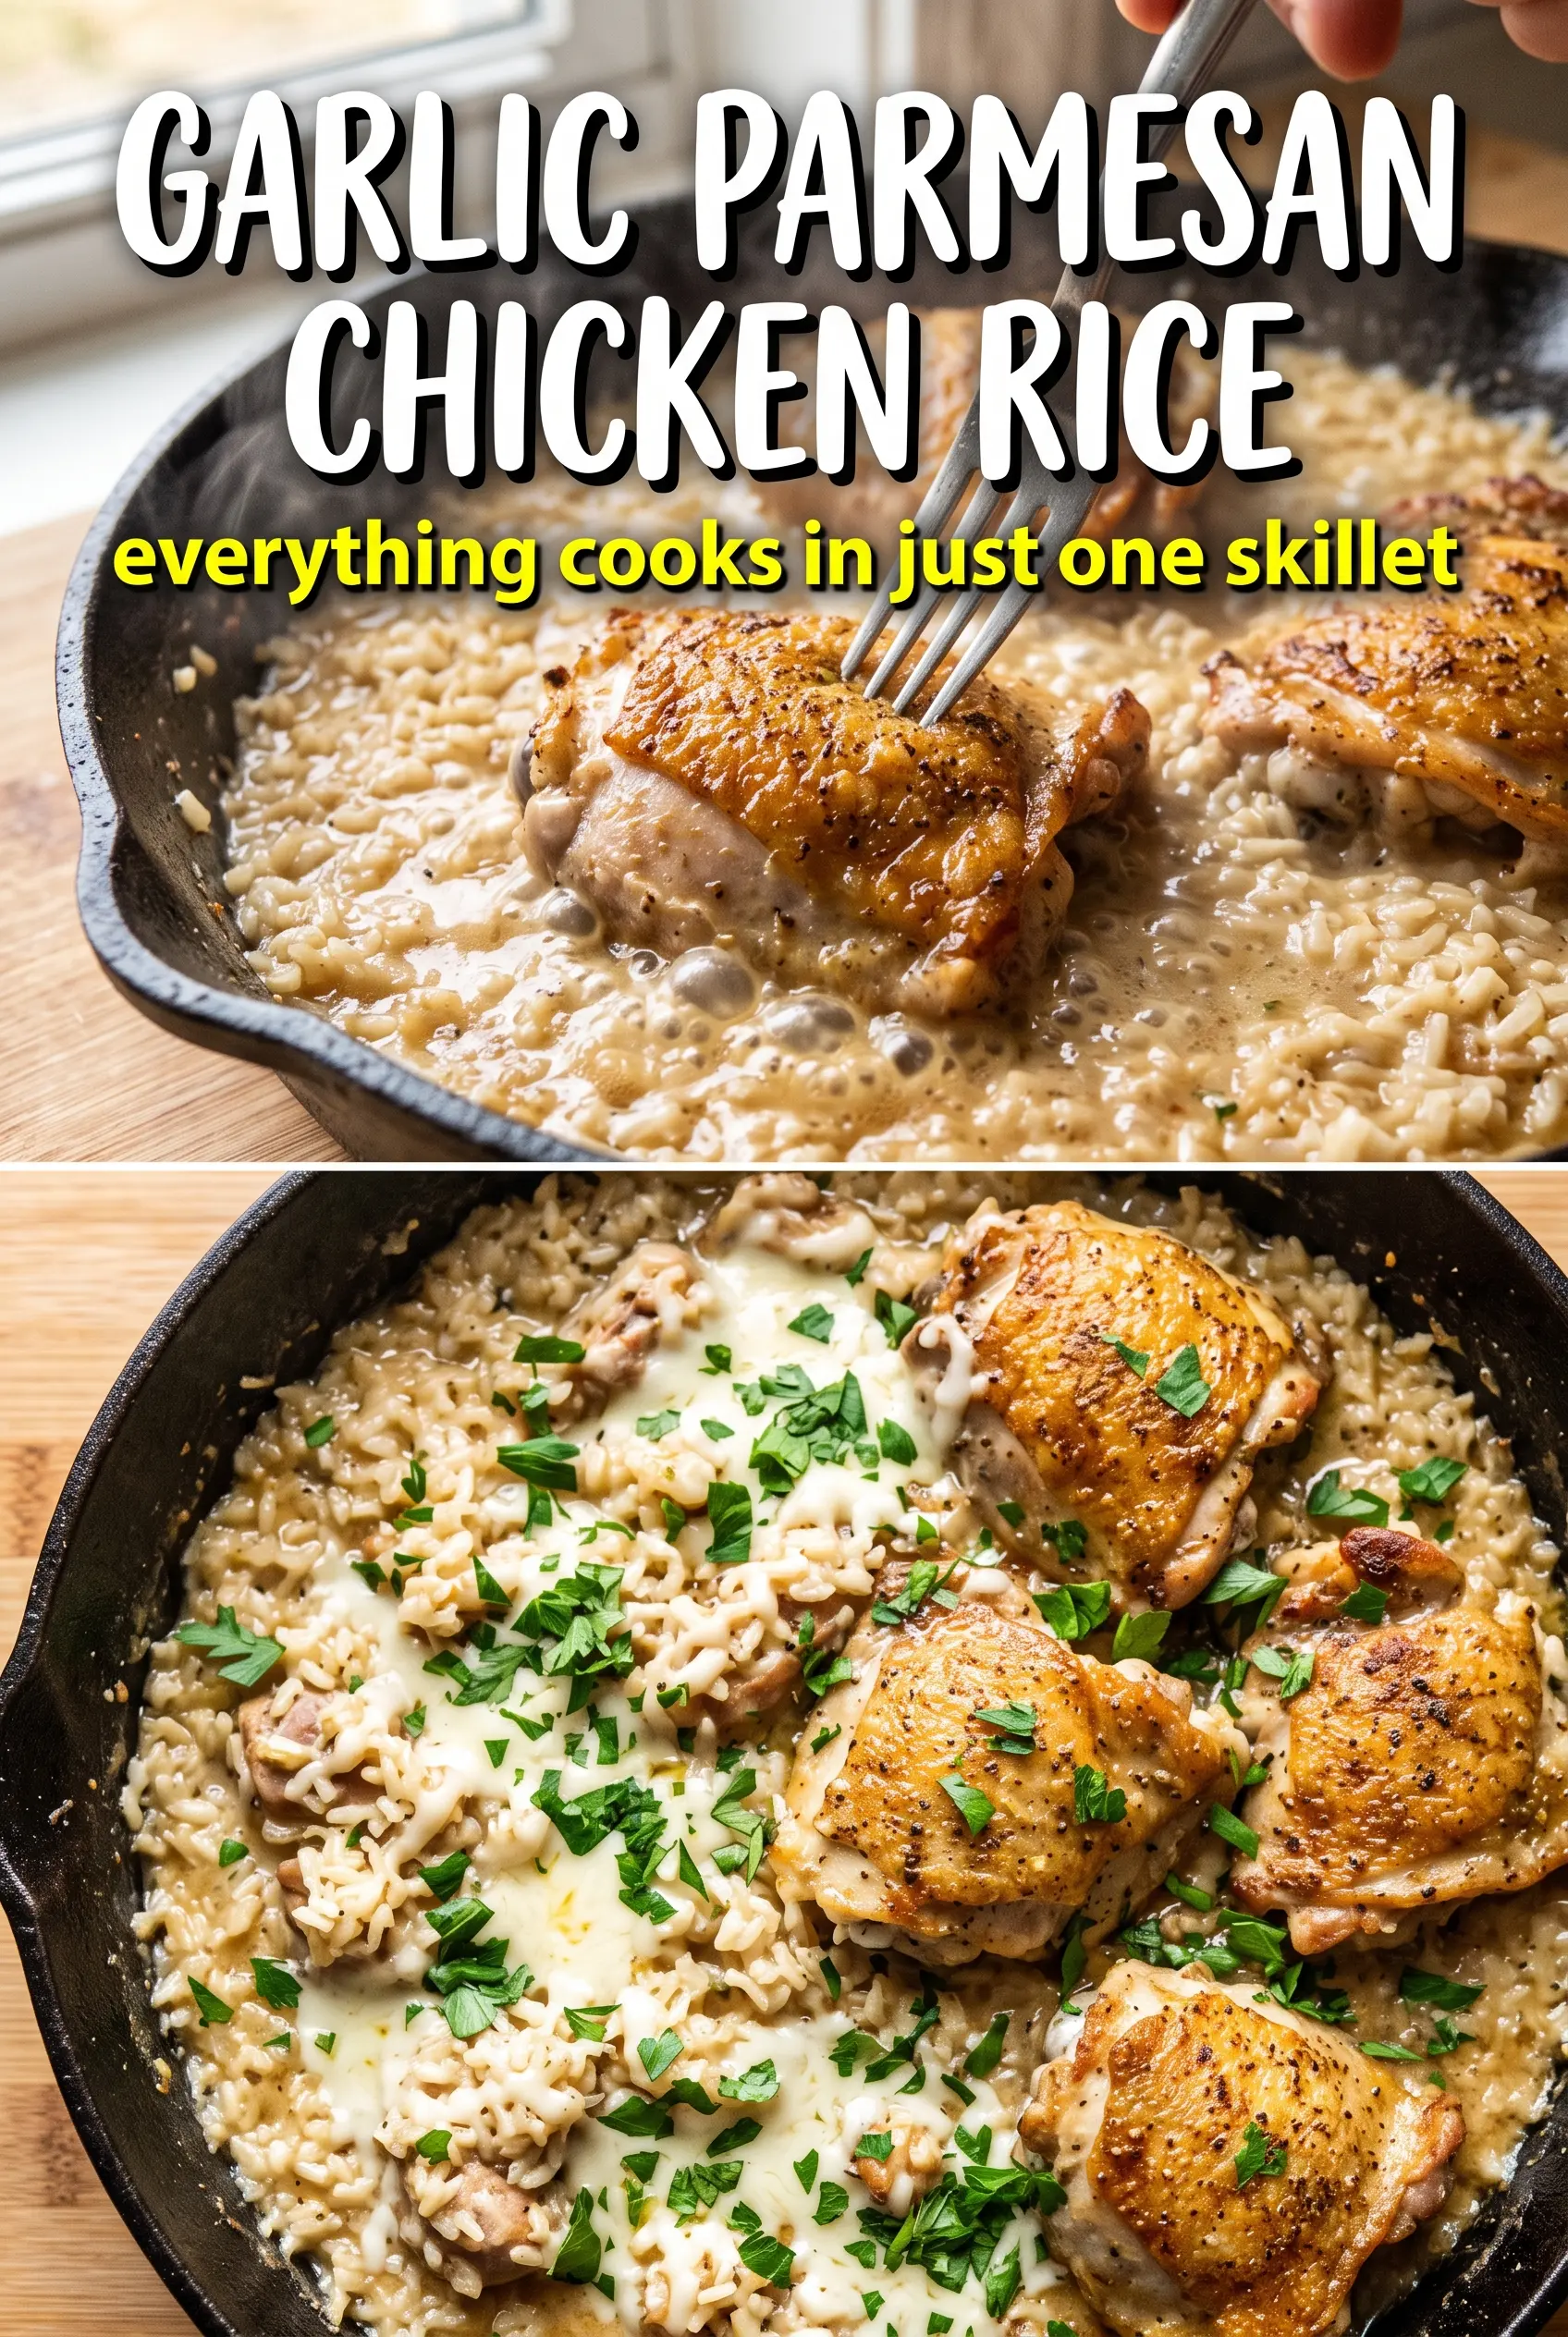
Crispy-skinned chicken thighs tucked over creamy garlic Parmesan rice make the kind of dinner that disappears fast and doesn’t leave a sink full of pans behind. The chicken stays juicy because it starts with a hard sear, and the rice gets depth from the browned bits left in the skillet before the broth goes in. By the time it comes out of the oven, the rice has absorbed all that savory flavor and the top is flecked with golden cheese.
The key here is building the dish in stages instead of dumping everything in at once. Toasting the rice for a couple of minutes keeps the grains separate and gives the finished dish better texture, while adding the Parmesan to the broth before baking helps it melt through the rice instead of sitting in clumps on top. Using bone-in, skin-on thighs matters too; they bring enough fat and flavor to season the rice as they roast.
Below you’ll find the small details that keep the rice from turning mushy, plus a few smart swaps if you need to work with what you already have in the kitchen.
The chicken skin came out crackly and the rice underneath was creamy without getting soupy. I followed the sear and toast steps exactly, and the whole pan tasted like it had cooked for hours.
Save this one-pan garlic Parmesan chicken and rice for a night when you want crispy chicken, creamy rice, and one skillet to clean.
The Rice Needs a Head Start, Not a Shortcut
The biggest mistake in one-pan chicken and rice is treating the oven like it will fix an undercooked base. It won’t. The rice needs enough liquid, enough heat, and enough contact with the hot skillet to start softening before the chicken finishes on top. That first simmer on the stove matters because it tells you whether the pan has the right amount of broth before everything goes into the oven.
Letting the chicken sear skin-side down first does two jobs at once: it renders out fat for the rice and builds a browned crust that stays crisp after baking. If you skip the sear, the skin tends to steam. If you skip the rice toast, the grains can turn soft and a little flat instead of staying separate and creamy.
- Skin-on chicken thighs — These carry the dish. Boneless chicken breasts won’t give you the same self-basting effect, and the rice will taste leaner. Thighs stay forgiving in the oven, which matters when the rice needs a full bake.
- Long-grain white rice — This is the right rice for a fluffy, spoonable finish. Short-grain rice can go sticky, and brown rice needs more liquid and a longer cook time than this recipe allows.
- Chicken broth — Use broth, not water. Water will cook the rice, but broth gives it the savory backbone that makes the whole pan taste finished. Low-sodium broth is the easiest choice because the Parmesan adds salt.
- Parmesan — Freshly grated Parmesan melts smoother than the shelf-stable kind. Pre-grated cheese often contains anti-caking agents that can make the rice a little grainy instead of silky.
What Each Ingredient Is Actually Doing in the Pan

- Onion and garlic — The onion melts into the rice base, and the garlic perfumes the whole skillet. Add the garlic after the onion softens so it doesn’t scorch; burnt garlic turns the broth bitter fast.
- Italian seasoning and smoked paprika — Italian seasoning brings the herb notes, while smoked paprika gives the chicken skin a deeper color and a little warmth. The paprika doesn’t make the dish smoky in an overpowering way; it just rounds out the savory edges.
- Olive oil — You need enough fat to get the skin moving and browning in the pan. A neutral oil works too, but olive oil fits the garlic and Parmesan without disappearing.
- Fresh parsley — Add it at the end for contrast. It doesn’t change the flavor much, but it keeps the finished dish from tasting heavy.
How to Keep the Chicken Skin Crisp While the Rice Finishes
Getting the Sear Right
Start the chicken skin-side down in a hot oven-safe skillet and leave it alone until the skin releases and turns deep golden. If it sticks when you try to move it, it isn’t ready yet. That sear should render out a visible layer of fat, because that fat seasons the rice and protects the skin from turning soggy later.
Building the Rice Base
Use the same skillet for the onion and garlic so you keep every browned bit in the pan. Stir the rice into that mixture and toast it for about two minutes until the grains look glossy and smell nutty. If the rice looks dry and pale, it hasn’t picked up enough fat yet and the texture can end up uneven after baking.
Finishing in the Oven
Once the broth and Parmesan go in, bring the pan to a simmer before the chicken returns. You want the liquid hot enough to start the rice immediately, but not boiling so hard that the Parmesan turns clumpy. Nestle the chicken skin-side up and leave it uncovered so the skin roasts instead of steaming; covered, the whole dish softens and the top loses that crisp finish.
Make It Dairy-Free Without Losing the Creamy Texture
Swap the Parmesan for a dairy-free Parmesan-style alternative that melts well, or use a spoonful of nutritional yeast for a savory finish. You won’t get the same salty richness, so add a little extra seasoning and expect the rice to taste lighter and less buttery.
Using Boneless Chicken Thighs Instead
Boneless thighs work, but they cook faster and don’t baste the rice the same way. Sear them quickly, then check for doneness a little early so they stay juicy. The rice still turns out good, but you’ll lose the crackling skin on top.
Turning It Into a Gluten-Free Dinner
This recipe is already naturally gluten-free as long as your broth is certified gluten-free. That’s worth checking on the label because some broths contain hidden wheat-based additives. Everything else in the pan works exactly the same.
Stretching It for a Bigger Table
You can scale this up, but use a wider pan or two skillets so the rice stays in an even layer. If the rice is piled too deep, the bottom gets soft before the top is fully cooked. A shallow layer gives you the best chance at even texture and crisp chicken skin.
Storage and Reheating
- Refrigerator: Store leftovers in an airtight container for up to 4 days. The rice will firm up as it chills, but it softens again when reheated.
- Freezer: The rice and chicken can be frozen for up to 2 months, though the texture of the rice gets a little softer after thawing. Cool completely first and freeze in portions for the easiest reheating.
- Reheating: Reheat covered in the oven at 325°F with a splash of broth to loosen the rice, or warm smaller portions in the microwave with a damp paper towel on top. The common mistake is blasting it on high heat, which dries out the chicken before the rice is hot.
Questions I Get Asked About This Recipe
One-Pan Garlic Parmesan Chicken and Rice
Ingredients
Equipment
Method
- Preheat the oven to 400°F and season the chicken thighs with salt, pepper, garlic powder, Italian seasoning, and smoked paprika. Pat lightly so the seasoning adheres.
- Heat olive oil in a large oven-safe skillet over medium-high heat, then sear the chicken thighs skin-side down for 6-7 minutes until the skin is golden. Remove the chicken to a plate.
- In the same skillet, cook the diced onion for 3 minutes until softened. Add the minced garlic and cook for 1 minute, until fragrant.
- Add the long-grain white rice and toast for 2 minutes, stirring so grains are coated. Pour in the chicken broth and stir in Parmesan and dried Italian seasoning to combine.
- Bring the mixture to a simmer so the liquid starts bubbling around the rice. The Parmesan should look partially melted and evenly distributed.
- Nestle the chicken thighs into the rice skin-side up and sprinkle with extra Parmesan. Make sure the thighs are mostly supported by the rice.
- Transfer to the oven and bake uncovered for 30-35 minutes, until the rice is cooked through and the chicken skin is golden. The cheese at the edges should brown slightly as it bakes.
- Garnish with fresh parsley and serve immediately. The rice should be fluffy with a creamy, Parmesan finish.