Creamy, glossy black beans with a gentle hit of cumin and garlic are the kind of side dish that disappears before the main course gets a chance to settle on the table. These beans cook down into something spoonable and rich, with enough whole beans left behind to keep every bite interesting. The broth reduces just enough to coat the beans, and the finish of lime and cilantro keeps the whole pot tasting bright instead of heavy.
What makes this version work is the order of the cooking. The onion and garlic go in first so the oil picks up their flavor, then the beans simmer uncovered with broth long enough to soften and concentrate without turning watery. A little mashing at the end gives you that restaurant-style texture without needing cream, butter, or a blender.
Below, you’ll find the small details that make a big difference: how much to mash, when to add the lime, and what to do if you want the beans a little looser or a little thicker. There’s also a simple note on storage, because these hold up well and taste even better the next day.
I’ve made a lot of black beans, but these finally had that thick, silky restaurant texture without getting mushy. Mashing a few against the pot at the end made all the difference, and the lime at the finish kept them from tasting flat.
Save these restaurant-style black beans for taco night, rice bowls, or any meal that needs a creamy, bright side with almost no effort.
The Reason These Beans Turn Creamy Instead of Watery
The difference between good black beans and restaurant-style black beans comes down to reduction and texture. If you add the beans and broth, then cover the pot, you’ll steam them instead of concentrating them. Uncovered simmering lets the liquid thicken naturally, so the beans end up coated in a glossy sauce instead of sitting in thin broth.
The other move that matters is mashing a portion of the beans against the side of the pot. That releases starch and gives the liquid body without turning the whole batch into purée. If your beans taste right but still seem loose, keep simmering for a few more minutes before mashing more of them. The texture should look creamy and a little rustic, not paste-like.
What Each Ingredient Is Actually Doing in the Pot
- Black beans — Canned beans are the shortcut here, and they work because they’re already fully cooked and consistent. Rinsing them removes the can liquid that can taste flat and muddy. If you cook dried beans instead, use them fully tender before starting this recipe.
- Olive oil — This carries the garlic, onion, and spices through the whole dish. Don’t cut it too much or the beans will taste lean instead of rich.
- White onion and garlic — These build the base flavor fast. Quartered onion softens enough to perfume the oil without disappearing completely, while minced garlic needs just a minute so it doesn’t burn and turn bitter.
- Broth — This is what gives the beans a savory finish instead of plain saltiness. Vegetable broth keeps them vegetarian, and chicken broth adds a little more depth if that’s what you have on hand.
- Bay leaves, cumin, and lime — Bay leaves round out the simmer, cumin adds that warm earthy note, and lime wakes everything up at the end. Lime goes in last because acid can dull the flavor if it cooks too long.
Building the Flavor Without Losing the Texture
Softening the Onion and Garlic
Start with the olive oil over medium heat, then add the onion and let it soften for a couple of minutes. You’re not looking for browning here; you want the edges to go translucent and the onion to lose its raw bite. Add the garlic next and cook just until fragrant, because garlic turns harsh fast once it starts to color. If the pan is too hot and the garlic threatens to brown, lower the heat before moving on.
Simmering the Beans Open to the Air
Once the beans, bay leaves, cumin, pepper, salt, and broth go in, bring the pot up to a steady simmer and leave it uncovered. Stir every so often so the beans on the bottom don’t scorch and the liquid reduces evenly. After about 20 minutes, the broth should look thicker and the beans should taste seasoned all the way through. If the pot still looks soupy at the end, give it a few more minutes instead of adding more beans or more thickener.
Finishing with the Right Amount of Mash
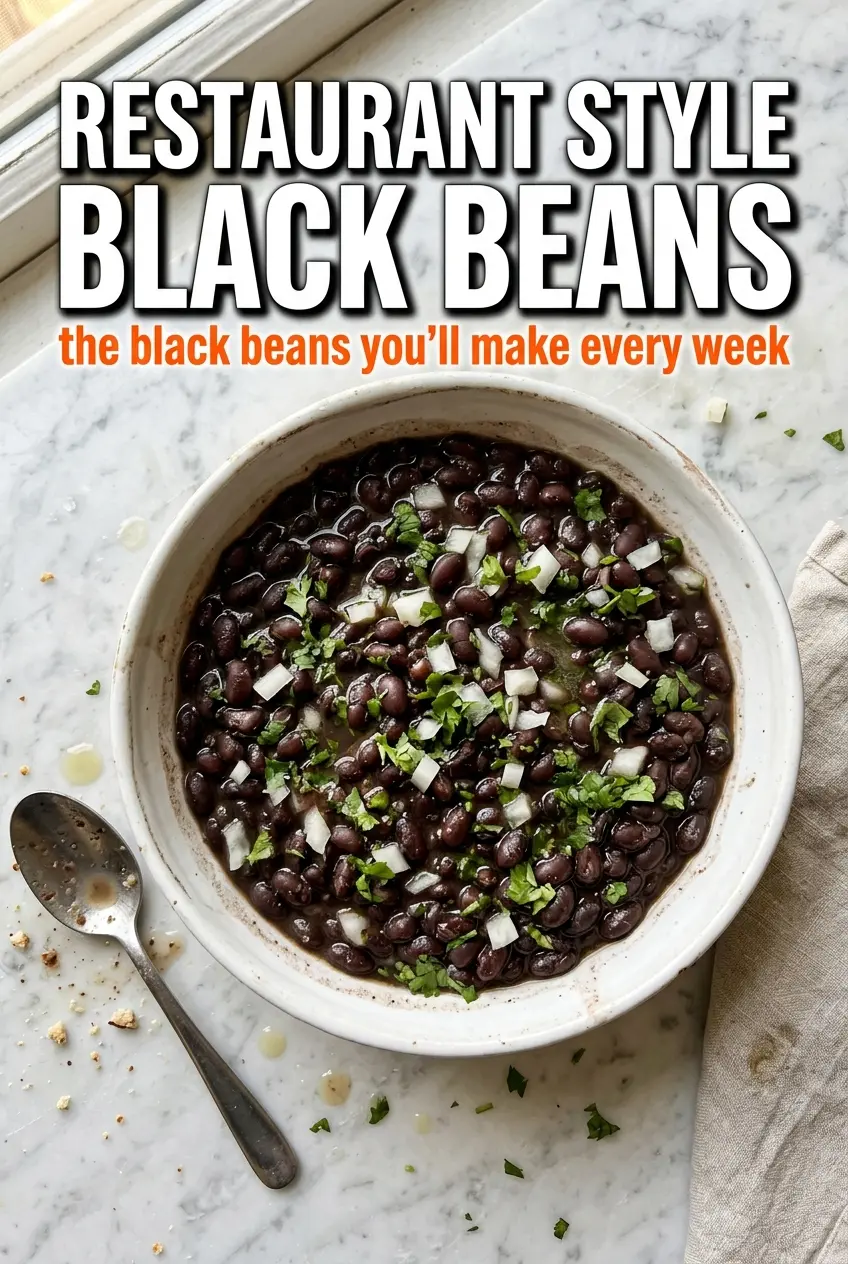
Use a spoon or potato masher to press about a quarter of the beans against the side of the pot. That little bit of starch is what gives you the restaurant texture: creamy, glossy, and still textured. Stir in the cilantro and lime after you’ve adjusted the salt, because both ingredients taste brightest when they stay on top of the finished beans. If the beans seem too thick, loosen them with a splash of broth; if they’re too thin, let them simmer uncovered a few minutes longer.
Make Them Smokier and a Little Deeper
Add a pinch of smoked paprika or a tiny spoonful of chipotle in adobo with the cumin. That gives the beans a darker, more complex finish that works especially well beside grilled meats or fajitas. Keep the amount small at first, because the goal is depth, not heat.
Vegetarian and Vegan Version
Use vegetable broth and you’re set. The beans stay every bit as creamy because the richness comes from the oil and the starch, not from meat stock. If your vegetable broth tastes bland, add a little extra salt at the end rather than pouring in too much up front.
If You Want Them Thicker for Burritos or Bowls
Simmer a few minutes longer and mash closer to half the beans. You’ll get a spreadable, denser texture that holds up better inside tortillas or under rice. The tradeoff is that the beans lose a little of their saucy look, so stop before they turn pasty.
Storage and Reheating
- Refrigerator: Store in an airtight container for up to 4 days. The beans thicken as they sit, which is normal.
- Freezer: They freeze well for up to 3 months. Cool completely, pack into freezer-safe containers, and leave a little space for expansion.
- Reheating: Warm gently on the stove over low heat with a splash of water or broth. The common mistake is blasting them on high heat, which dries out the edges before the center loosens again.
Answers to the Questions Worth Asking
Restaurant Style Black Beans
Ingredients
Equipment
Method
- Heat the olive oil in a large pot over medium heat. Add the quartered onion and cook for 2 minutes, stirring once or twice to keep it from sticking.
- Add the minced garlic and cook for 1 minute until fragrant. Keep the heat at medium so the garlic browns lightly rather than burning.
- Add the drained black beans, bay leaves, cumin, black pepper, salt, and broth to the pot. Bring everything to a simmer and cook uncovered for 20 minutes, stirring occasionally so the mixture thickens evenly.
- Mash about 1/4 of the beans against the side of the pot to create a creamy consistency while keeping some beans whole. This will make the beans glossy and thicker without turning them fully smooth.
- Taste the beans and adjust seasonings with lime juice. Remove the bay leaves, then stir well to distribute the citrus flavor.
- Stir in the chopped cilantro and serve hot. The beans should look creamy with visible whole beans and fresh green flecks.