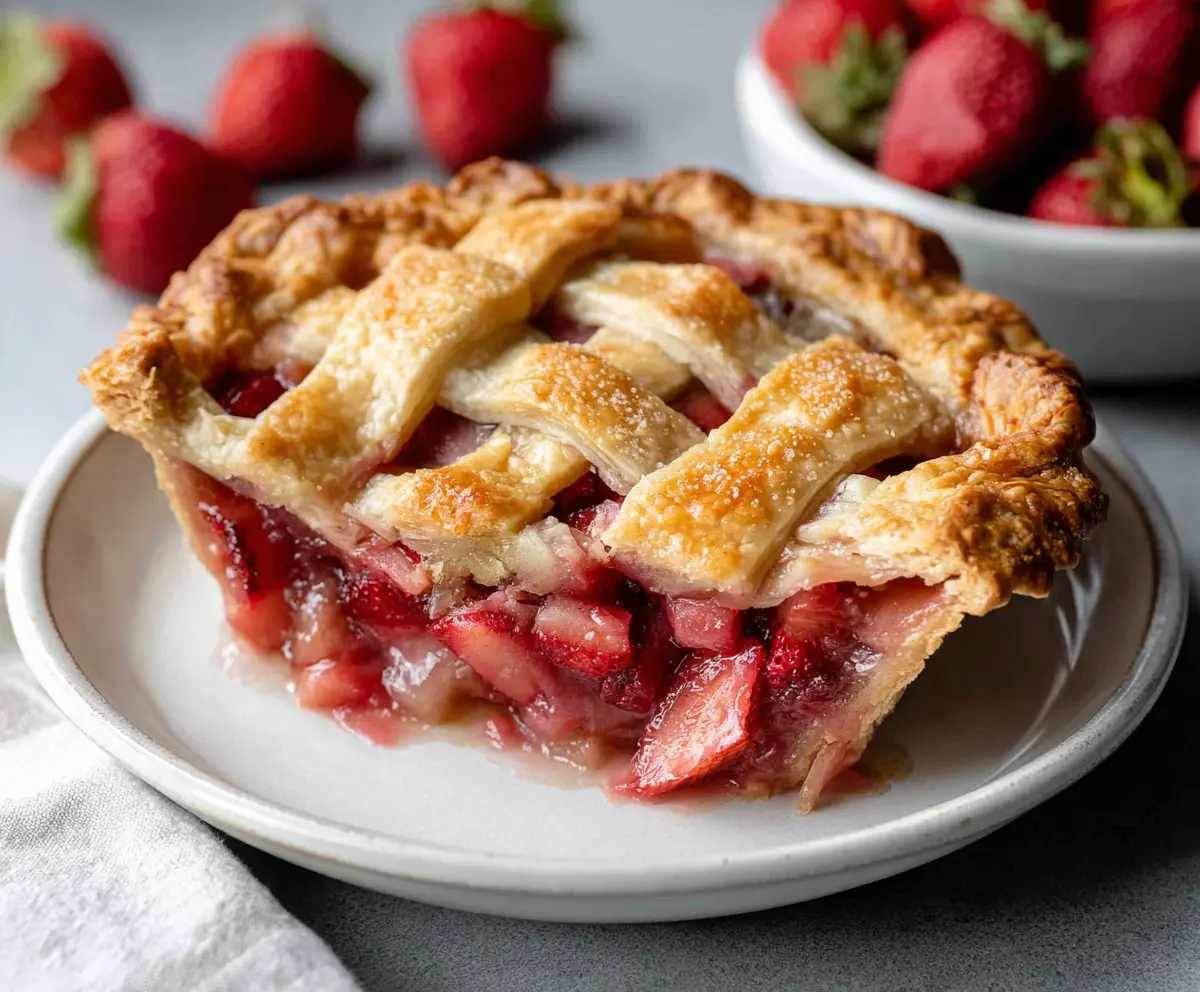
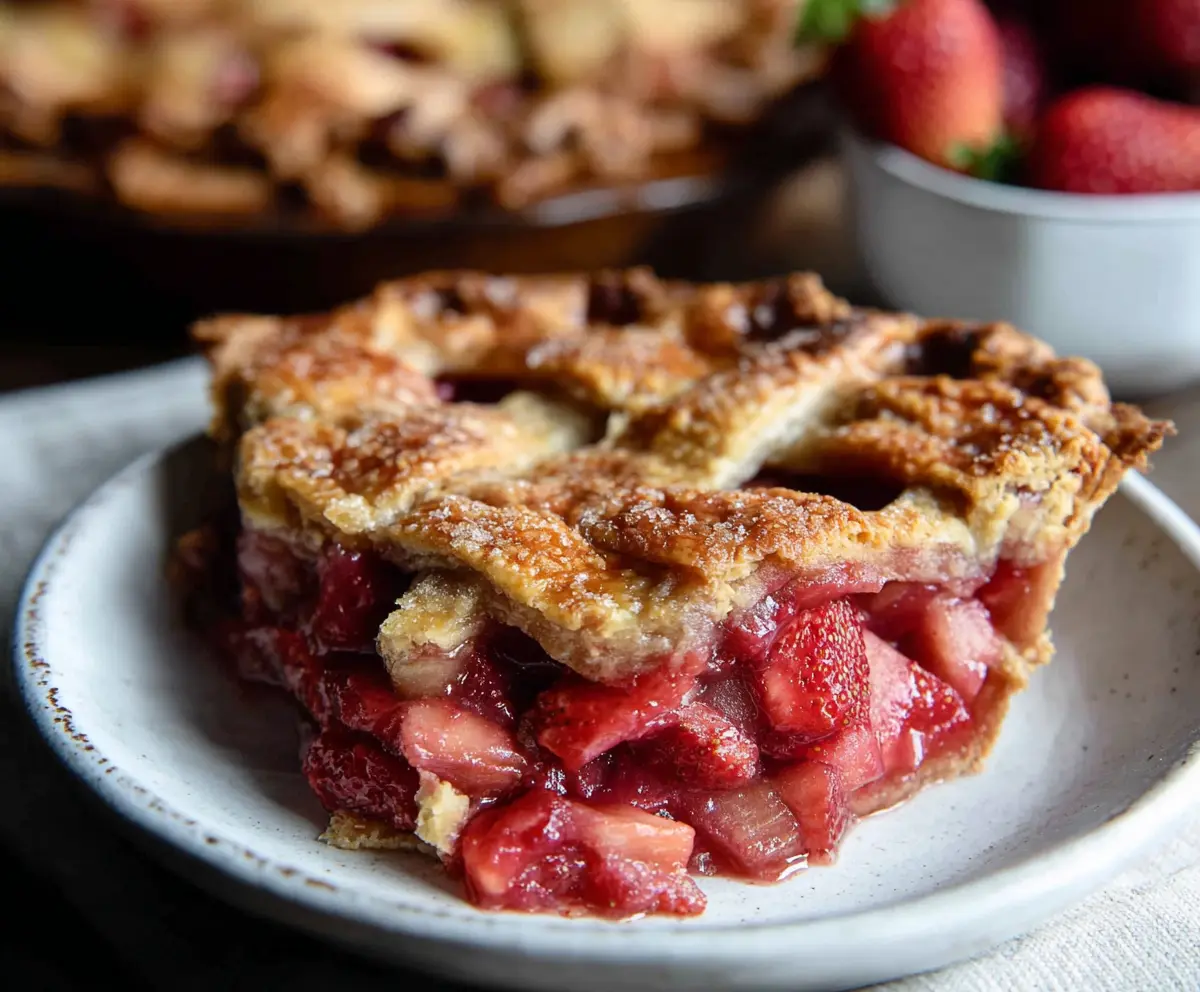
This Rhubarb Strawberry Pie is a fantastic mix of sweet and tart flavors. The juicy strawberries balance the tangy rhubarb, all wrapped in a flaky crust that’s hard to resist!
Every bite feels like a little celebration of spring. I love serving it warm with a scoop of ice cream—because who doesn’t enjoy a classic combo like that? 🍰
Key Ingredients & Substitutions
Rhubarb: Fresh rhubarb is the star here. It has a tangy flavor that balances well with the sweetness of strawberries. If you can’t find fresh rhubarb, frozen works too—just thaw and drain excess moisture.
Strawberries: Use fresh strawberries for the best texture and taste. If strawberries aren’t in season, you can substitute with other berries like raspberries or blueberries, or try a combination!
Sugar: The recipe calls for granulated sugar, but you could use brown sugar for a richer flavor. Honey or maple syrup can work as substitutes, just adjust the quantity since they are more concentrated in sweetness.
Cornstarch: This thickener helps set the filling. You can replace it with tapioca flour, which is a great alternative, especially for a gluten-free option.
Butter: Unsalted butter adds richness to the filling. If you’re dairy-free, coconut oil or vegan butter can be used instead for a similar effect.
How Do You Create a Beautiful Lattice Crust?
Making a lattice crust adds a rustic charm to your pie, but it can seem tricky. Here’s a simple way to achieve this look:
- Roll out your second pie crust thinly and cut it into 1-inch strips using a knife or pizza cutter.
- Lay half of the strips parallel across the pie, about 1 inch apart.
- Fold back every other strip and lay a new strip perpendicular to the first set. Unfold the folded strips back over the new strip.
- Repeat with the remaining strips until the entire pie is covered in a woven pattern.
- Remember to trim and crimp the edges to seal everything nicely!
Taking your time during this step can really elevate the look of your rhubarb strawberry pie, making it feel extra special when served.
How to Make Rhubarb Strawberry Pie
Ingredients You’ll Need:
For the Filling:
- 2 1/2 cups fresh rhubarb, chopped into 1/2-inch pieces
- 2 cups fresh strawberries, hulled and halved or quartered
- 1 1/4 cups granulated sugar
- 1/3 cup cornstarch
- 1/4 teaspoon salt
- 1 teaspoon vanilla extract
- 1 tablespoon lemon juice
- 2 tablespoons unsalted butter, cut into small pieces
For the Pie Crust:
- 1 package (14 oz) refrigerated pie crust or homemade pie dough for top and bottom crust
For the Egg Wash:
- 1 egg (for egg wash)
- 1 tablespoon coarse sugar, for sprinkling on top (optional)
How Much Time Will You Need?
This delightful pie will take about 20 minutes of prep time, with an additional 50-60 minutes of baking time. After baking, let it cool for at least 2 hours to allow the filling to set before slicing. You’ll be savoring every bite in no time!
Step-by-Step Instructions:
1. Preheat the Oven:
Start by preheating your oven to 425°F (220°C). This high temperature will help get that crust nice and golden!
2. Prepare the Fruit Filling:
In a large bowl, combine the chopped rhubarb and fresh strawberries. They’ll make a perfect fruity blend! In a separate smaller bowl, mix the sugar, cornstarch, and salt. Sprinkle this mixture over the fruit, and add the lemon juice and vanilla extract. Gently toss everything together and let it sit for about 10 minutes. This will help the flavors meld and the fruit soften a bit.
3. Assemble the Pie Crust:
Roll out one pie crust and fit it into a 9-inch pie pan, trimming the edges to leave about a 1/2 inch overhang. Pour the prepared fruit filling into the crust, spreading it evenly. Dot the filling with small pieces of butter for extra richness.
4. Create the Lattice Top:
Roll out the second pie crust and cut it into strips about 1 inch wide. Now comes the fun part! Weave these strips over the fruit filling to create a lattice pattern. Trim any excess dough from the edges and pinch or crimp the edges to seal everything together.
5. Brush and Sprinkle:
Beat the egg in a small bowl and brush it over the lattice crust. This will give your pie a beautiful golden color when baked. If you like, sprinkle coarse sugar on top for a little sparkle!
6. Bake the Pie:
Cover the edges of the pie with foil or a pie shield to prevent burning. Bake it in your preheated oven for 15 minutes at 425°F (220°C). Then, reduce the heat to 350°F (175°C) and bake for another 35–45 minutes. Your pie is done when the crust is golden and the filling is bubbling.
7. Cool and Serve:
After baking, remove the foil shield for the last 15 minutes if your crust needs more browning. Once it’s done, let the pie cool completely on a wire rack. This cooling time is crucial—it allows the filling to set up nicely. Enjoy your delicious Rhubarb Strawberry Pie!
Can I Use Frozen Rhubarb or Strawberries in This Recipe?
Yes, you can use frozen rhubarb or strawberries! Just be sure to thaw them completely and drain any excess liquid before using them in the filling. This will help prevent the pie from becoming too watery.
How Do I Know When the Pie Is Done Baking?
The pie is ready when the crust is golden brown and the filling is visibly bubbling through the lattice. A good indication is to check the sides where the filling is exposed; it should look thickened and not runny.
Can I Make This Pie in Advance?
Absolutely! You can prepare the pie ahead of time and freeze it unbaked. Just cover it tightly with plastic wrap and aluminum foil. When you’re ready to bake, cook it from frozen, adding an additional 10-15 minutes to the baking time.
What’s the Best Way to Store Leftovers?
Store any leftover pie in the refrigerator, covered loosely with foil or plastic wrap. It should stay fresh for up to 3-4 days. For longer storage, you can freeze slices individually wrapped in plastic wrap for up to three months. Just thaw in the fridge before enjoying!