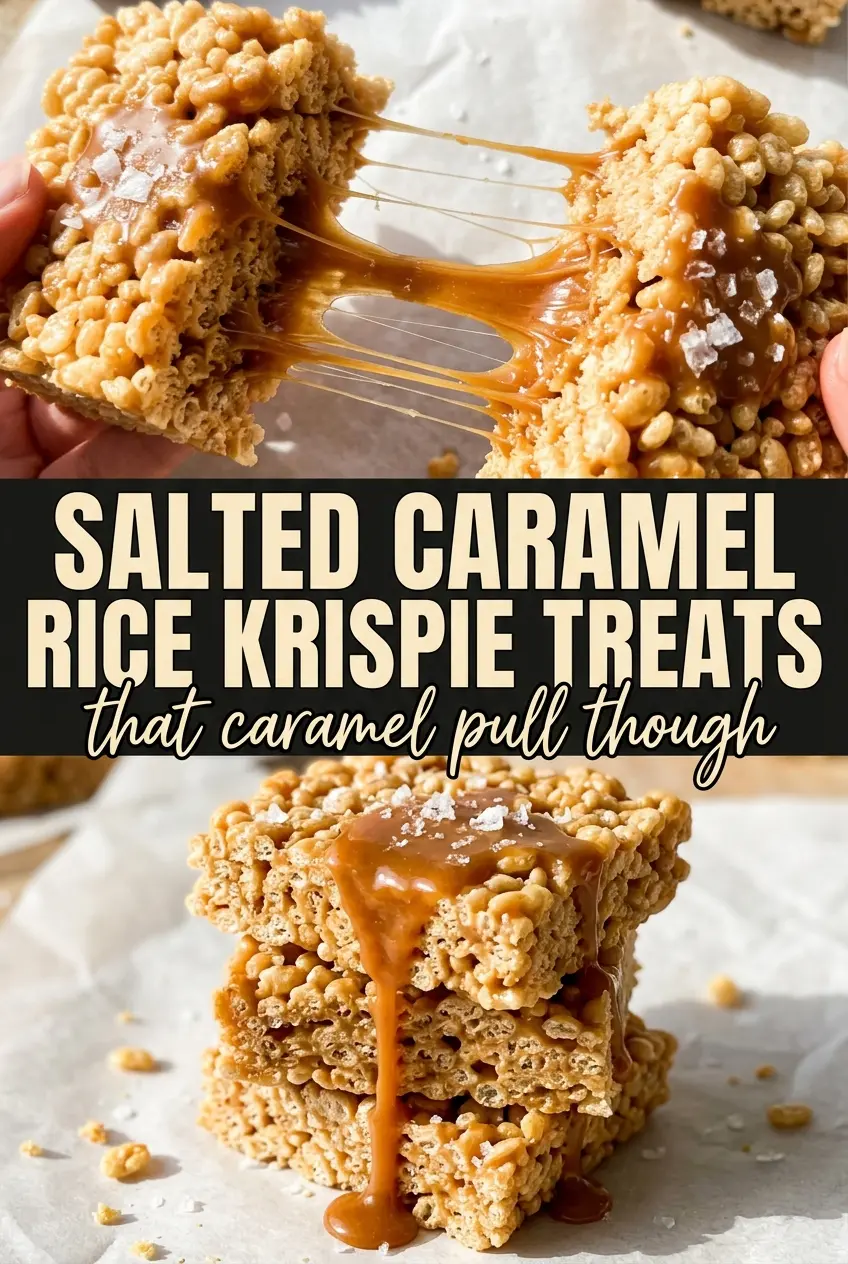
Salted Caramel Rice Krispie Treats hit that sweet spot between nostalgic and a little more grown-up. The bars stay chewy instead of turning hard, with gooey marshmallow pockets inside and a thick caramel finish on top that keeps every bite sticky, buttery, and just salty enough to cut through the sweetness.
The trick is moving fast once the cereal goes in and not pressing the mixture into the pan like you’re packing concrete. A light hand keeps the treats tender, and folding in extra mini marshmallows at the end gives you those soft, stretchy pockets that make these taste bakery-level instead of standard lunchbox fare.
Below, I’ll walk you through the texture cues that matter, the caramel choice that gives the best result, and a couple of variations if you want to tweak the finish without losing the chew.
The caramel stayed silky and the extra marshmallows made every square soft instead of dense. I let them set for the full 30 minutes and they cut cleanly without sticking all over the knife.
Save these salted caramel Rice Krispie treats for when you want chewy marshmallow bars with a glossy caramel drizzle and flaky sea salt on top.
The Part That Keeps These Bars Chewy Instead of Cement-Set
Most Rice Krispie treats turn dense because the mixture gets handled too slowly or pressed too hard. Marshmallows cool fast, and once they start to tighten up, the cereal can’t coat evenly without you overworking everything. That’s when the bars lose that soft pull and become stiff around the edges.
The fix is to keep the marshmallow base warm, fold the cereal in quickly, and use buttered hands to press the mixture into the pan with just enough pressure to level it. The extra cup of marshmallows matters here too. They don’t fully melt, so you get little pockets that stay gooey after the bars set.
- Butter — This gives the base its flavor and keeps the mixture from sticking to the pan and your hands. Salted butter works fine, but if that’s what you use, keep an eye on the added salt so the caramel doesn’t get muddy.
- Mini marshmallows — Mini marshmallows melt faster and more evenly than large ones, which helps the base stay smooth. The extra cup folded in at the end is what creates those soft bursts inside the bars.
- Store-bought caramel sauce — Use a sauce that pours smoothly at room temperature, not a thick candy-caramel that sets hard. A jarred caramel sauce is ideal here because it blends into the marshmallow mixture and still leaves you a glossy drizzle on top.
- Rice Krispies cereal — This is the structure of the whole dessert, so stale cereal will make the bars taste flat. Fresh cereal keeps the texture crisp against the chewy marshmallow.
- Flaky sea salt — Don’t swap this for fine table salt on top. Flaky salt gives you little bursts of contrast instead of making the top taste uniformly salty.
What Each Ingredient Is Actually Doing in This Recipe

- Primary ingredient (the star) — Quality matters most. Choose the best you can find.
- Cooking medium (oil, butter, or broth) — This carries flavors and prevents dryness.
- Seasonings (salt, pepper, spices, herbs) — Layer flavors so nothing overpowers. Build depth gradually.
- Aromatics (garlic, onion, herbs) — Cook with fat to bloom flavors. Become the foundation.
- Supporting ingredients — Complement the main ingredient without overpowering it.
- Sauce or liquid (if applicable) — Brings flavors together. Balance richness with acid.
- Acid (lemon, vinegar, wine, or other) — Brightens and prevents flat-tasting results.
- Final finish (garnish, glaze, or sauce) — Prevents one-dimensional taste and adds visual appeal.
How to Keep the Caramel Smooth From Stove to Pan
Melting the Marshmallow Base
Melt the butter over medium-low heat first, then stir in the mini marshmallows and keep moving them until the mixture turns fully smooth and glossy. If the heat is too high, the sugar tightens and the finished bars can taste a little toasted in a bad way instead of buttery. You’re looking for a base that slips off the spoon in thick ribbons, not one that looks grainy or dry around the edges.
Adding the Caramel Without Breaking the Texture
Take the pot off the heat before you add the caramel sauce, vanilla, and salt. That keeps the caramel from cooking down too far and turning sticky in the pan instead of blending into the marshmallow mixture. Stir just until the whole base looks unified and shiny, then move straight to the cereal. Letting this sit even a few minutes makes it harder to coat the cereal evenly.
Folding and Pressing for the Right Chew
Add the Rice Krispies and extra marshmallows together, then fold with a spatula until everything is coated. Stop as soon as there aren’t any dry patches left. If you keep stirring, the cereal breaks down and the bars lose their airy chew. Press the mixture into the parchment-lined pan with buttered hands, but don’t smash it flat. A light, even press gives you bars that hold together without turning hard.
Finishing With Caramel and Sea Salt
Drizzle the caramel over the top while the bars are still warm so it settles into the surface a little. Sprinkle the flaky sea salt immediately after the drizzle so it sticks before the top firms up. Let the pan rest for the full 30 minutes before cutting. If you cut too early, the caramel smears and the center can collapse instead of giving you clean, chewy squares.
How to Adapt These Bars Without Losing the Chewy Center
Dairy-Free Version
Use a plant-based butter that melts cleanly and a dairy-free caramel sauce. The bars will still hold together, but the flavor will be a little less rich, so the vanilla and salt matter more for balance. Keep the heat low, because vegan butter can separate faster if it gets too hot.
Extra-Gooey Center
Add up to another 1/2 cup mini marshmallows with the cereal if you want more pockets of melt-through in each bite. The bars will be a little softer and stickier, so let them set fully before slicing. This version is best if you want a dessert-bar texture that leans fudgy instead of crisp.
Chocolate-Caramel Twist
Drizzle melted dark chocolate over the caramel after the bars set for a sharper, less sweet finish. That extra bitterness makes the salt pop and turns the bars into something closer to a candy-bar dessert. Don’t mix chocolate into the marshmallow base or it can stiffen the texture.
Storage and Reheating
- Refrigerator: Store in an airtight container for up to 3 days. The bars firm up in the fridge, so let them sit at room temperature for 10 to 15 minutes before eating if you want the chew back.
- Freezer: Freeze tightly wrapped bars for up to 1 month. Separate layers with parchment so the caramel topping doesn’t smear when you pull them apart.
- Reheating: These don’t need reheating, and the microwave can make the marshmallows rubbery. If you want the topping a little softer, let a bar sit on the counter until the caramel loosens naturally.
Questions I Get Asked About This Recipe
Salted Caramel Rice Krispie Treats
Ingredients
Equipment
Method
- Line a 9x13 pan with parchment paper and spray lightly with cooking spray so the treats release cleanly.
- Melt butter in a large pot over medium-low heat until it turns glossy.
- Add mini marshmallows and stir constantly until fully melted and smooth, with a thick, lump-free texture.
- Remove from heat and stir in caramel sauce, vanilla extract, and salt until evenly combined and glossy.
- Fold in Rice Krispies cereal quickly until evenly coated so no dry cereal pockets remain.
- Fold in the extra 1 cup mini marshmallows for gooey pockets.
- Press the mixture into the prepared pan using buttered hands, pressing firmly but not too hard to keep the bars chewy.
- Drizzle generously with additional caramel sauce and immediately sprinkle flaky sea salt on top.
- Let set for 30 minutes before cutting into 16 bars so the center pulls apart in stretchy layers.