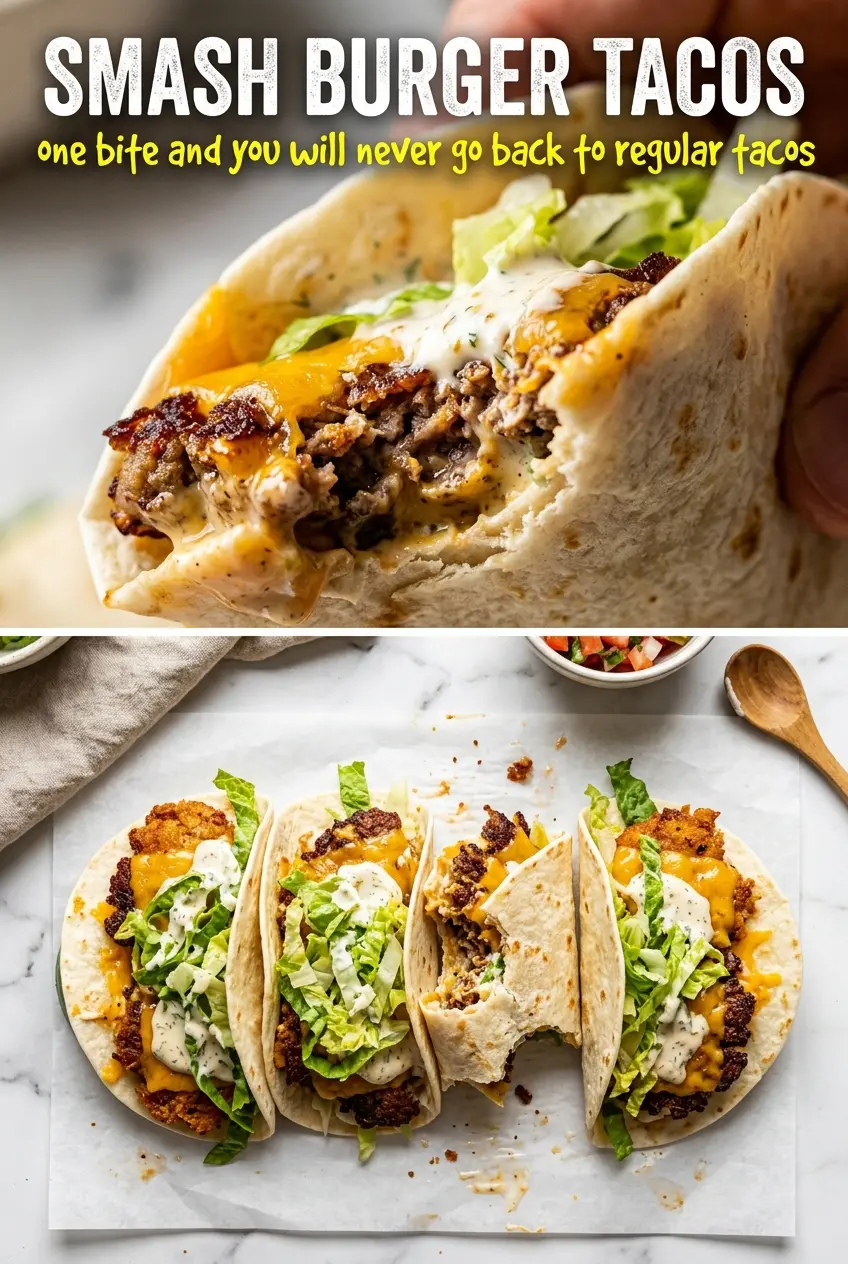
Smash burger tacos hit the sweet spot between fast dinner and something people get excited about the second it lands on the table. You get the crispy, lacy edges of a smash burger, the melty American cheese, and the crunch of a taco shell all in one bite. The best part is that nothing about it feels fussy, but the texture contrast makes it taste like you worked harder than you did.
The trick is treating the beef like a smash burger, not like taco filling. A hot griddle and a firm smash create those browned edges that make the whole thing worth making. American cheese matters here because it melts fast and coats the patty instead of sitting on top in a stubborn slab. Keep the toppings simple and cool so the hot beef stays the star and the shell doesn’t get buried.
Below you’ll find the small details that keep the patties crisp, the cheese melted, and the tacos from turning soggy before they hit the plate. There’s also a couple of easy ways to change them up depending on what you have on hand.
The patties got those crispy edges fast, and the cheese melted right over the beef instead of sliding off. I used flour tortillas and they held up great with the pickles and mustard.
Save these smash burger tacos for the nights when you want crispy beef, melty cheese, and a dinner that comes together in 10 minutes.
The Smash That Makes the Crispy Edges Happen
The biggest mistake with this style of taco is treating the beef like a neat little patty. That leaves you with a thick middle and no real browning. The smash has to happen right away while the meat is still loose on the hot surface, because that pressure is what creates the thin edge lace and deep caramelization.
Leave the patties alone after you smash them. If you start nudging them around, the crust tears before it has time to set. A hot cast iron griddle helps a lot here because it holds steady heat, which means the beef browns instead of steaming. If the pan looks dry after the first batch, add a tiny bit more butter, but don’t flood it or the patties will fry instead of sear.
What Each Ingredient Is Actually Doing in These Tacos
- Ground beef — An 80/20 blend gives you enough fat for flavor and browning. Leaner beef works, but the patties won’t crisp as dramatically and can taste a little dry after smashing.
- American cheese — This is the easiest way to get that classic burger melt. It softens fast and hugs the patty, which matters more here than using a fancier cheese that can turn oily or clumpy under heat.
- Corn or flour taco shells — Corn shells bring more corn flavor and a little extra crunch, while flour shells stay softer and are easier to fold around the patty. Flour is the safer choice if you’re loading the tacos generously.
- Dill pickles, tomato, lettuce, and red onion — These toppings give the taco the burger hallmarks that keep it from tasting like a plain beef taco. Keep the lettuce dry and the tomato sliced thin so the shells don’t get soggy.
- Ketchup and mustard — The tang cuts through the beef fat and cheese. Don’t overdo either one at the start; a light drizzle keeps the taco balanced instead of sliding into one-note burger sauce territory.
- Butter — A thin film on the griddle helps the beef release cleanly and adds a little extra browning on the first side. Too much butter cools the pan, so use just enough to coat the surface.
Building the Tacos So the Shell Stays Crisp
Heating the Pan Properly
Set the cast iron over medium-high heat and let it get fully hot before the beef goes on. If the pan is only warm, the meat sits there and loses its juices before the crust forms. You want an immediate sizzle the second the beef touches the surface. A light buttering is enough; if the butter smokes hard right away, the heat is too high and the outside will scorch before the center finishes.
Smashing and Searing the Beef
Divide the beef into four loose portions and drop them on the griddle without packing them first. Smash each one thin with a sturdy spatula, using firm pressure so the edges spread out and brown. Don’t move them for 2 to 3 minutes. When the edges look dark and lacy and the centers are no longer glossy raw, they’re ready to flip.
Melting the Cheese and Assembling Fast
Flip the patties and lay the cheese on immediately so the residual heat starts melting it at once. Give them just 1 to 2 minutes on the second side; if you leave them too long, the burger dries out and the cheese can get greasy instead of silky. Warm the taco shells while the patties finish, then build each taco right away so the shells stay crisp and the cheese still soft when they hit the plate.
How to Adapt These Smash Burger Tacos When You Need a Shortcut
Flour Tortillas Instead of Taco Shells
Soft flour tortillas make these easier to fold and eat, especially if your patties are wide. You lose some crunch, but the tortilla gives you more of that diner-style smash burger feel and holds up better if you’re stacking on extra toppings.
Dairy-Free Version
Use a dairy-free butter for the griddle and skip the cheese or use a good melty plant-based slice. The tacos still work because the best part is the browned beef, but you’ll want to lean harder on pickles, mustard, and onion to keep the filling lively.
Lettuce Wrap Version
If you want a lower-carb version, tuck the smashed patties and toppings into sturdy lettuce cups instead of shells. You’ll lose the taco crunch, but the burger flavor stays intact and the juicy beef keeps it satisfying.
Storage and Reheating
- Refrigerator: Store the cooked patties separately for up to 3 days. The shells and toppings are best kept apart so nothing turns soggy.
- Freezer: The cooked patties freeze well for up to 2 months. Cool them completely, wrap tightly, and freeze without the toppings or shells.
- Reheating: Reheat the patties in a skillet over medium heat until hot through and the edges crisp again. The microwave softens the crust, which is the one part you don’t want to lose.
Questions I Get Asked About This Recipe
Smash Burger Tacos
Ingredients
Equipment
Method
- Heat a cast iron griddle or skillet over medium-high heat and lightly butter the surface. Stop when the surface is hot enough that the beef sizzles immediately.
- Divide ground beef into 4 equal portions and place on the griddle. Season with salt and pepper to taste before smashing.
- Using a sturdy spatula, smash each patty very thin, about 1/4 inch thick. Press firmly so the patties spread into ultra-thin rounds.
- Cook without moving for 2-3 minutes until the edges are crispy and caramelized. Look for deep browning around the perimeter and a set center.
- Flip each patty and immediately top with a slice of cheese. Cook for another 1-2 minutes until the cheese melts, covering the crispy edges.
- Warm taco shells and place one smashed burger patty in each. Keep them warm so they stay pliable for stacking.
- Top each taco with dill pickle chips, tomato, shredded lettuce, and diced red onion. Add in layers for crunch and bright flavor with every bite.
- Drizzle with ketchup and mustard to taste. Use a light zigzag so the sauces don’t soak the shells.