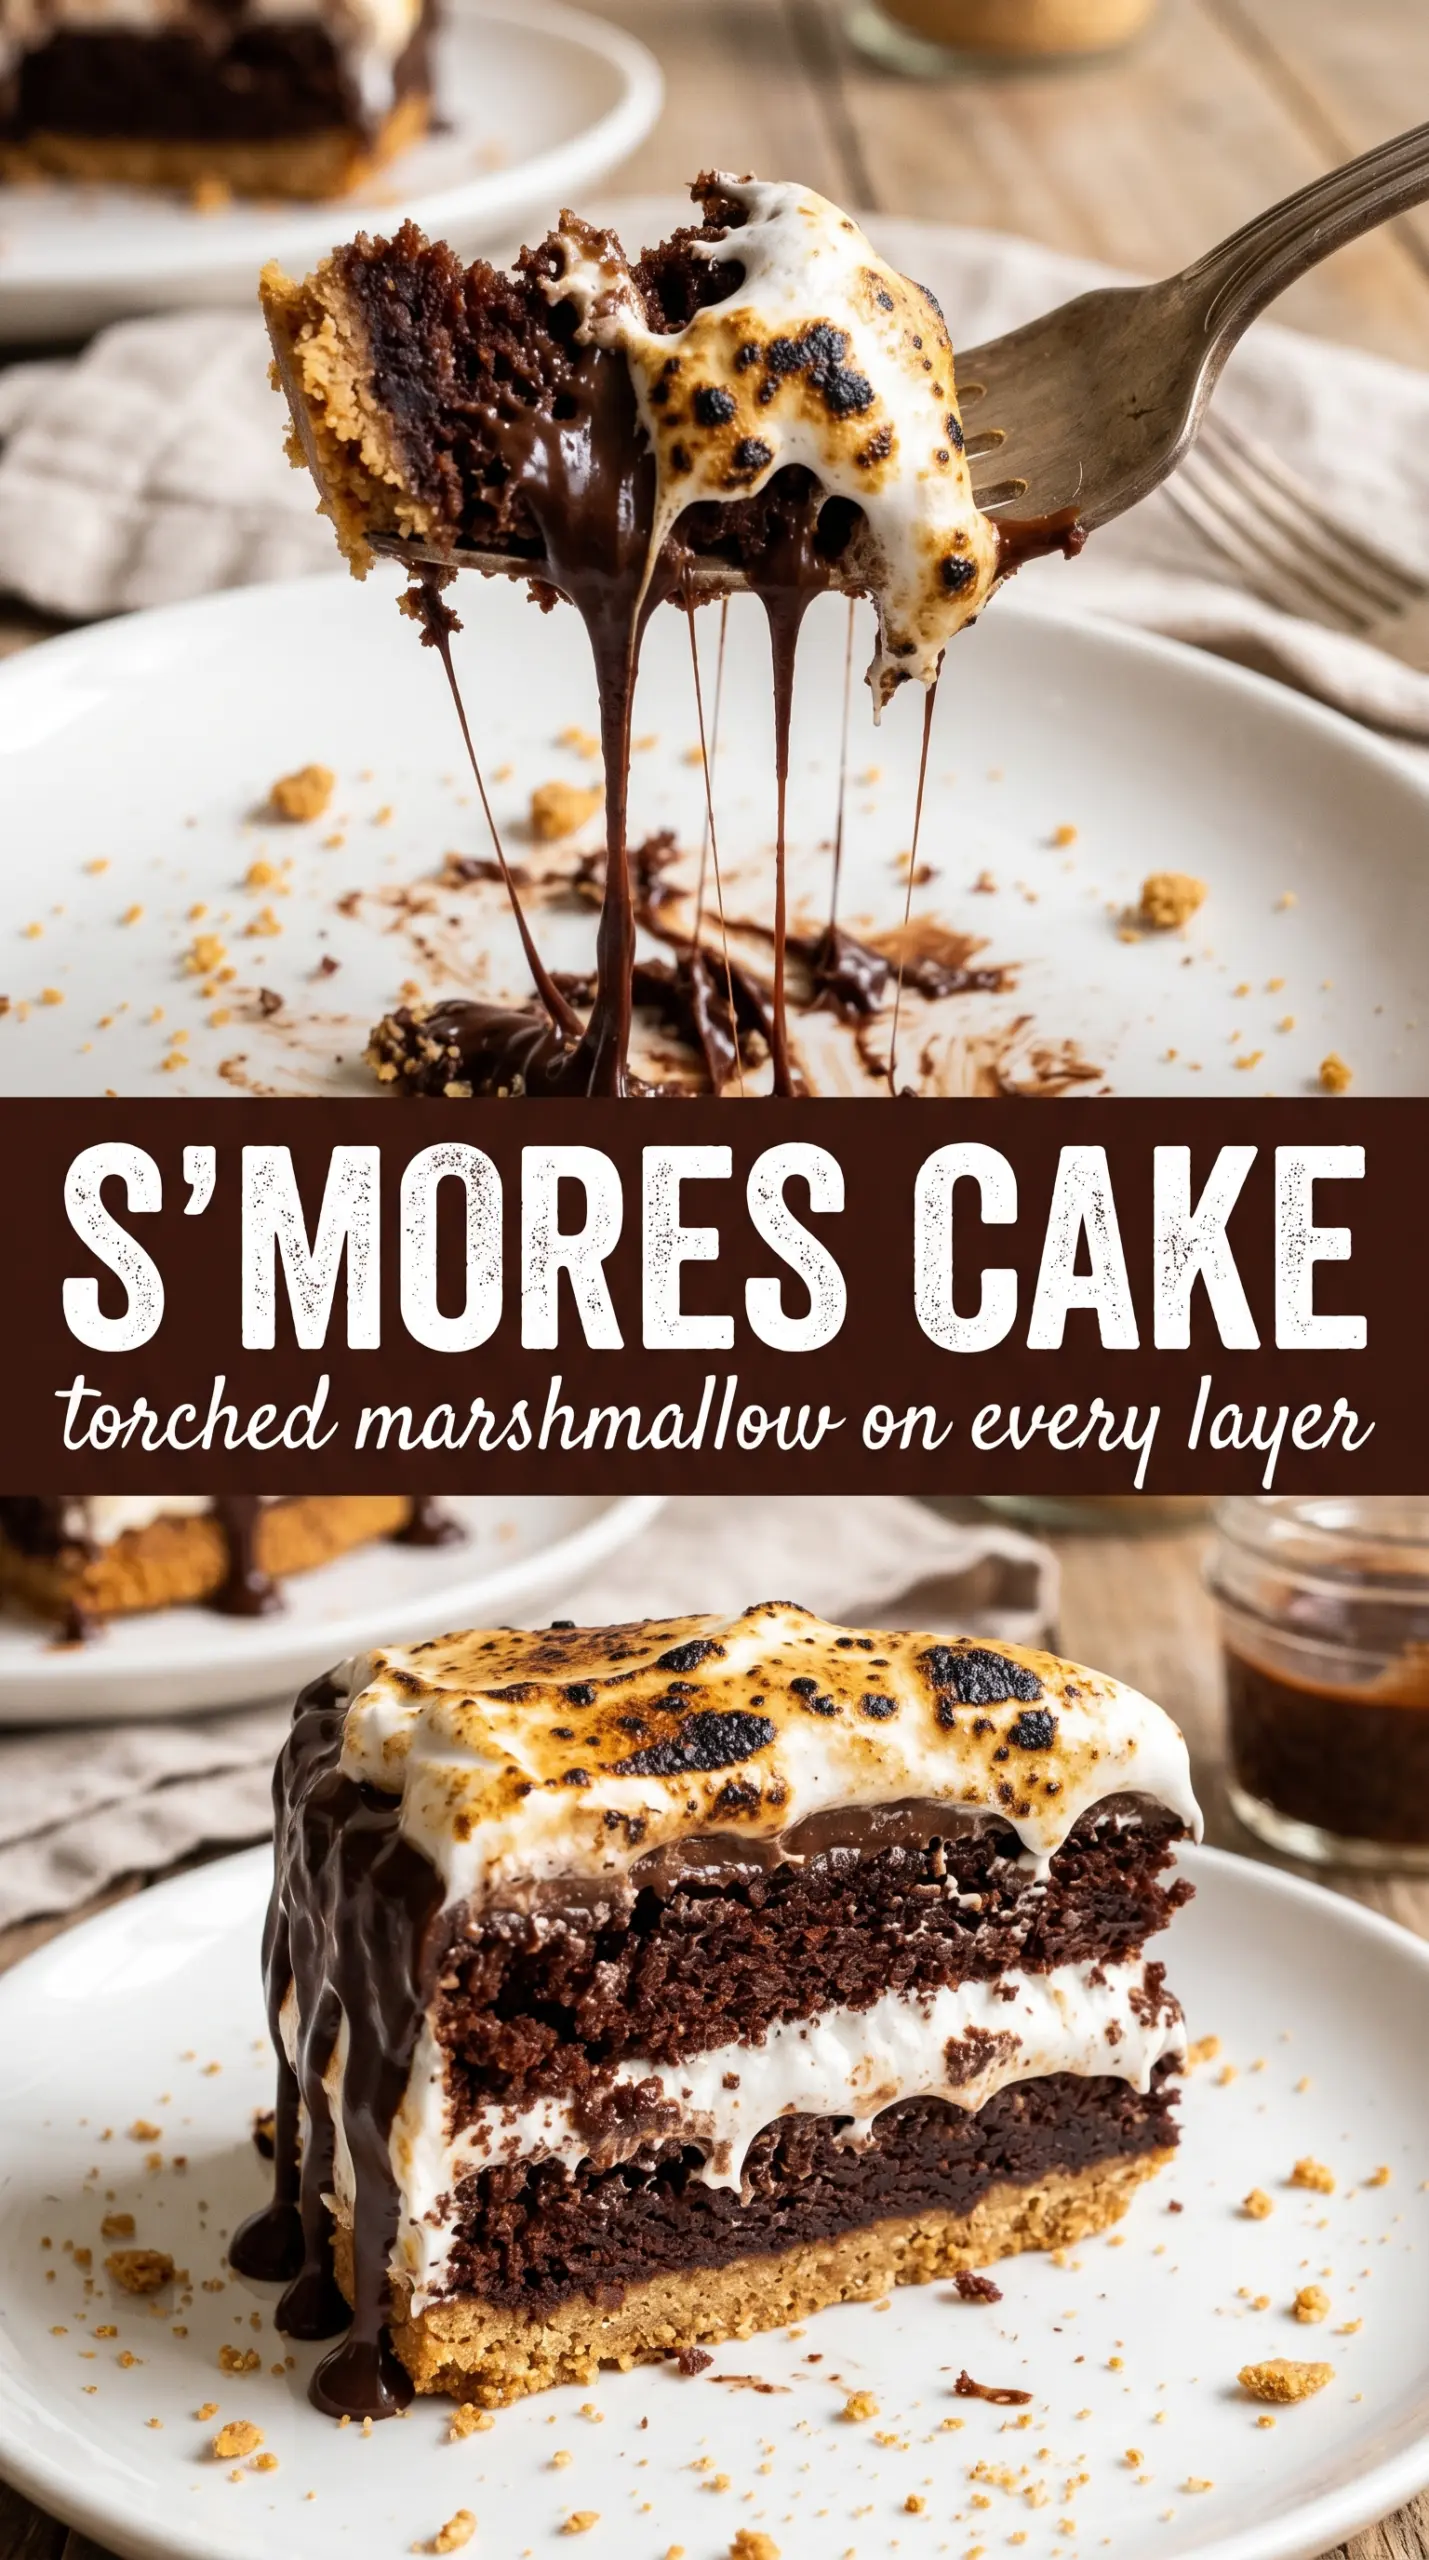
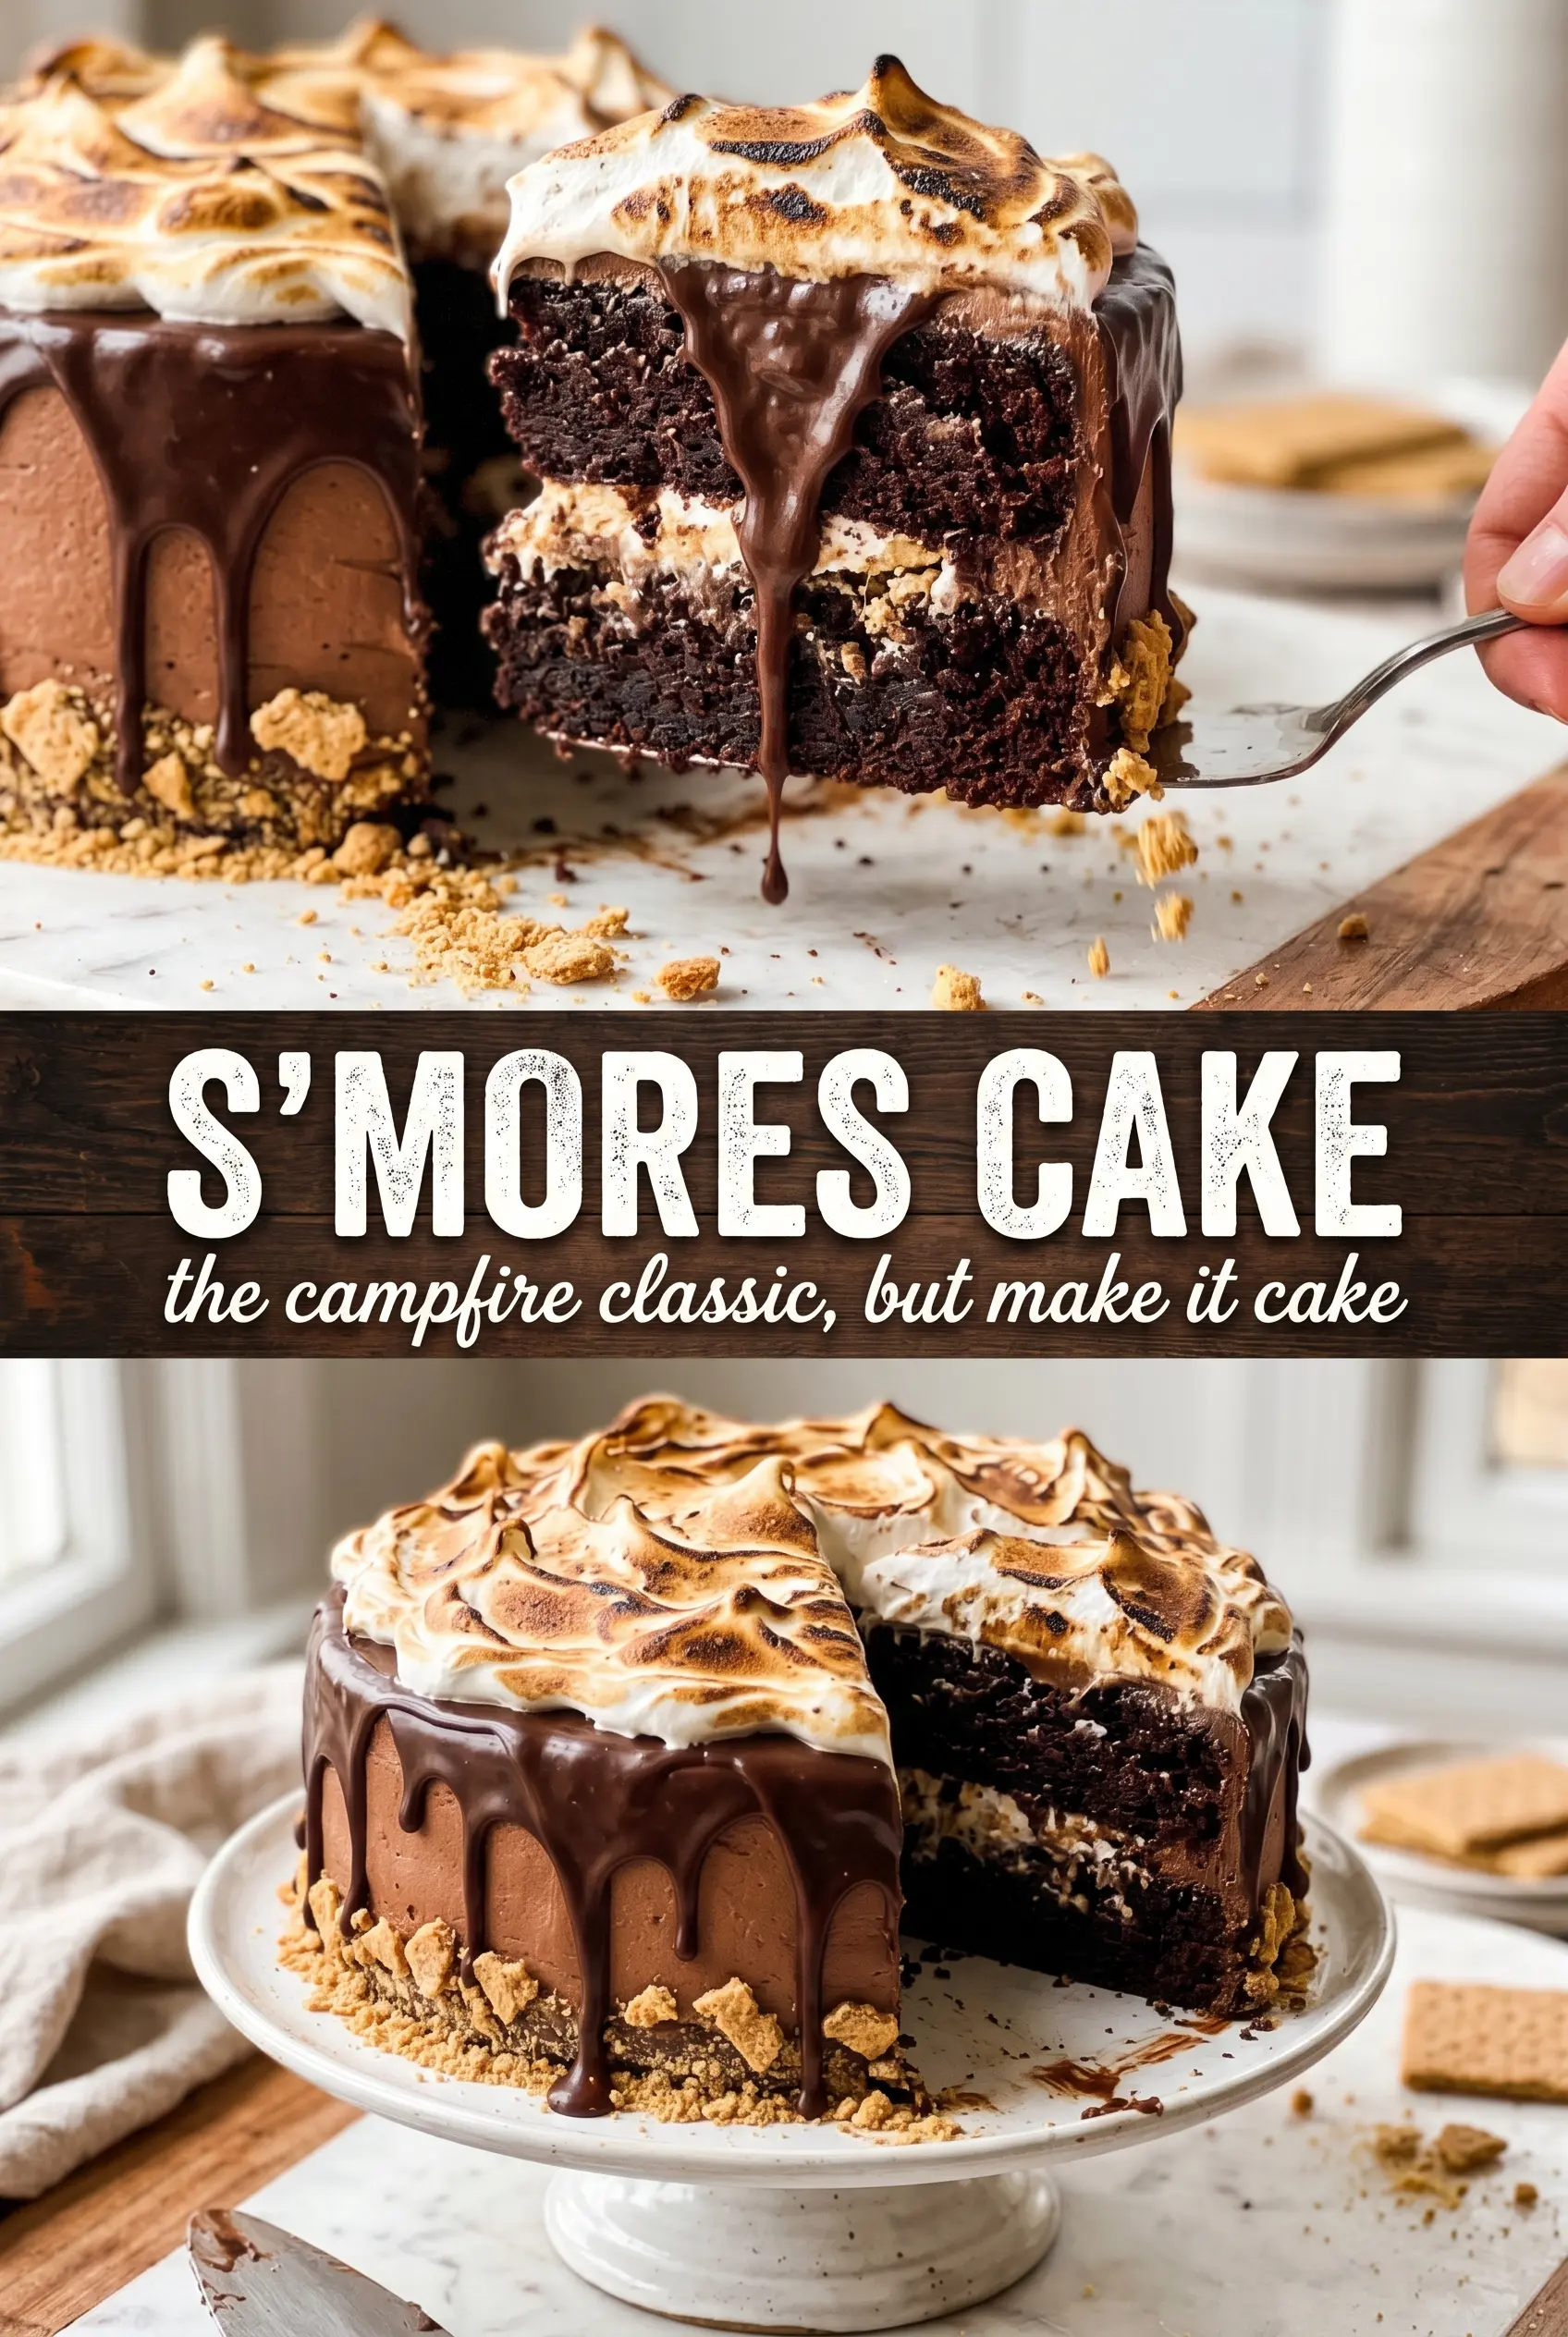
All the best parts of a campfire treat show up here in cake form: tender chocolate layers, a glossy ganache filling, graham cracker crunch, and a toasted marshmallow meringue that turns a simple layer cake into something people stop talking over their forks to eat. It slices cleanly, tastes rich without being heavy, and hits that sweet spot where chocolate and marshmallow don’t fight each other.
The chocolate cake uses both buttermilk and coffee, which is the combination that keeps the crumb soft while deepening the cocoa flavor. The coffee doesn’t make it taste like coffee; it just pulls more from the chocolate. The meringue is cooked over a double boiler before whipping, which gives it better stability than a raw egg white frosting and helps it hold those dramatic peaks after torching.
Below, I’ve included the exact cue I watch for when the ganache is the right texture for filling, plus the little finish that keeps the graham cracker crumbs from getting soggy too fast.
The chocolate layers stayed super moist and the meringue toasted into those perfect golden peaks without sliding off the cake. The ganache set up just enough between layers, and my kids went straight for the graham cracker edge.
Save this s’mores cake for the chocolate-and-marshmallow dessert that slices neatly and toasts beautifully.
The Trick to a Cake That Tastes Like a Campfire Treat Instead of Just Chocolate Cake
The difference between a good s’mores cake and one that just reads as chocolate cake with frosting comes down to contrast. You need a soft, deeply flavored chocolate crumb, something sticky and rich in the middle, and a topping with enough structure to toast without melting into a puddle. If any one of those pieces is off, the whole cake feels one-note.
The other place people get tripped up is assembly. Warm ganache can slip out the sides, and meringue spread too thin won’t hold those tall toasted peaks. Let each component cool to the right texture before you build the cake, and the layers will stay distinct instead of smearing together.
- Cocoa powder — This is the backbone of the cake flavor, so use unsweetened cocoa you actually like the taste of. Dutch-process won’t behave the same here because the recipe leans on baking soda for lift, so stick with natural cocoa powder unless you adjust the leavening.
- Strong brewed coffee — This sharpens the chocolate flavor and keeps the cake from tasting flat. It doesn’t leave a coffee flavor behind unless you brew it too weak or use flavored coffee; the point is depth, not a mocha note.
- Buttermilk — This gives the crumb a softer, finer texture and reacts with the baking soda for lift. If you’re in a pinch, mix 1 cup milk with 1 tablespoon vinegar or lemon juice and let it sit 5 minutes, but the cake will taste a little less rich.
- Graham cracker crumbs — Use them at the end, not in the filling, so you keep that sandy, toasty texture around the base. Finely crushed crumbs cling better to the frosting than coarse pieces, but a few bigger bits are welcome.
What Each Ingredient Is Actually Doing in This Recipe
- Primary ingredient (the star) — Quality matters most. Choose the best you can find.
- Cooking medium (oil, butter, or broth) — This carries flavors and prevents dryness.
- Seasonings (salt, pepper, spices, herbs) — Layer flavors so nothing overpowers. Build depth gradually.
- Aromatics (garlic, onion, herbs) — Cook with fat to bloom flavors. Become the foundation.
- Supporting ingredients — Complement the main ingredient without overpowering it.
- Sauce or liquid (if applicable) — Brings flavors together. Balance richness with acid.
- Acid (lemon, vinegar, wine, or other) — Brightens and prevents flat-tasting results.
- Final finish (garnish, glaze, or sauce) — Prevents one-dimensional taste and adds visual appeal.
Building the Layers So the Filling Stays Put and the Top Gets Those Toasted Peaks
Mixing the Chocolate Batter
Whisk the dry ingredients first so the baking soda and baking powder are evenly distributed, then combine the wet ingredients in a separate bowl before bringing everything together. The batter will look loose, and that’s what you want; chocolate cakes with coffee often scare people because the mixture seems thinner than expected. Stop mixing as soon as the flour disappears, or the crumb turns tight instead of tender.
Baking and Cooling Without Rushing It
Divide the batter evenly between two greased 9-inch pans and bake until the centers spring back and a tester comes out with just a few moist crumbs. If the tops dome a little, that’s fine — you can level them after cooling if needed. Let the cakes cool completely before you move on; warm layers will melt the ganache and soften the meringue into a slide.
Cooking the Ganache to the Right Texture
Heat the cream just until it simmers, then pour it over the chopped chocolate and let it sit untouched for 2 minutes before stirring. If you stir too soon, you cool the mixture unevenly and sometimes leave unmelted bits behind. The finished ganache should drip slowly off a spoon, not pour like sauce and not set up like truffle filling, because you want it spreadable between layers.
Whipping the Meringue Until It Holds Shape
Set the egg whites, sugar, and cream of tartar over simmering water and whisk until the sugar dissolves and the mixture feels hot when rubbed between your fingers. That step matters; if the sugar stays gritty, the meringue won’t whip as smoothly and can weep later. Beat it until it’s glossy and stiff enough to hold tall peaks that curve just slightly at the tip.
Stacking and Finishing the Cake
Spread ganache between the layers, then use the meringue around the outside and on top, building it into thick swirls instead of smoothing it flat. Press the graham cracker crumbs around the base while the frosting is still tacky so they stick in place. Torch the meringue in uneven passes until you get deep golden patches; if you stay in one spot too long, you’ll scorch the sugar before the rest of the frosting has a chance to toast.
How to Adapt This S’mores Cake Without Losing the Texture That Makes It Work
Make It Gluten-Free
Swap in a good 1:1 gluten-free baking flour for the all-purpose flour. The crumb will be a little more delicate, so let the cakes cool fully before moving them, and expect a slightly softer slice rather than the same exact springy texture.
Dairy-Free Version
Use a plant-based buttermilk made from non-dairy milk and vinegar, and swap in coconut cream for the ganache. The cake still bakes up nicely, but the ganache will taste a little coconut-forward unless you use a very neutral dairy-free cream.
Make the Chocolate Flavor Even Deeper
Use espresso instead of standard brewed coffee and add an extra tablespoon of cocoa powder to the cake batter. That won’t make the cake taste like coffee; it just pushes the chocolate flavor darker and more intense.
Make Ahead for Easier Assembly
Bake the cake layers a day ahead and wrap them once they’re completely cool. You can also make the ganache ahead and gently warm it until spreadable, but save the meringue for the day you plan to serve the cake so the peaks stay crisp and glossy.
Storage and Reheating
- Refrigerator: Store covered for up to 3 days. The graham cracker crumbs soften a bit, but the cake stays sliceable.
- Freezer: Freeze the unfrosted cake layers for up to 2 months, wrapped tightly. Don’t freeze the finished meringue cake; the topping loses its best texture after thawing.
- Reheating: Let slices sit at room temperature for 20 to 30 minutes before serving. This isn’t a cake you warm through, because the ganache and meringue both suffer when heated.
Questions I Get Asked About This S’mores Cake
S'mores Cake
Ingredients
Equipment
Method
- Preheat the oven to 350°F, then grease two 9-inch round pans. Make sure the pans are evenly greased so the cake releases cleanly.
- Whisk together the flour, granulated sugar, cocoa powder, baking soda, baking powder, and salt. Whisk until the dry ingredients look uniform with no cocoa lumps.
- Whisk the eggs, buttermilk, cooled strong brewed coffee, vegetable oil, and vanilla extract in a separate bowl. Mix until glossy and fully combined.
- Combine the wet and dry ingredients and mix until smooth. Stop as soon as the batter is cohesive and thick, about 1 minute.
- Divide the batter between the two pans and bake for 30-35 minutes at 350°F. Bake until the centers spring back and a toothpick comes out with a few moist crumbs.
- Cool the cakes completely on a rack. Let them cool fully before assembling to prevent frosting from melting.
- Heat the heavy cream until it is simmering. Keep it at a gentle simmer for smooth melting.
- Pour the simmering cream over the chopped dark chocolate and let it sit for 2 minutes. Wait until the chocolate looks glossy and softened.
- Stir until smooth, then cool the ganache until pourable but still fluid. The surface should be thick but able to drizzle.
- Combine the egg whites, granulated sugar, and cream of tartar in a double boiler. Whisk continuously so the sugar dissolves evenly.
- Whisk over simmering water until the sugar dissolves and the mixture is hot. Stop when it feels smooth between your fingers.
- Beat the mixture with a mixer until stiff, glossy peaks form. Stop when the meringue holds sharp ridges and does not droop.
- Fill the cake with ganache and meringue between the layers. Spread to the edges so each slice shows the layered effect.
- Frost the outside with the marshmallow meringue. Cover the sides evenly for a base layer that can be torched.
- Press graham cracker crumbs around the base of the cake. Use gentle pressure so crumbs adhere without disturbing the frosting.
- Use a kitchen torch to toast the meringue to golden in dramatic patches. Move the torch quickly so the peaks bronze without burning.
- Drizzle the remaining ganache over the top. Let the ganache run down the sides for the drip effect.