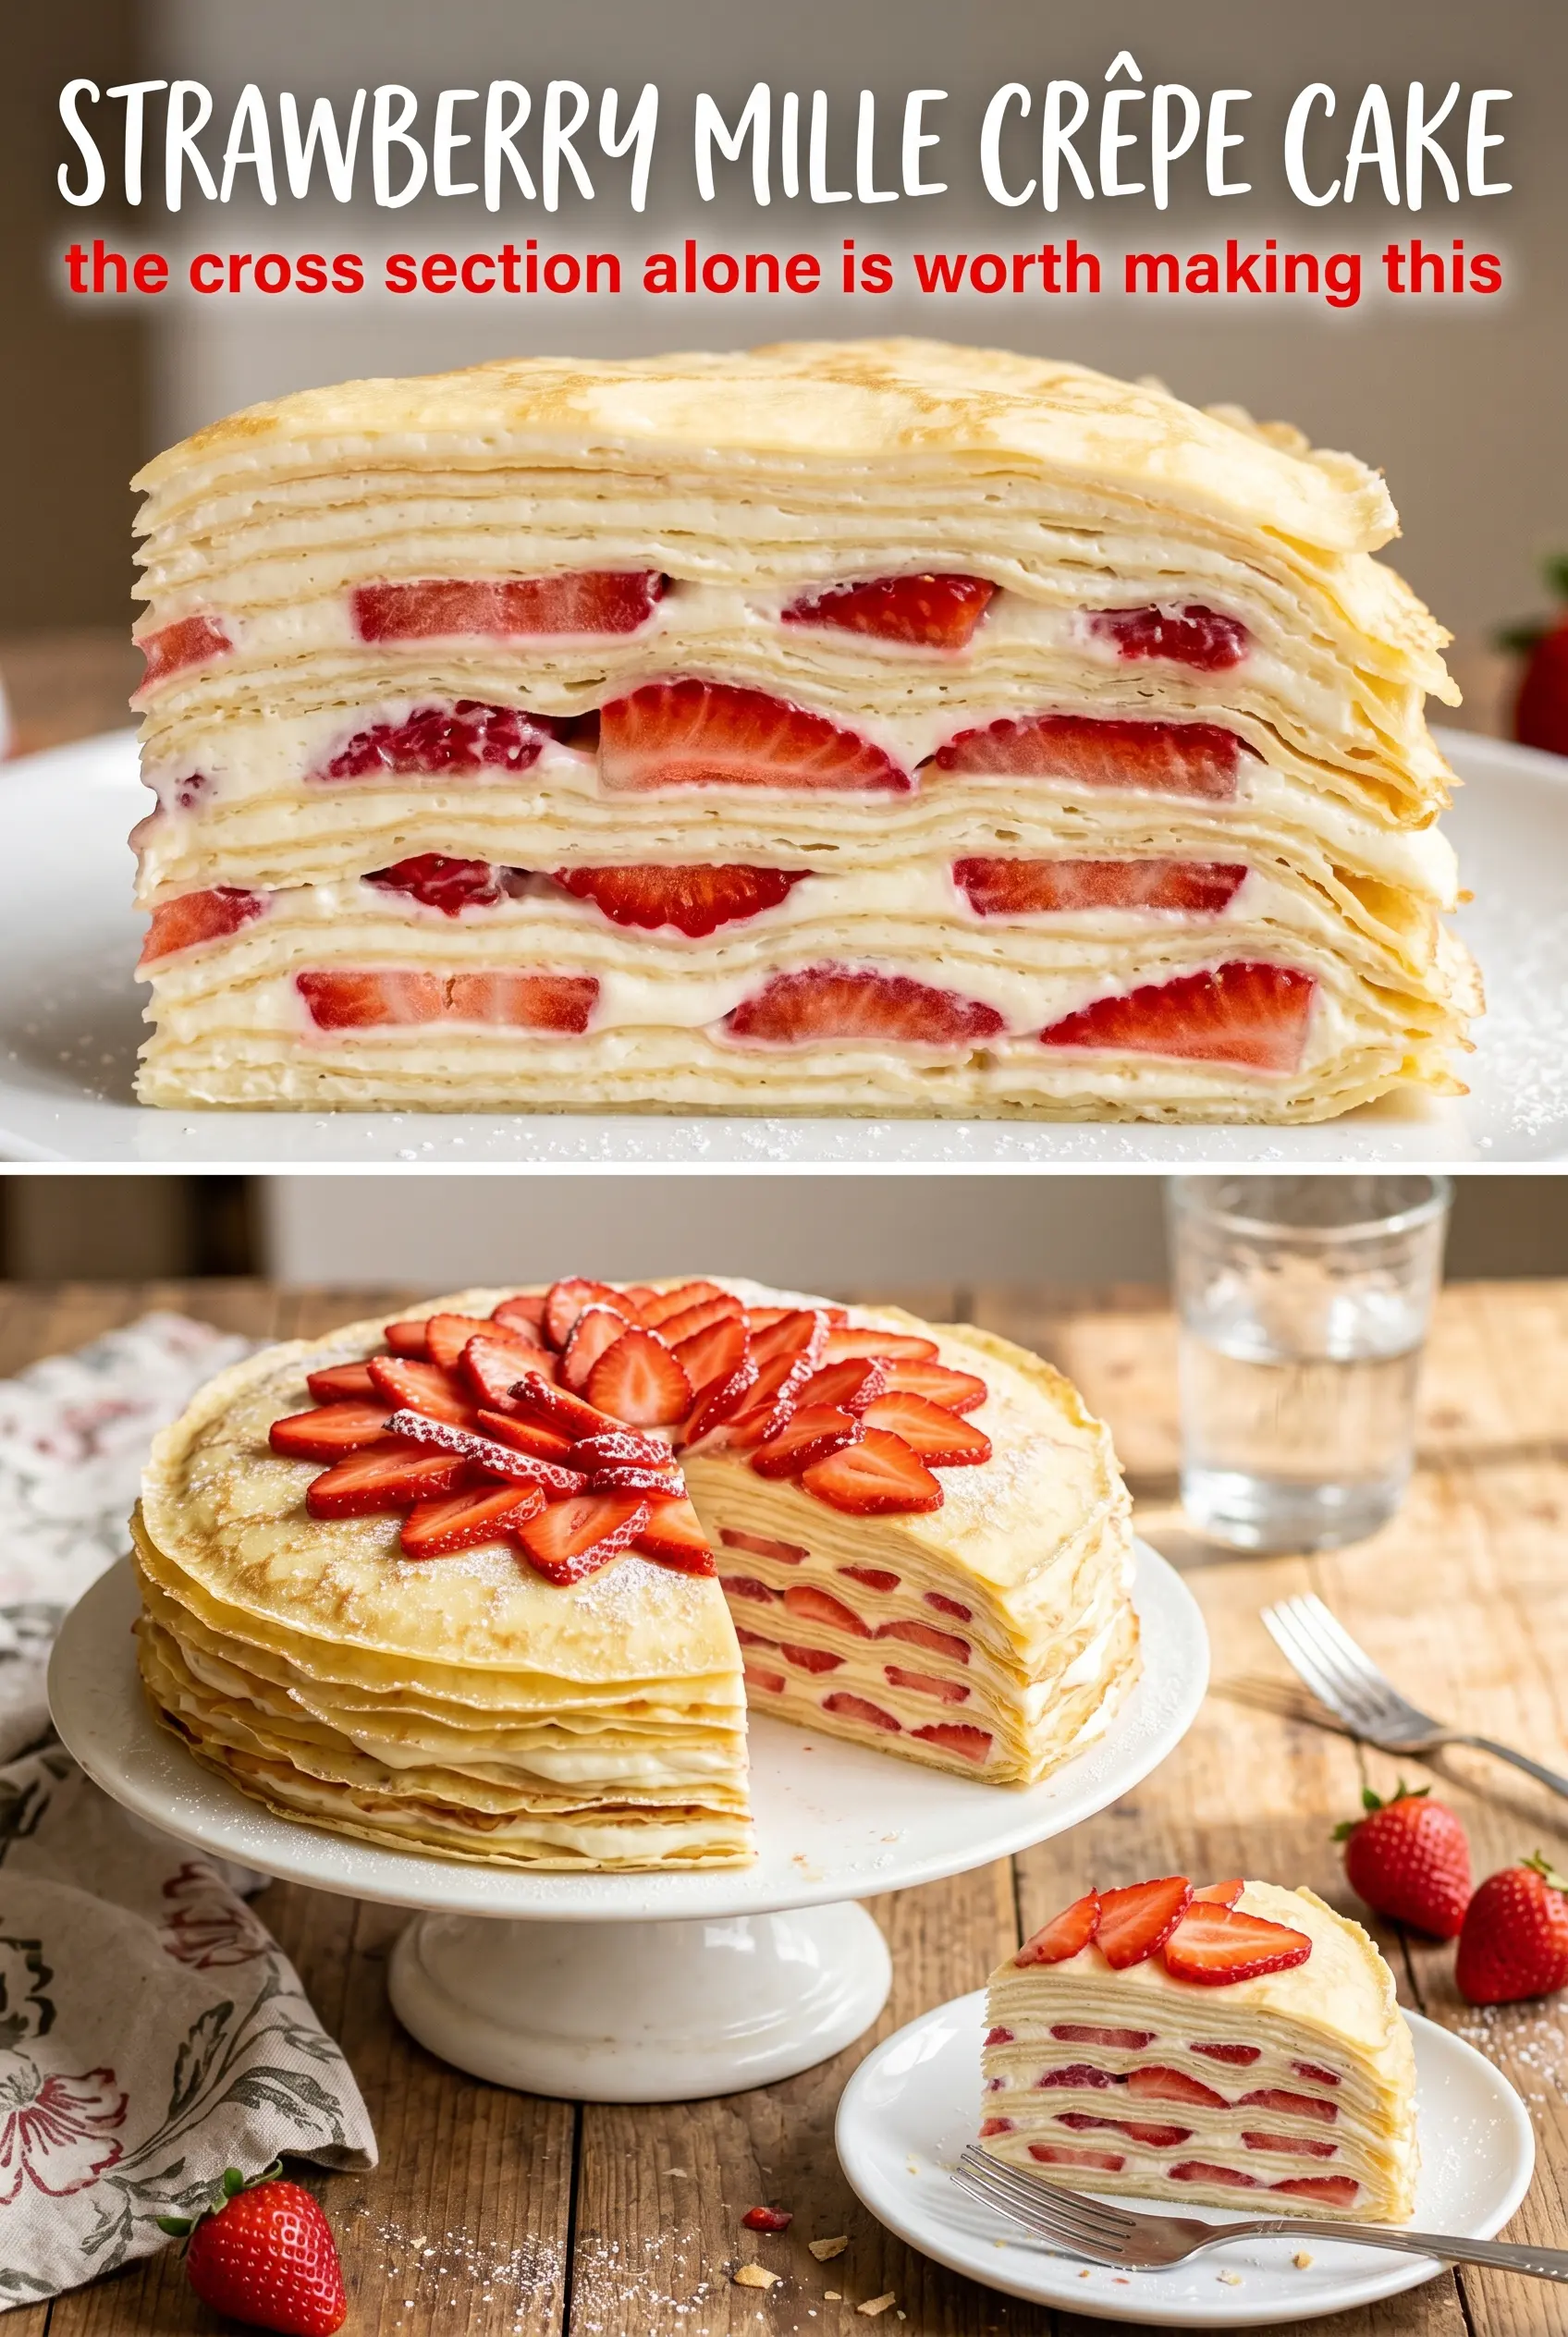
Strawberry mille crêpe cake slices cleanly into soft, fragile layers, with pastry cream settling between each crêpe and fresh strawberries bringing just enough brightness to keep every bite from feeling heavy. The finished cake looks delicate on the plate, but what makes it memorable is the balance: tender crepes, cool vanilla cream, and berries that stay juicy without turning the whole stack soggy.
The trick is in the texture of each layer. The batter needs to be thin enough to spread in a whisper across the pan, and the pastry cream has to be cooked low and slow until it thickens without tasting starchy. If either one is rushed, the cake loses its clean slice and starts sliding apart. Letting the crepes rest and the assembled cake chill for a full three hours gives the layers time to set into something that cuts neatly instead of slumping.
Below, I’ve included the small details that matter most: how to keep the pastry cream silky, why the strawberries should be sliced at the right thickness, and what to do if your crepes tear on the first try. Those little fixes are what turn this from a pretty dessert into one you’ll want to make again.
The pastry cream thickened up beautifully and the cake sliced into clean layers after chilling. I was worried the strawberries would make it messy, but they stayed fresh and the whole dessert held together better than I expected.
Save this strawberry mille crêpe cake for the dessert night when you want thin layers, silky pastry cream, and a slice that looks as elegant as it tastes.
The Trick to Mille Crêpe Cake That Actually Slices Cleanly
The biggest mistake with mille crêpe cake is stacking layers before the pastry cream and crepes have enough structure to hold one another. If the cream is still warm or loose, the strawberries will slide, the crepes will shift, and the whole cake will slump the second you cut it. What you want instead is a pastry cream that has fully chilled and thickened, plus crepes that are cool enough to stack without trapping steam.
The other thing that matters is uniformity. Thin, even crepes create the clean striped look this dessert is known for, and they also help the cake cut without tearing. A heavy hand with the batter or too much heat in the pan gives you lumpy edges and browned spots that show through every layer. Gentle heat and a thin pour give you those delicate, almost translucent rounds that make the finished cake look polished.
What the Strawberries and Pastry Cream Are Really Doing Here

- Pastry cream — This is the backbone of the cake. It needs egg yolks and cornstarch to set into a sliceable filling, and milk gives it the clean, classic flavor that whipped cream alone can’t match. If you swap in plain whipped cream, the cake will taste lighter but it won’t hold its shape nearly as well.
- Strawberries — Slice them thin enough to nestle into the layers, but not so thin that they disappear. Fresh berries matter here because frozen strawberries release too much liquid and will bleed into the cream. If your berries are very sweet, a short toss with sugar is enough; if they’re tart, let them sit a few extra minutes so the juices start to form a light syrup.
- Butter in the crepe batter — Melted butter keeps the crepes tender and helps them release cleanly from the pan. That little bit of fat also keeps the layers from tasting dry after chilling. If you skip it, the crepes can turn papery and tear when you stack them.
- Whole milk and water in the batter — The combination gives the batter enough richness to taste good, while the water keeps it light and pourable. Whole milk alone makes the crepes heavier and less flexible, which works against the delicate texture you want in a layered cake.
Building the Layers Without Letting the Cake Slide Apart
Mixing the Crepe Batter Until It’s Truly Smooth
Blend the flour, eggs, milk, water, salt, and melted butter until the batter looks completely smooth, with no flour streaks or little bubbles clinging to the sides. The batter should pour like thin cream, not pancake batter. Let it rest for 30 minutes so the flour hydrates and the bubbles settle, because unrested batter tends to make tough crepes that shrink in the pan.
Cooking Crepes Thin Enough for a Clean Stack
Use a non-stick pan over medium heat and pour just enough batter to coat the surface in a very thin layer. Swirl the pan right away so the batter reaches the edges before it sets. If the pan is too hot, the crepes brown too fast and become brittle; if it’s too cool, they dry out before the surface sets and you’ll end up peeling up torn edges.
Making Pastry Cream That Stays Silky
Heat the milk, then whisk the yolks, sugar, and cornstarch until smooth before slowly tempering in the hot milk. Cook over low heat and stir constantly until the cream turns thick and glossy, with a soft pudding-like body. If you crank the heat, the yolks can scramble and the starch can go grainy, so low heat is the difference between silk and a lumpy filling.
Stacking the Cake in Tight, Even Layers
Spread a thin layer of pastry cream over each crepe and add sliced strawberries in a single, even layer. Keep the layers modest; if you overload the filling, the cake will wobble and leak once it chills. Finish with a crepe on top, press lightly to settle the stack, then refrigerate for a full 3 hours so the whole dessert firms into clean, neat slices.
Three Ways to Adjust the Cake Without Losing the Structure
Dairy-Free Version
Use an unsweetened plant-based milk in both the crepes and pastry cream, and swap in a dairy-free butter for the batter. The texture will still work, but the cream may set a little less firmly, so chill the cake an extra 30 minutes before slicing.
Gluten-Free Crepes
A good 1:1 gluten-free flour blend can replace the all-purpose flour in the crepes. The batter may need a few extra minutes to rest, and the crepes can be a touch more delicate, so lift them gently with a thin spatula and don’t overcook them.
Mixed Berry Version
Swap part of the strawberries for raspberries or thinly sliced blueberries if that’s what you have. Raspberries add more tang and a softer texture, while blueberries keep their shape better but don’t give the same juicy layer effect. Keep the total fruit amount the same so the cake doesn’t get too wet.
Storage and Reheating
- Refrigerator: Keep covered for up to 3 days. The crepes soften a little as they sit, but the cake still slices well.
- Freezer: I don’t recommend freezing this cake. The pastry cream and strawberries lose their clean texture after thawing, and the layers can weep.
- Reheating: Don’t reheat it. Serve it cold from the fridge for the best texture, and wipe the knife between cuts if you want the slices to look sharp.
Questions I Get Asked About This Recipe
Strawberry Mille Crêpe Cake
Ingredients
Equipment
Method
- Blend all-purpose flour, large eggs, whole milk, water, salt, and melted butter until smooth, with no visible lumps. Scrape down the blender as needed so the batter looks uniform and glossy.
- Let the batter rest for 30 minutes at room temperature. Cover it so it doesn’t skin, and it should thicken slightly for easier, ultra-thin crepes.
- Heat whole milk in a Dutch oven over medium heat until steaming and just beginning to bubble around the edges, about 3–5 minutes. Keep it hot but not boiling.
- Whisk egg yolks, granulated sugar, and cornstarch in a bowl until smooth and pale. Drizzle in vanilla extract and mix to combine.
- Temper the yolks by slowly whisking in the hot milk a little at a time, then pour the mixture back into the Dutch oven. Whisk continuously so it thickens evenly and doesn’t scramble.
- Cook over low heat, stirring constantly, until thickened like pudding, 6–8 minutes. Visual cue: you should see lines from the whisk that hold their shape.
- Cool the pastry cream by pressing plastic wrap directly on the surface. Refrigerate until needed, keeping the wrap in contact to prevent a skin.
- Heat a non-stick pan over medium heat and lightly grease if needed. Ladle batter in small amounts to create very thin circles, about 10–12 cm wide.
- Cook each crepe until set, then flip once and cook briefly on the second side. Visual cue: edges look dry and lightly golden, typically 30–45 seconds per side for 20–25 crepes total.
- Slice fresh strawberries and toss with granulated sugar. Let them sit while you assemble so they release some juice for the layers.
- Layer crepes with pastry cream and strawberries in a cake pan, starting and ending with a crepe. Spread evenly for thin layers and press gently to level the stack.
- Refrigerate the assembled cake for 3 hours to set the layers. Visual cue: the stack should feel firm when you gently tap the top.
- Slice the Strawberry Mille Crêpe Cake with a sharp knife. Serve each piece with whipped cream for a soft, creamy finish.