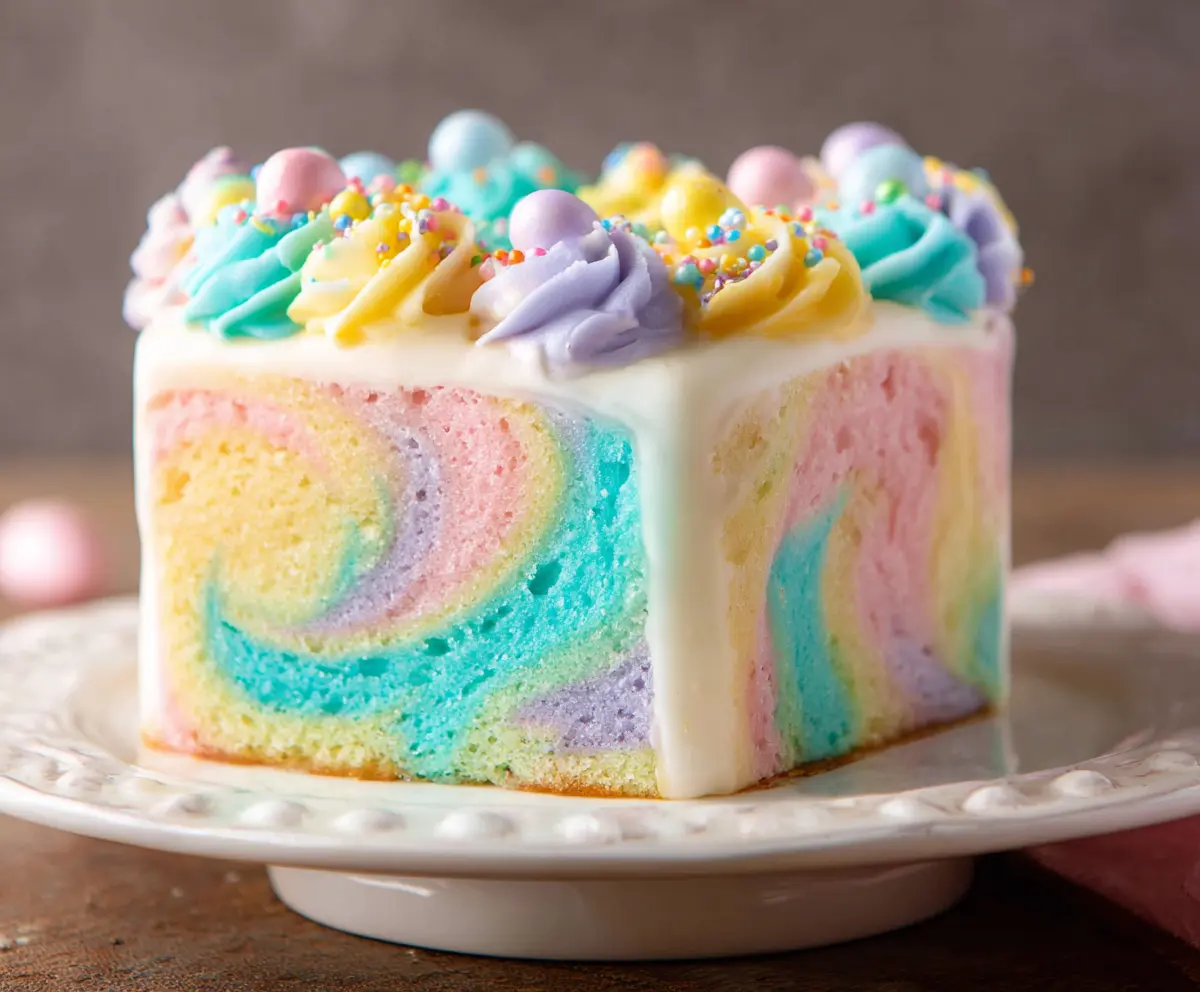
This Swirled Easter Cake is a colorful treat that’s perfect for celebrations! It combines soft, moist cake with bright, swirly patterns that make it a feast for the eyes and the taste buds.
Baking this cake is a fun way to get into the holiday spirit! I love adding extra sprinkles on top—because who doesn’t want a bit more sparkle in their life? 🎉 Enjoy it with family and friends!
Key Ingredients & Substitutions
All-Purpose Flour: This is essential for structure. If you’re gluten-free, substitute with a gluten-free baking blend. I’ve had success using a mix of almond and coconut flour for a unique flavor.
Unsalted Butter: This adds richness. You can use salted butter, just omit the added salt in the recipe. For a lighter version, replace some butter with applesauce, about ½ cup for this recipe.
Granulated Sugar: It sweetens the cake and helps with texture. Brown sugar can be swapped for a deeper flavor, but it may make the cake denser. Honey or agave syrup can substitute for a healthier option, but adjust the liquid in the recipe.
Food Coloring: Pastel colors are perfect for Easter. If you don’t have gel colors, liquid works too but may alter the cake’s moisture slightly. You can also omit coloring for a classic vanilla cake!
How Can I Get Beautiful Swirls in the Cake?
The swirling technique is key to achieving that eye-catching marbled effect. Here’s how to ensure success:
- After dividing the batter, dollop spoonfuls directly into the center of the pan instead of spreading them. This keeps the colors separate longer.
- Use a skewer or knife to create gentle swirls; don’t overmix, or you’ll lose the distinct layers and color contrast.
- Experiment with layering the colors in different order for a new pattern each time you bake!
Remember, the colors will blend a bit while baking, so aim for bold spoonfuls for a striking finish.
How to Make a Swirled Easter Cake
Ingredients You’ll Need:
For The Cake:
- 2 ½ cups all-purpose flour
- 2 ½ tsp baking powder
- ¼ tsp salt
- 1 cup unsalted butter, softened
- 1 ¾ cups granulated sugar
- 4 large eggs
- 1 tbsp vanilla extract
- 1 cup whole milk
- Food coloring: pastel pink, pastel yellow, pastel blue, pastel purple (gel or liquid)
For The Frosting:
- 1 cup unsalted butter, softened
- 4 cups powdered sugar, sifted
- ¼ cup heavy cream (more if needed)
- 1 tsp vanilla extract
- Pastel food coloring: pink, yellow, blue, purple (for decorating)
- Sprinkles (multi-colored)
- Edible Easter candy eggs or pastel candy balls
How Much Time Will You Need?
This delightful Swirled Easter Cake takes about 20 minutes to prepare and 35-40 minutes to bake. After baking, let it cool for a bit, and then you’ll need another 20-30 minutes to frost and decorate. Overall, you are looking at around 1.5 to 2 hours from start to finish!
Step-by-Step Instructions:
1. Preheat Oven and Prepare Pans:
To get started, preheat your oven to 350°F (175°C). Grease and flour a 9-inch square cake pan. This will help your cake come out easily after baking!
2. Mix Dry Ingredients:
In a medium bowl, whisk together the flour, baking powder, and salt. This is your dry mixture. Set it aside for later.
3. Cream Butter and Sugar:
In a large bowl, use a hand mixer to beat the softened butter and granulated sugar together on high speed. Mix until the mixture is light and fluffy—this should take about 3 to 4 minutes.
4. Add Eggs and Vanilla:
Now it’s time to add in the eggs. Do this one at a time, making sure to beat well after each addition. Then, mix in the vanilla extract until everything is combined.
5. Alternate Dry Ingredients and Milk:
With your mixer on low speed, start adding the flour mixture and the milk. Add the dry ingredients and milk alternately, starting and finishing with the flour mixture. Mix just until everything is combined. Don’t overmix!
6. Divide Batter and Color:
Next, divide your cake batter evenly into 4 small bowls. Tint each portion with a different pastel food coloring: pink, yellow, blue, and purple. Stir gently to get the color mixed in without overmixing.
7. Create Swirl Pattern:
In your prepared cake pan, dollop spoonfuls of each colored batter randomly throughout the pan. It’s like layering colors! Use a skewer or the back of a knife to swirl the colors together gently, but don’t mix them completely. This will create a lovely marbled effect!
8. Bake the Cake:
Place the cake in the oven and bake for 35-40 minutes. You can check if it’s done by inserting a toothpick into the center; it should come out clean. Once baked, let it cool in the pan for about 10 minutes, then carefully turn it out onto a wire rack to cool completely.
9. Prepare the Frosting:
While the cake cools, you can make the frosting. In a mixing bowl, beat the softened butter until it’s creamy. Gradually add the powdered sugar, alternating with the heavy cream, mixing until you get a spreadable consistency. Then, beat in the vanilla extract. For decoration, separate a small amount of frosting into 4 bowls and tint with the same pastel colors as your cake batter.
10. Frost the Cake:
Once the cake has cooled completely, spread a smooth layer of the white frosting over the top and sides of the cake. It’s best to use an offset spatula for this.
11. Decorate:
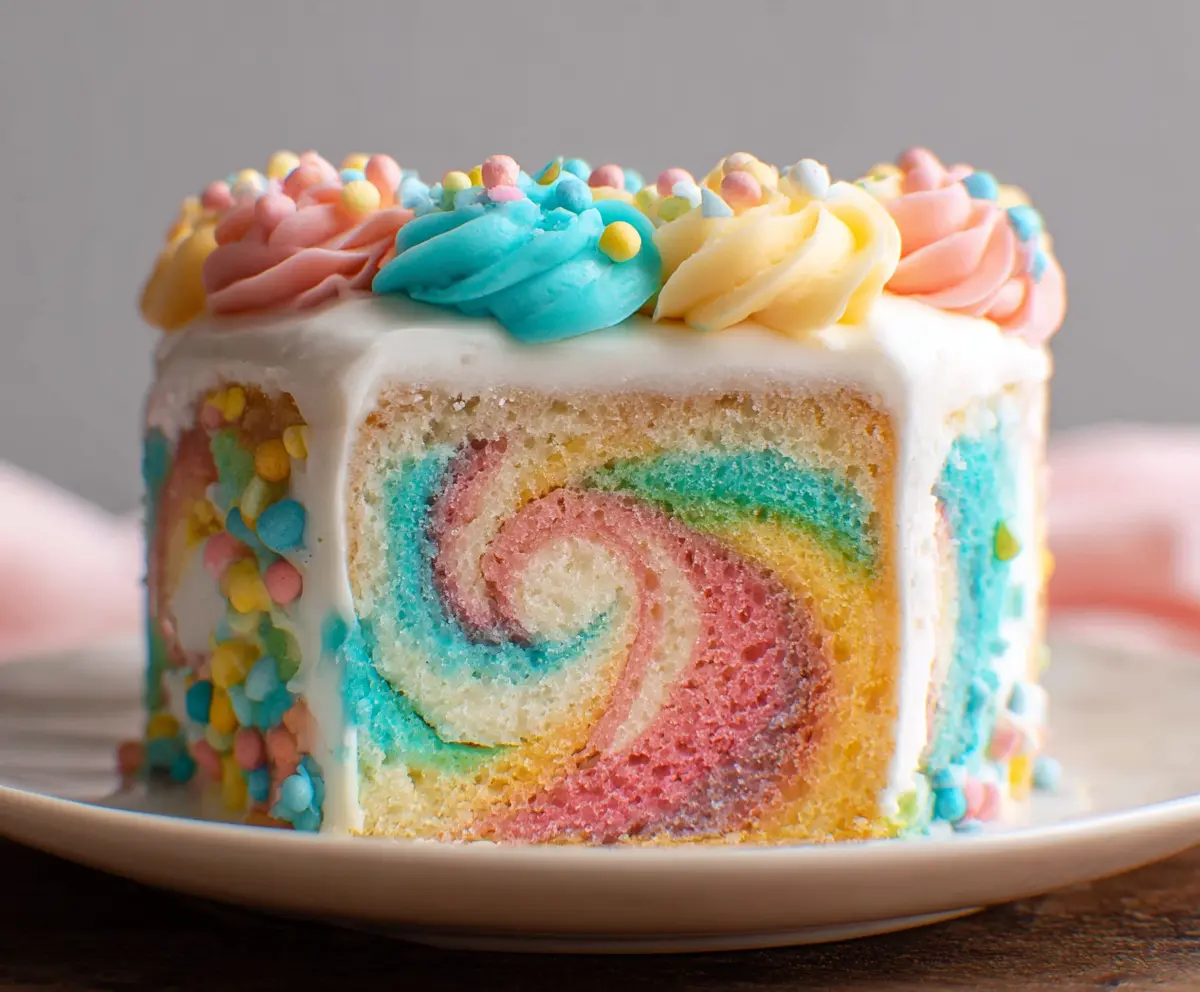
Using piping bags fitted with star tips, pipe rosettes or swirls of your colored frosting around the top edge of the cake. Go wild with the colorful sprinkles and finish off by placing edible Easter candy eggs or pastel candy balls on top for that festive touch!
12. Serve:
Finally, slice the cake and enjoy the beautiful colorful swirls inside along with the delicious frosting. This cake is not just a treat but a visual delight perfect for your spring celebrations!
Can I Use a Different Cake Pan Size?
Yes! If you don’t have a 9-inch square cake pan, you can use an 8-inch round pan instead. Just keep in mind that baking times may vary, so start checking for doneness a few minutes earlier.
Can I Make This Cake Gluten-Free?
Absolutely! Simply substitute the all-purpose flour with a gluten-free baking blend. Check the blend’s packaging for any extra binding agents you might need to add.
What’s the Best Way to Store Leftovers?
Store leftover cake in an airtight container at room temperature for up to 3 days. If you want to keep it longer, you can refrigerate it for up to a week or freeze slices for up to 3 months. Just wrap each slice tightly in plastic wrap before freezing!
How Can I Make the Cake More Colorful?
For even bolder colors, use gel food coloring instead of liquid. Gel tends to provide more vibrant hues without adding extra moisture to the batter. Feel free to add multiple layers of colors for a fun surprise when you slice the cake!