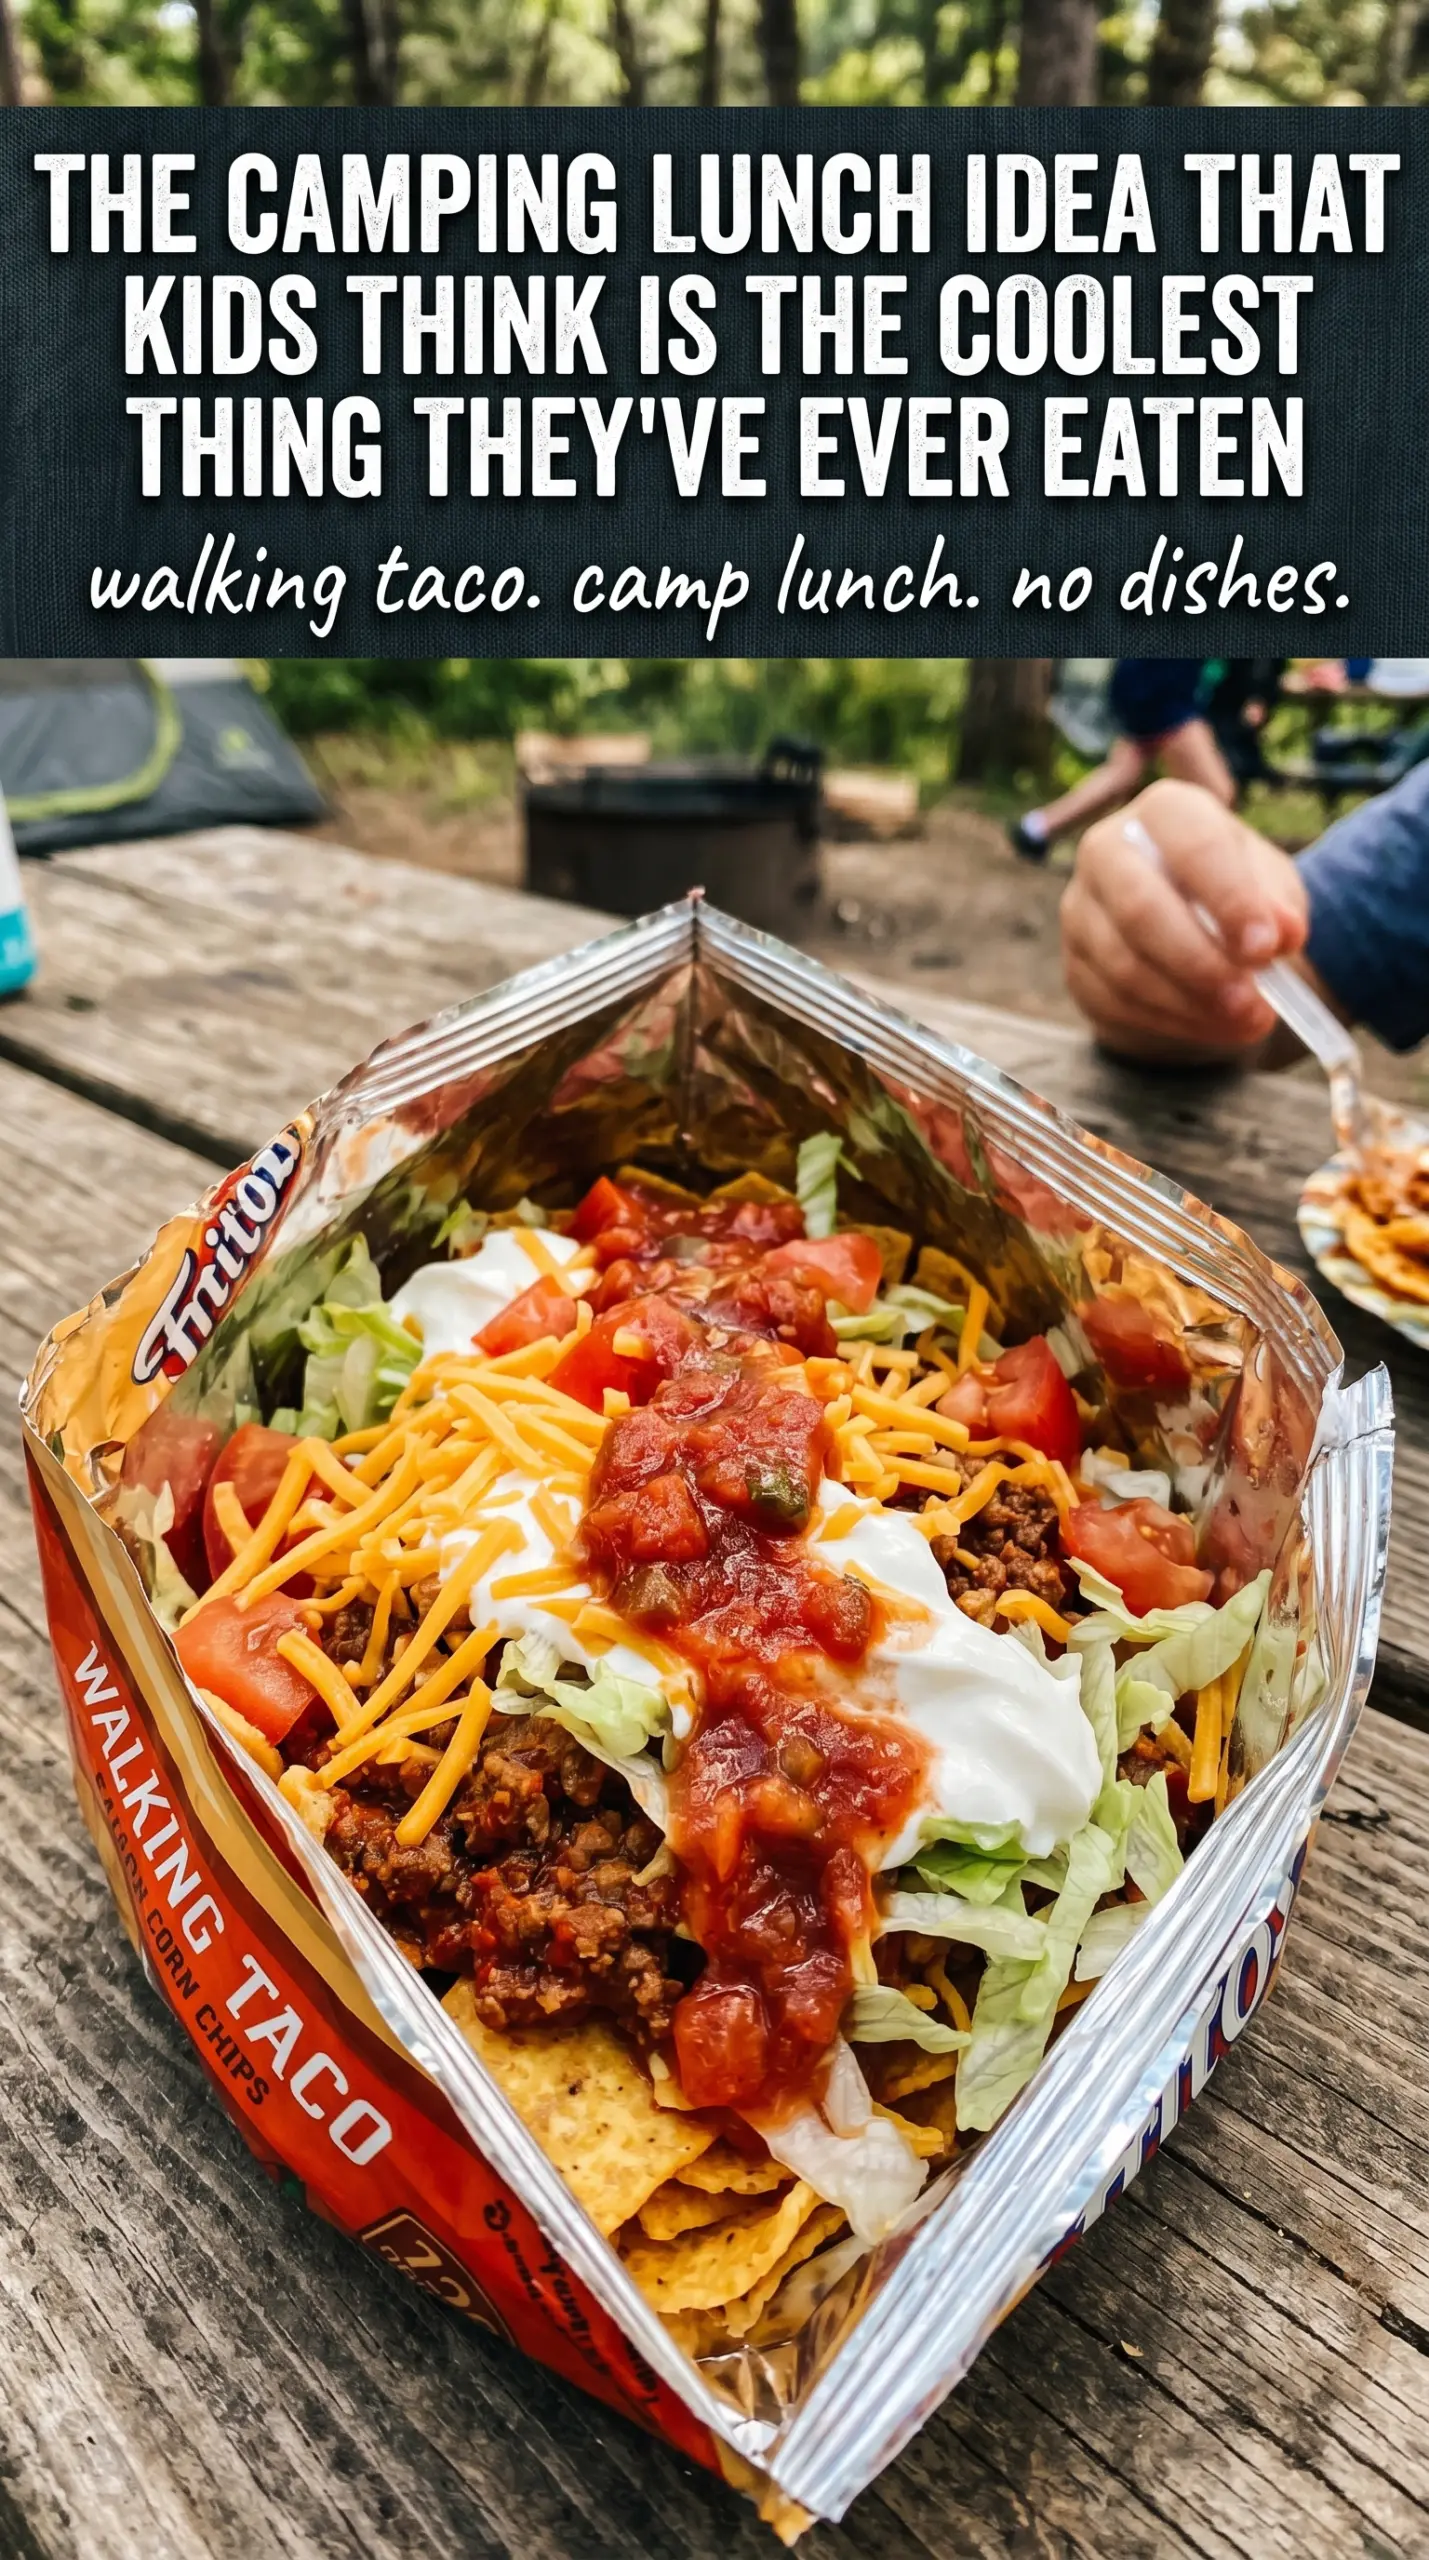
Crunchy, salty chips holding warm taco meat, cool lettuce, sharp cheese, and bright toppings make taco salad in a bag one of those meals that disappears fast. The chip bag does half the work for you, and the payoff is all about contrast: hot and seasoned at the bottom, cold and crisp on top, with just enough sauce to pull everything together without turning the chips soggy.
What makes this version work is the order. The meat goes in first while it’s still hot, then the lettuce and cheese create a little barrier before the wetter toppings land on top. That keeps the chips from softening too quickly, which matters whether you’re making these for a weeknight dinner, a camping lunch, or a crowd that wants to eat standing up.
Below you’ll find the small details that make walking tacos taste as good as they look: how to keep the bags from splitting, when to add the salsa, and the one swap that makes this easier when you’re feeding kids or a bigger group.
The layers stayed crisp way longer than I expected, and cutting the bags open at the top made serving so easy. The taco meat was still warm when the cheese went in, and the whole thing tasted like a taco night and a snack bag had the best possible baby.
Save this taco salad in a bag for camping nights, game day, or any time you want all the taco toppings with no bowls to wash.
The Chip Bag Trick That Keeps Walking Tacos Crunchy
The biggest mistake with taco salad in a bag is dumping in wet toppings too early and letting the chips go soft before anyone takes a bite. The fix is simple: build the base with hot meat first, then add the dry or sturdier toppings before finishing with sour cream and salsa. That layering matters more than the exact brand of chips.
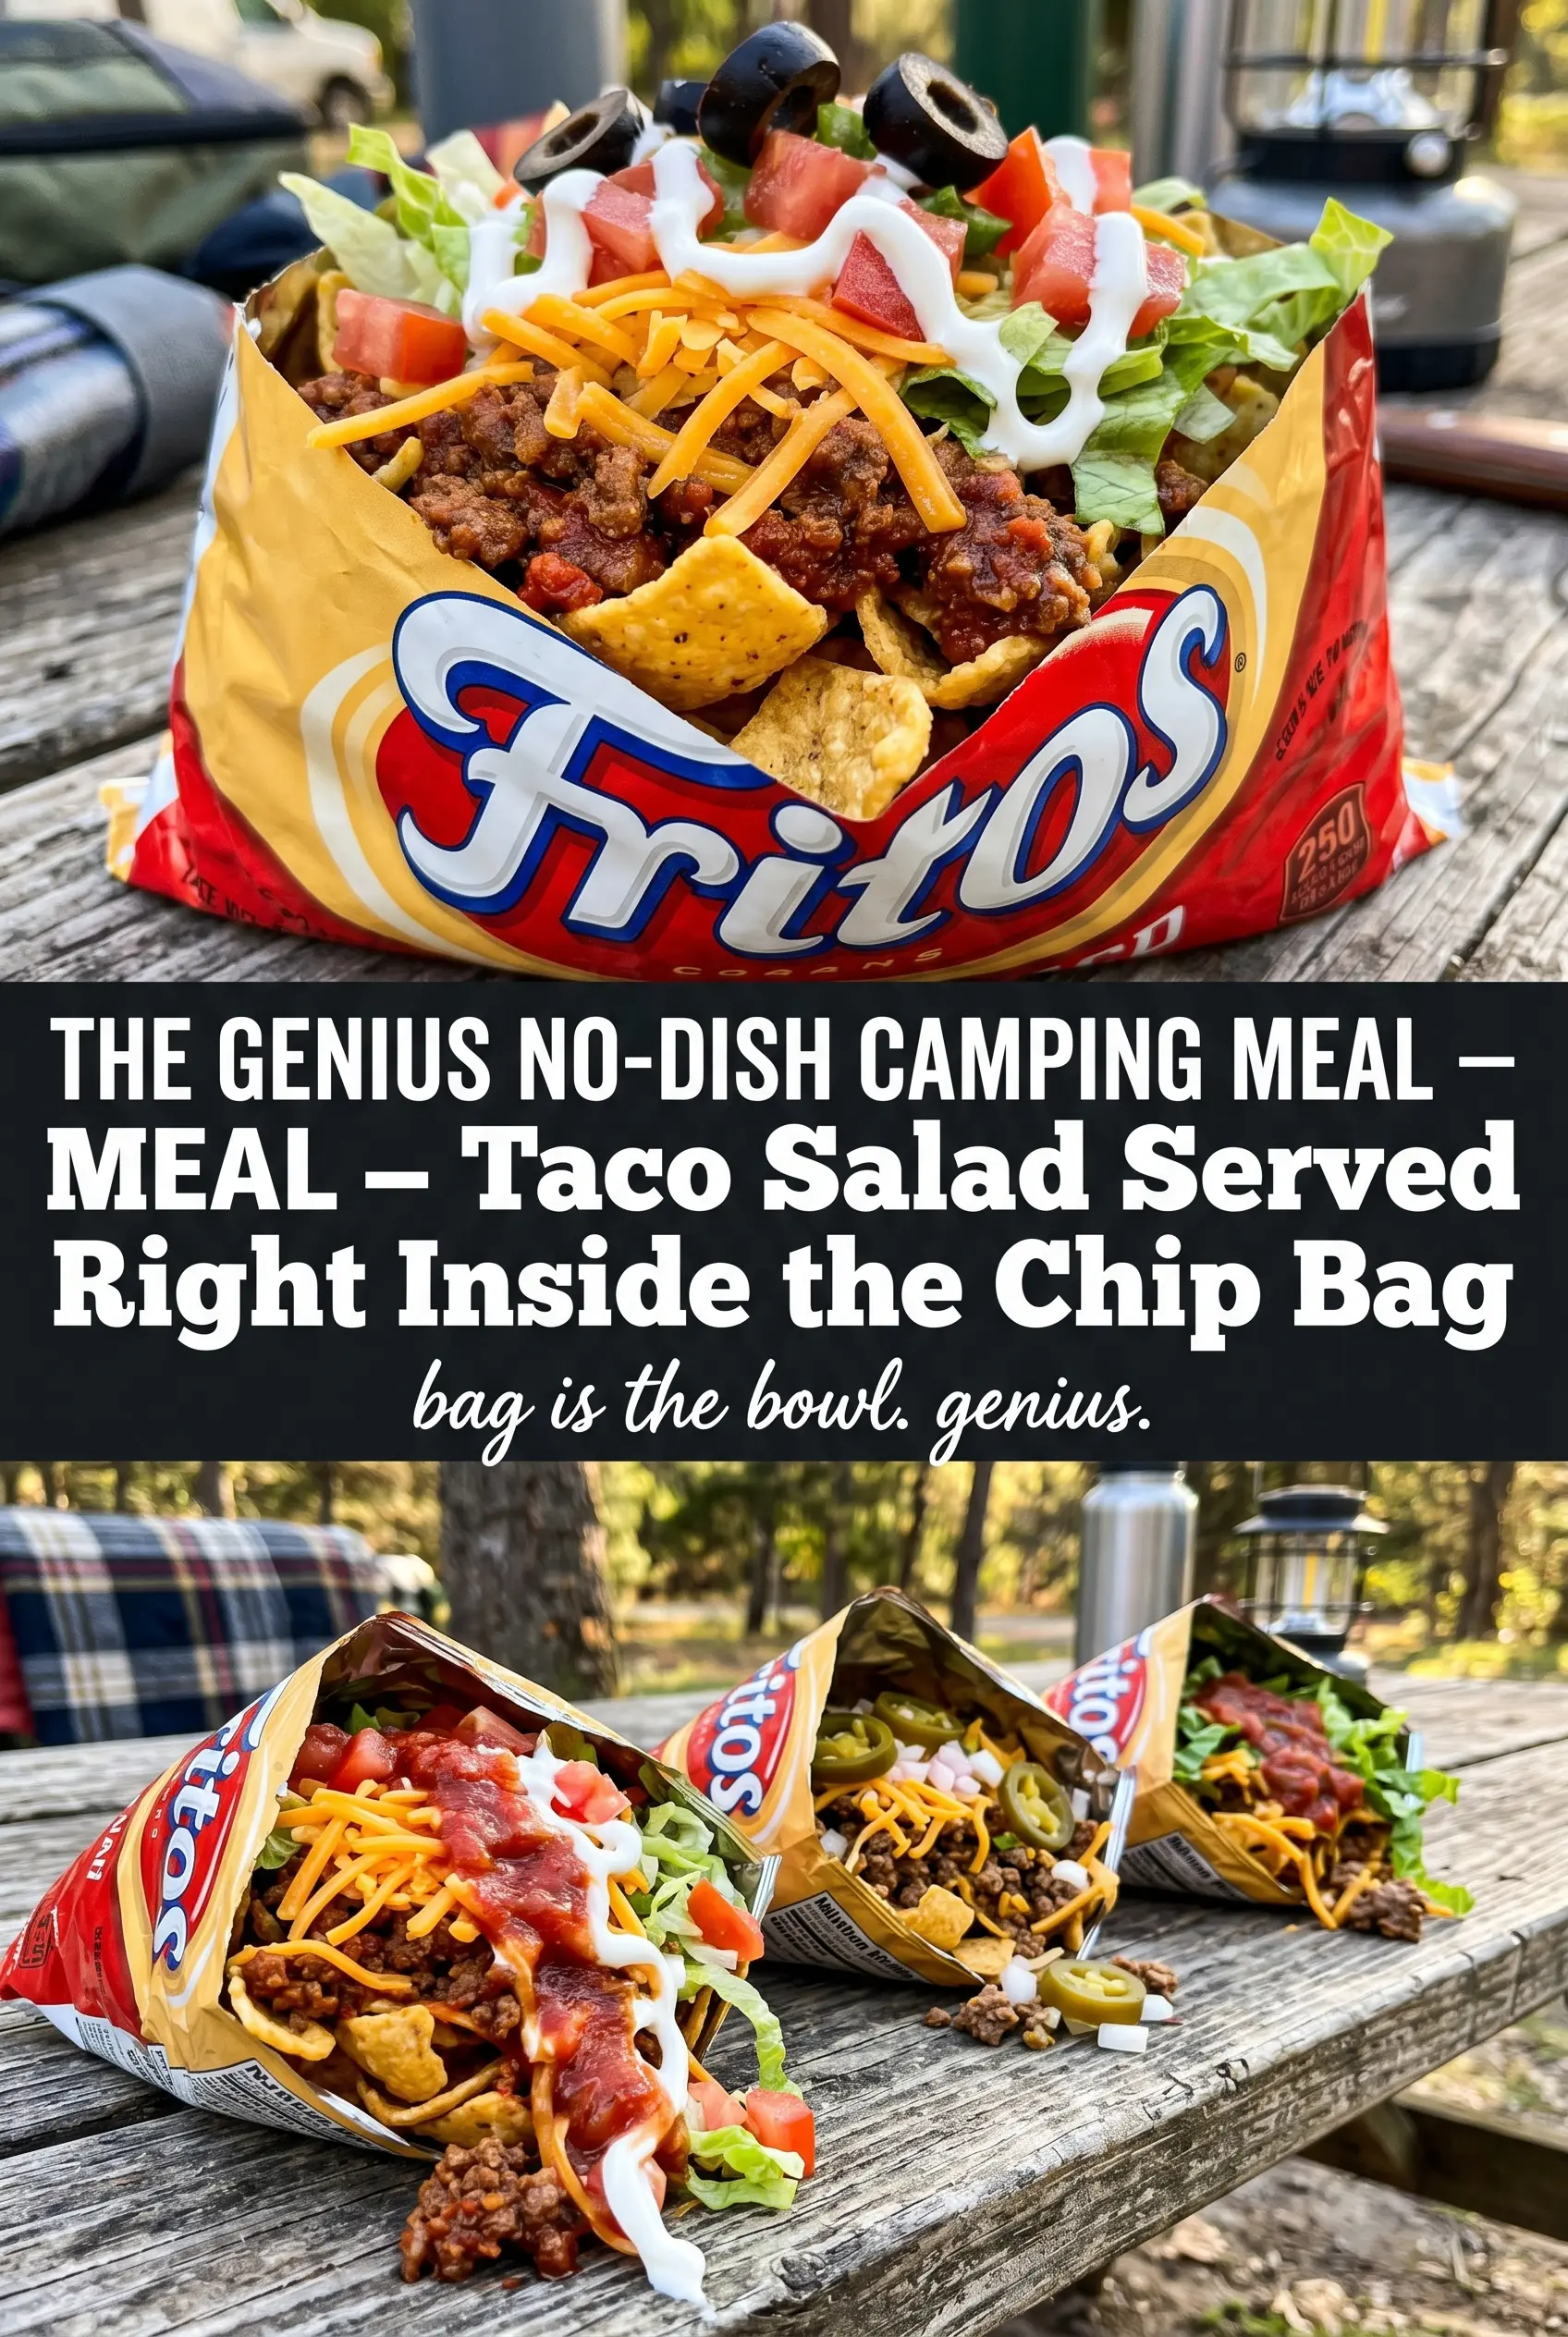
Doritos give you a sweeter, louder crunch, while Fritos lean more savory and stand up well to the taco seasoning. Either one works, but the bag needs to stay intact, so cut it with a clean slit across the top or down one side instead of tearing it open and making a jagged edge that spills in your lap.
- Ground beef — Use 80/20 or 85/15 for the best flavor. If you go leaner, add a spoonful of oil or the meat can taste dry once the seasoning goes in.
- Taco seasoning — A packet works fine, but homemade seasoning lets you control the salt. If you’re using a low-sodium packet, the salsa and cheese will carry more of the flavor.
- Shredded lettuce — Chop it small so it tucks into the bag instead of sitting on top in a clump. Romaine stays crunchier than iceberg if the tacos sit for a few minutes.
- Sour cream and salsa — These are the first toppings to soften the chips, so keep them right on top and add them just before eating. Thicker salsa holds up better than a thin one.
What Each Layer Is Doing Inside the Bag
- Chip bags — The individual bags do more than make serving easy. They also hold the chips upright so the toppings settle instead of getting smashed in a big bowl.
- Cheese — Shredded cheese melts a little against the warm meat, which helps bind the layers. Pre-shredded is fine here; this isn’t a place where freshly grated makes a big difference.
- Tomatoes — Dice them small and drain off extra juice. Big wet chunks make the chips soggy fast.
- Black olives — These add a salty, briny note that cuts through the richness. If you don’t like them, leave them out and the salad still holds together.
Building the Bag in the Right Order
Cooking the Meat First
Brown the ground beef in a skillet until there’s no pink left and the edges are starting to take on color. Drain off excess grease before adding the taco seasoning so the filling tastes seasoned, not greasy. If the meat looks wet and loose, keep cooking a minute or two longer; you want it juicy, but not swimming in liquid.
Opening the Bags Cleanly
Use a sharp knife or scissors to cut across the top or down one side of each bag. A neat cut gives you a wider opening and keeps the bag from tearing while you’re piling in toppings. Set each bag in a mug or small bowl if you want both hands free for layering.
Layering Without Sogging the Chips
Spoon the hot taco meat in first, then add lettuce, cheese, and tomatoes. Finish with sour cream, salsa, and olives right before serving so the chips stay crunchy for the first few bites. If the meat is piping hot and the bag is thin, let it sit for a minute before adding the lettuce so it doesn’t wilt on contact.
Serving Straight From the Bag
Hand each bag out with a fork and let people eat directly from it. That part sounds like a gimmick, but it solves a real problem: no bowls, no serving line, and no extra dishes when you’re eating outdoors. The only rule is to tuck the bottom of the bag into your hand so the toppings don’t slide all at once.
How to Make Walking Tacos Work for Different Crowds
Gluten-Free Bags With the Same Crunch
Use certified gluten-free corn chips or tortilla chips in individual bags. The texture stays close to the original, but the bags may be a little more fragile, so open them gently and support the bottom in a bowl while serving.
Turkey or Plant-Based Filling
Ground turkey works if you want something lighter, but it needs a little extra oil because it cooks leaner than beef. A plant-based crumble also works well here; just brown it fully and season it generously so it doesn’t taste flat against the chips.
Make-It-Your-Own Toppings Bar
If you’re feeding kids or a mixed crowd, set out toppings separately and let everyone build their own bag. That keeps picky eaters happy and also helps the chips stay crisp longer because the wetter toppings only go in at the end.
Storage and Reheating
- Refrigerator: Store the taco meat for up to 4 days. Keep the chips and fresh toppings separate so nothing turns limp.
- Freezer: The seasoned beef freezes well for up to 2 months. Cool it completely first, then pack it flat in a freezer bag for faster thawing.
- Reheating: Reheat the meat in a skillet or microwave until steaming hot, adding a splash of water if it looks dry. Don’t reheat the assembled bag; the chips will go soft before the filling is warm.
Answers to the Questions Worth Asking
Taco Salad In A Bag
Ingredients
Equipment
Method
- Cook the ground beef in a skillet over a campfire until browned. Season with taco seasoning and cook about 10 minutes total, then set aside.
- Open each Doritos or Fritos bag by cutting along the top or side. Keep the bags upright so you can layer ingredients cleanly.
- Add a layer of taco meat to each opened bag. Divide evenly among the 6 bags.
- Add shredded lettuce over the taco meat in each bag. Aim for a crinkle layer for crunch.
- Sprinkle shredded cheese over the lettuce in each bag. Add enough to cover most of the lettuce so it clings to the warm meat.
- Add diced tomatoes as the next layer. Distribute them so each bite gets a bit of fresh tomato.
- Top each bag with sour cream. Add in small dollops so it stays visible and doesn’t fully disappear into the chips.
- Add salsa over the sour cream and tomatoes. Pour gently so the bags don’t get soggy too quickly.
- Finish each bag with sliced black olives. Sprinkle evenly for a salty topping in every section.
- Eat directly from each bag with a fork. Mix as you dig in so chips and toppings stay layered.