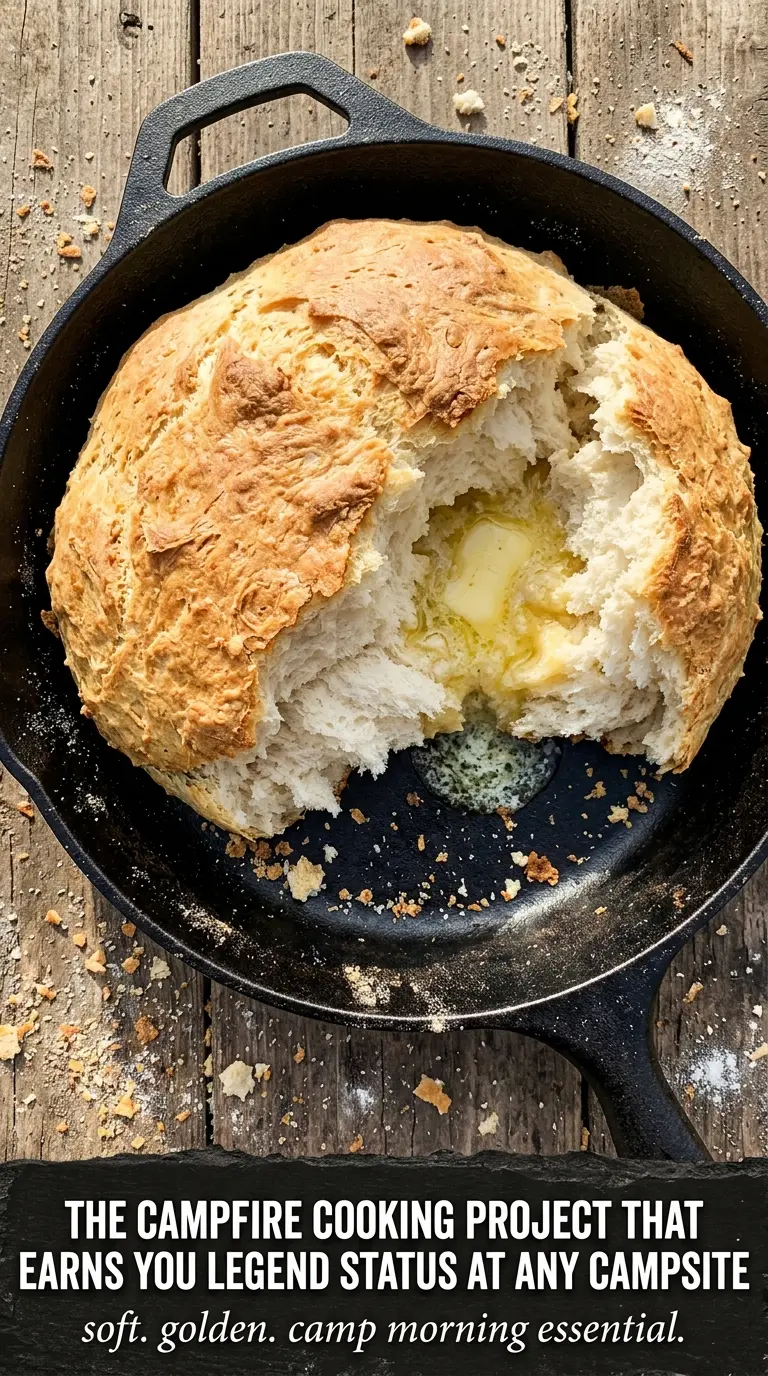
Golden campfire bread with a crisp outside and a soft, fluffy middle is one of those simple outdoor foods that disappears fast once it comes off the stick. The dough turns into a lightly sweet, toasty bread with just enough structure to hold over the fire, and the best part is how little fuss it takes to get there.
This version works because the dough is kept lean and easy to handle. Baking powder gives it lift without needing yeast or rising time, while a small amount of sugar helps the crust brown before the inside dries out. Melted butter brings richness and keeps the dough tender, and kneading it right in a zip-top bag means less mess when you’re cooking outdoors.
Below you’ll find the one part that matters most over the fire, plus a few smart swaps if you’re working with what you packed. A little attention to the heat makes the difference between bread that’s browned all the way through and dough that still tastes raw in the center.
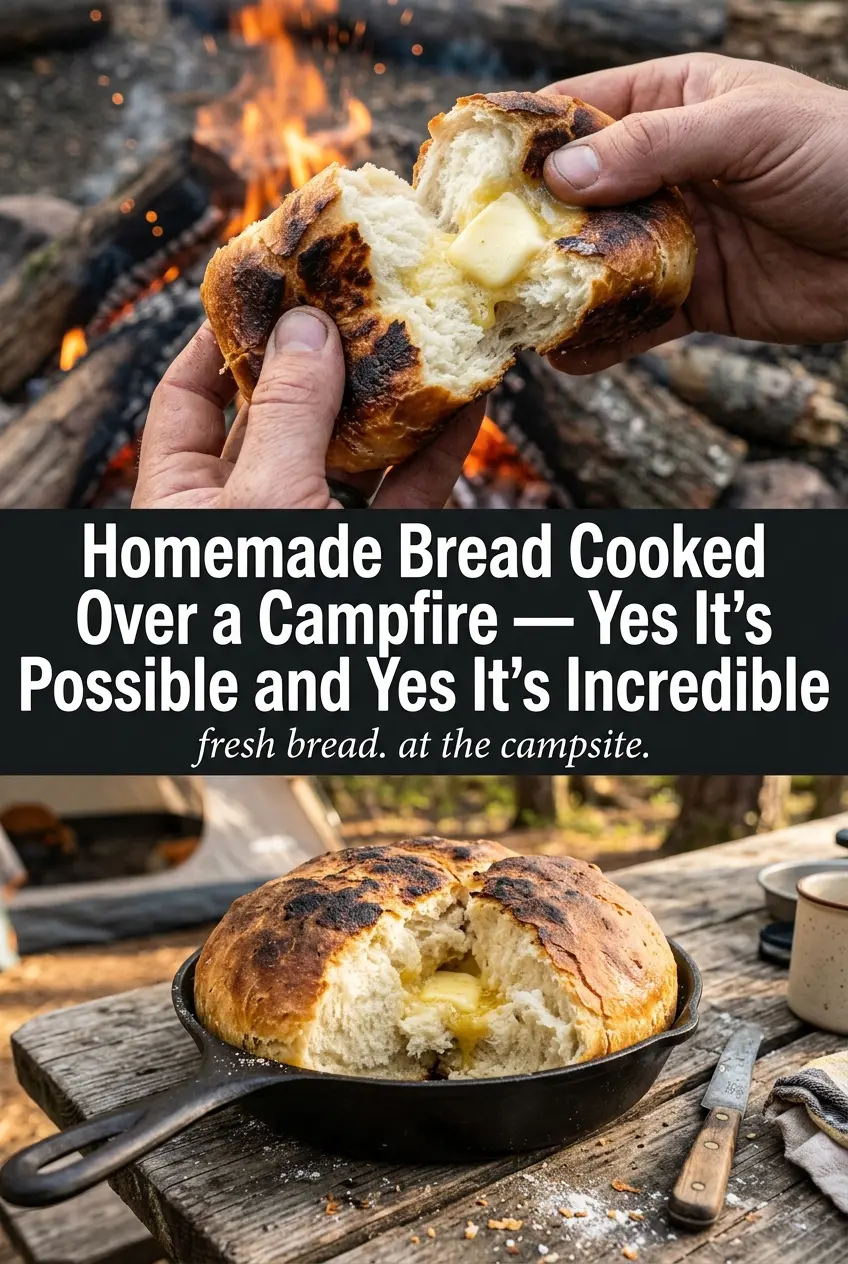
The dough came together fast in the bag and cooked evenly once I kept it over the coals instead of the flames. The outside was golden and the inside stayed soft, not doughy at all.
Like this fluffy campfire bread? Save it to Pinterest for your next fire-night side dish with a crisp crust and soft center.
The Fire Heat Matters More Than the Dough
Campfire bread fails when the outside catches too fast and the inside never has time to cook. Flames are too aggressive for this kind of dough. What you want is steady heat from coals, with the bread turned often so one side doesn’t scorch before the center firms up. The goal is a deep golden shell that gives slightly when pressed, not a hard crust with raw dough hidden underneath.
The dough itself is forgiving, but the fire isn’t. If the bread is browning in spots before the full 10 minutes are up, move it higher or farther from the hottest part of the coals. If it looks pale after 12 minutes, the heat was too low or the rope was wrapped too thick. Thin, even ropes cook much better than bulky ones.
What Each Ingredient Is Actually Doing in This Dough
- All-purpose flour — This gives the bread enough structure to wrap around the stick without turning heavy. Bread flour makes a firmer, chewier result, which isn’t wrong, but it loses some of the soft, tender bite that works best here.
- Baking powder — This is the lift. Since there’s no yeast or rise time, baking powder is what keeps the inside from baking up dense and flat.
- Sugar — Just a little helps the outside brown and adds a mild sweetness that tastes right with butter or honey. You can reduce it slightly, but cutting it too much makes the bread less balanced and less golden.
- Butter and milk — The butter tenderizes the dough, and the milk adds moisture plus enough richness to keep the crumb from tasting plain. If you need to swap the milk, use a neutral unsweetened non-dairy milk; water will work in a pinch, but the bread comes out less soft and less flavorful.
- Roasting sticks — A sturdy stick matters more than people think. Thin sticks flex and make the dough bake unevenly, while a solid roasting stick holds the rope in place so it cooks evenly all the way around.
Wrapping the Dough So It Cooks Through Instead of Burning
Mixing the Dough in the Bag
Start by combining the dry ingredients in the zip-top bag, then add the melted butter and milk. Knead the bag from the outside until the dough comes together and no dry flour remains hidden in the corners. If the dough feels sticky enough to cling hard to your fingers, add a spoonful of flour; if it won’t hold together, a splash more milk brings it back. The dough should feel soft and slightly tacky, not wet.
Shaping the Ropes
Divide the dough into 8 equal portions and roll each one into a rope that is even from end to end. Uneven ropes create thick spots that stay raw while the thinner sections dry out. Wrap the rope around the stick with a little overlap so it grips itself, but don’t press it so tightly that the layers seal shut. Airflow around the dough helps it cook through.
Cooking Over the Coals
Hold the bread over hot coals, not open flames, and keep it moving. Rotate constantly so the heat colors the dough on all sides instead of burning one patch before the rest has a chance to set. When it’s done, the outside will be deeply golden and dry to the touch, and the bread will release cleanly from the stick. If the outside looks done but the center still feels soft and gummy, the fire was too hot; lower the bread and give it more time rather than pulling it too early.
Serving It Warm
Slide the bread off the stick while it’s still warm and serve it right away with butter, jam, or honey. That’s when the crumb feels its fluffiest and the crust has its best contrast. If you wait too long, the exterior softens and the bread loses that fresh-from-the-fire texture that makes it worth the effort.
How to Adapt This for Different Camps and Eaters
Dairy-Free Campfire Bread
Use a neutral unsweetened non-dairy milk and swap the butter for melted vegan butter or another mild-fat option. The bread will still cook up light and golden, though the flavor is a little less rich than the original.
Sweeter Breakfast-Style Bread
Add another tablespoon of sugar and brush the finished bread with melted butter before serving. That gives you a softer, more biscuit-like sweetness that works well with jam or honey.
Gluten-Free Version
Use a cup-for-cup gluten-free flour blend that includes xanthan gum. The dough will be a little more delicate to wrap, but it still browns nicely if you keep the ropes a touch thicker and handle them gently.
Storage and Reheating
- Refrigerator: Store leftovers in an airtight container for up to 2 days. The crust softens as it sits, so it won’t have the same fresh-from-the-fire bite.
- Freezer: Freeze the baked bread after cooling completely, wrapped well, for up to 1 month. Thaw before reheating so the center doesn’t turn rubbery.
- Reheating: Warm in a dry skillet over low heat or in a 300°F oven for a few minutes. High heat dries the bread out before the middle warms through.
Answers to the Questions Worth Asking
Fluffy Campfire Bread
Ingredients
Equipment
Method
- Combine all-purpose flour, baking powder, salt, and sugar in a large zip-top bag until evenly distributed.
- Add melted butter and milk to the bag, seal it, and knead until a cohesive dough forms.
- Divide the dough into 8 portions.
- Roll each portion into a long rope and wrap it around the end of a roasting stick.
- Hold the stick bread over campfire coals and rotate constantly for 10-12 minutes until golden brown.
- Keep roasting and rotating until the bread is cooked through and the outside looks crusty.
- Slide the campfire bread off the stick and serve warm with butter, jam, or honey.